
Desserts
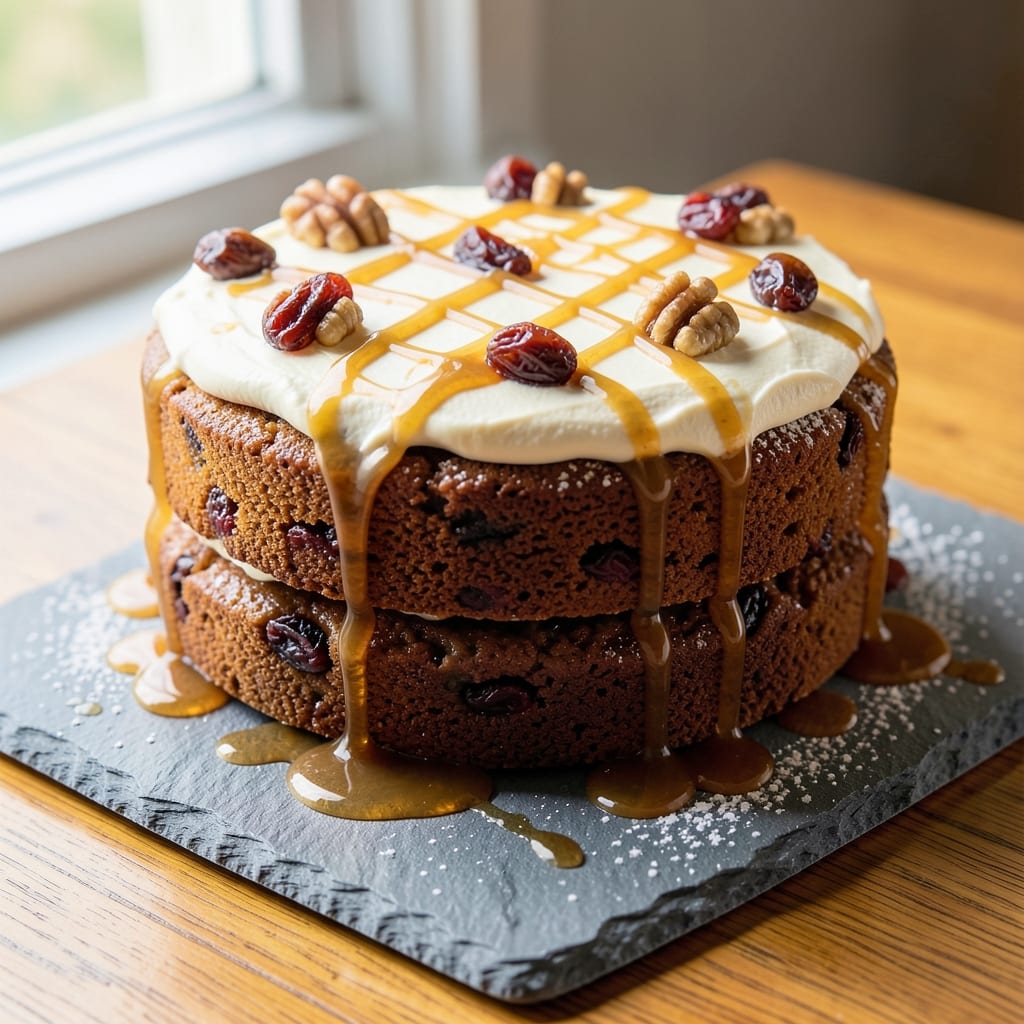
This amazin raisin cake delivers the perfect balance of moist crumb, plump raisins, and warm spices that make every slice feel like a hug. 💛 The secret lies in soaking the raisins overnight—this transforms them from chewy to tender, creating pockets of sweetness throughout each bite. I developed this recipe after years of baking raisin cakes that either dried out or left the raisins too hard, and this version solves both problems with a simple technique.
The cake's magic starts with a rich, buttery batter infused with cinnamon and nutmeg, which complements the raisins beautifully. Baking at 350°F for 45-50 minutes ensures a golden top and a tender interior that stays moist for days. The raisins distribute evenly, so every forkful delivers that perfect mix of fruit and spice.
What you'll end up with is a cake that's rich enough for dessert but hearty enough to serve with afternoon tea. The aroma of warm spices fills your kitchen as it bakes, and the texture is impossibly tender—no dry crumbs here. This recipe is foolproof, with step-by-step instructions that ensure success every time.
Serve it warm with a scoop of vanilla ice cream or dusted with powdered sugar for a classic touch. The cake keeps well for up to five days, making it perfect for gatherings or when you want to treat yourself. Let's get baking!
Ingredients for amazin raisin cake
Warm spices, tender raisins, and a moist crumb—this cake is pure comfort in every bite!
| Ingredient | Amount | Notes |
|---|---|---|
| All-Purpose Flour 🌾 | 2 ½ cups | Sifted for even texture |
| Granulated Sugar 🍚 | 1 ½ cups | White or light brown |
| Packed Brown Sugar 🍚 | ¾ cup | For deep caramel notes |
| Unsalted Butter 🧈 | 1 cup | Room temperature, full-fat |
| Large Eggs 🥚 | 2 whole | Room temperature for blending |
| Vanilla Extract 🌿 | 2 tsp | Pure, high-quality extract |
| Milk 🥛 | ½ cup | Whole milk preferred |
| Raisins 🍇 | 1 ½ cups | Golden or dark, plump |
| Granulated Sugar 🍚 | ¼ cup | For raisin soak (extra) |
| Ground Cinnamon 🌶️ | 1 ½ tsp | Freshly ground preferred |
| Ground Nutmeg 🌿 | ½ tsp | Freshly grated nutmeg |
| Baking Powder 🍞 | 1 ½ tsp | Double-acting for lift |
| Salt 🧂 | ½ tsp | Fine sea salt |
| Powdered Sugar 🍚 | ¼ cup | For dusting (optional) |
The raisins are the star here, so plumpness is key. Grab the golden or dark raisins from the bulk bins at Whole Foods or Trader Joe's—they're always fresher than the pre-packaged kind. Soak them overnight in warm water with that extra quarter cup of sugar (trust me, it's worth it). The spices? Penzeys sells the best ground cinnamon and nutmeg, but the regular grocery store stuff works in a pinch. Just make sure they smell fresh—no dusty old jars here!
No vanilla extract? Vanilla bean paste works just as well, or even a scraped vanilla bean. Running low on raisins? Dried cranberries or chopped dates add a similar chewy texture. The milk can be swapped for almond milk or oat milk**—just keep the same amount. And if you're feeling fancy, toss in a handful of chopped walnuts for crunch. The cake's magic comes from the spices, so don't skip them—even if you're not a huge cinnamon fan, the nutmeg rounds it out perfectly.
This cake keeps beautifully—5 days at room temperature wrapped in foil, or up to 2 weeks in the fridge. For serving, dust with powdered sugar right before slicing (that's where the optional quarter cup comes in). Leftovers? Toast slices lightly for a cozy breakfast treat. Freezes well too—3 months max—just wrap tightly and thaw overnight. The aroma baking? Absolute heaven—open a window if you're sensitive to kitchen smells!
Why You'll Love This Recipe
- No Mixer Needed: I swear by this—just a bowl and a whisk. The butter and sugars cream together in minutes, and the raisins fold right in without a trace of effort. My lazy Sunday mornings just got a whole lot sweeter.
- Sweet-Savory Magic: That brown sugar caramelizes into the flour while the butter melts, creating layers of rich, buttery depth. The raisins? They plump up like little bursts of jammy sunshine—no one ever guesses how simple the combo is.
- Crowd-Pleaser Every Time: Birthday? Brunch? A random Tuesday. This cake disappears faster than my willpower around it. I’ve served it to book clubs, potlucks, and even my skeptical teen cousin—everyone asks for seconds.
- Dollar Stretch Wonder: Flour, sugar, butter—pantry staples that don’t break the bank. A single batch feeds six, and leftovers? They reheat beautifully in the microwave or toast up crispy in the oven. Budget-friendly doesn’t mean boring.
Step-by-step instructions for amazin raisin cake
Here's how to bake this showstopper—rich, spiced, and packed with juicy raisins that melt into every bite.
👨🍳 Step 1: Soak the Raisins for Maximum Juiciness
In a small bowl, combine the 1.5 cups raisins with the 0.25 cup granulated sugar and the 0.5 cup milk. Stir until the sugar dissolves completely. Let this mixture sit for at least 30 minutes—this ensures the raisins plump up and become tender rather than dry. I like to give them up to 1 hour if I'm prepping ahead, as the longer they soak, the more flavorful they become. The sugar-milk mixture creates a syrupy coating that keeps the raisins moist throughout baking.
Here's the thing—don't skip this step. Dry raisins will bake into hard, chewy bits that ruin the cake's texture. The soaking process transforms them into sweet, juicy pockets that burst with every bite. After soaking, drain any excess liquid but leave the raisins coated in the syrup.
🍳 Step 2: Cream Butter and Sugars for Perfect Texture
In a stand mixer fitted with the paddle attachment, beat the 1 cup unsalted butter (at room temperature) with the 1.5 cups granulated sugar and 0.75 cup packed brown sugar on medium speed for 3-4 minutes. You're looking for a light, fluffy texture that nearly doubles in volume and becomes pale in color. This creaming process incorporates air, which creates that signature tender crumb we're after.
I press down on the butter occasionally to make sure it's fully incorporated. You'll see the mixture go from grainy to smooth and slightly ribbony. If it looks too thick, let it sit at room temperature for another 5-10 minutes—cold butter won't cream properly. This step makes all the difference between a dense cake and one with that perfect, melt-in-your-mouth texture.
👨🍳 Step 3: Mix Dry Ingredients and Combine Wet Components
In a separate bowl, whisk together the 2.5 cups all-purpose flour, 1.5 tsp baking powder, 1.5 tsp ground cinnamon, 0.5 tsp ground nutmeg, and 0.5 tsp salt. Sift the flour first for an even texture—this prevents lumps that can make your cake dense. Then add the 2 whole large eggs (at room temperature) one at a time, mixing just until combined after each addition.
With the mixer on low speed, gradually add the dry ingredients to the creamed butter mixture. Mix just until everything comes together—you should still see some flour streaks. Overmixing develops gluten, which can make the cake tough. Once combined, add the 2 tsp vanilla extract and mix for another 10 seconds to distribute it evenly. Now fold in the soaked raisins using a silicone spatula, being careful not to break them up too much.
🔥 Step 4: Bake to Golden Perfection
Preheat your oven to 350°F and grease two 9-inch round cake pans (or one 9x13-inch pan). Divide the batter evenly between the pans—this ensures even baking and prevents a dome-shaped cake. Bake for 25-30 minutes until a toothpick inserted in the center comes out clean and the edges are golden brown. Real talk: your oven might run hot, so start checking at the 20-minute mark to avoid overbaking.
The cake is done when it springs back slightly when touched and has developed a beautiful caramelized crust. If you're using the round pans, let them cool in the pans for 10 minutes before transferring to a wire rack. For the 9x13-inch pan, let it cool for 15 minutes before removing. This gradual cooling prevents cracking and helps set the cake structure.
🍽️ Step 5: Dust and Serve with Confidence
Once completely cooled, dust the top with the 0.25 cup powdered sugar using a fine-mesh sieve for that classic raisin cake presentation. The powdered sugar adds a delicate sweetness that complements the warm spices and fruity raisins. Slice into 8 equal portions—each piece should be rich with moist raisin pockets and tender crumb.
This cake tastes even better the next day as the flavors meld together. Store leftovers wrapped tightly at room temperature for up to 3 days, or refrigerate for up to 5 days. The raisins stay juicy and the spices deepen in flavor over time. Serve with a dollop of whipped cream or a scoop of vanilla ice cream for the ultimate dessert experience!
Pro Tips For Making Amazin Raisin Cake
- Cream Butter Slowly: I learned this the hard way—dumping cold butter into sugar at once just makes a greasy mess. Instead, cut the butter into small cubes (about ½-inch) and add them to the sugar one tablespoon at a time. Let the mixer do its thing between additions, and you’ll get that perfect fluffy texture without fighting the dough. ---
- Toast Raisins First: Sounds weird, but it works: Toss the raisins in a dry skillet over medium heat for 2–3 minutes until they’re fragrant and slightly puffed. This banishes that dried-fruit flavor and makes them taste like they’re fresh off the vine. (Yes, even if you’re impatient like me.) ---
- Measure Flour Right: Spooning flour directly from the bag into your measuring cup? Skip it. Use the "dip-and-sweep" method—fill the cup, level it off with a knife, then tap it gently on the counter to settle. Too much flour makes the cake dense; too little and it’ll collapse. This isn’t the prettiest method, but it’s the tastiest. ---
- Bake Until Springy: Your cake might look done at 30 minutes, but resist the urge to pull it out. Press the center lightly—if it springs back slowly (not instantly), it’s ready. Overbaking dries out the raisins and turns the crumb tough. A toothpick test is good, but your finger knows better. (Your future self will thank you.)
Make-ahead tips for leftovers
Overnight Prep
Start your raisin soak the night before—this is the secret to tender, juicy raisins that burst with flavor. Combine 1.5 cups raisins, 0.25 cup sugar, and 0.5 cup milk in an airtight container and refrigerate overnight. The longer they soak, the more flavorful they become. I like to use a quart-sized mason jar for easy storage and portioning. 💛
Batter Prep Ahead
Mix the entire batter up to 24 hours in advance and store it in an airtight container in the fridge. The flavors develop beautifully overnight, and the raisins absorb even more moisture. When ready to bake, simply divide the batter into your prepared pans and bake as directed. This is perfect for busy mornings or when you want to bake while company arrives.
Freezer-Friendly Layers
Bake the cake layers fully, then wrap each one individually in plastic wrap followed by aluminum foil. Store in a freezer-safe bag for up to 3 months. When ready to serve, thaw at room temperature for 2-3 hours before assembling. This works especially well for special occasions when you want to bake ahead but don't want to deal with fresh cake logistics.
Assemble Like a Pro
If making a layered cake, prepare your filling (like cream cheese frosting or whipped cream) ahead of time and store it in the fridge. When assembling, simply layer the thawed cake with filling between layers. This keeps everything organized and makes the final assembly quick and stress-free. I like to use a piped border of frosting for that restaurant-quality finish.
Portion for Perfection
Slice the cake into portions while still slightly warm (after cooling completely) for cleaner cuts. Wrap individual slices in plastic wrap and store them in a single-layer container. This prevents the cake from drying out and makes for easy grab-and-go desserts. Perfect for office lunches or quick treats throughout the week!
Revive Stale Slices
If your cake develops a dry top after a few days, simply wrap it tightly in aluminum foil and warm it in a 350°F oven for 5-10 minutes. The steam will restore moisture and bring back that fresh-baked aroma. I also like to brush the top with a little simple syrup (equal parts sugar and water heated until dissolved) before rewrapping for extra freshness.
Nutrition facts
Frequently asked questions
Why do the raisins need to soak overnight?
Soaking transforms dry raisins into tender, juicy fruit pockets! The 30-minute minimum (or overnight for best results) lets them absorb the sugar-milk mixture, preventing that annoying chewy bite. This simple step makes all the difference in texture—your cake will have bursts of sweetness with every bite.
Can I substitute raisins with something else?
Try dried cranberries for tartness or chopped dates for caramel notes. For a nutty twist, add 1 cup chopped walnuts to the batter. Just remember: soaking times may vary—check for tenderness before baking. The key is keeping the fruit moist and flavorful.
How do I prevent a dome-shaped cake?
Use two 9-inch round pans instead of one large pan, and divide the batter evenly. Tap the pans gently on the counter before baking to settle the batter. Bake at 350°F for 25-30 minutes—overbaking causes doming. For a 9x13-inch pan, reduce baking time by 5-10 minutes.
Can I make this cake gluten-free?
Yes! Replace the 2.5 cups all-purpose flour with a 1:1 gluten-free baking flour blend (like Bob's Red Mill). Add 1 tsp xanthan gum to improve texture. Note that gluten-free cakes may be slightly denser—check doneness at 20 minutes since they bake faster.
What's the best way to store leftovers?
Wrap tightly in foil at room temperature for 3 days or refrigerate for 5 days. For longer storage, freeze slices in airtight containers for 3 months. To revive stale slices, warm in a 350°F oven for 5 minutes with a sprinkle of water on top.