
Desserts
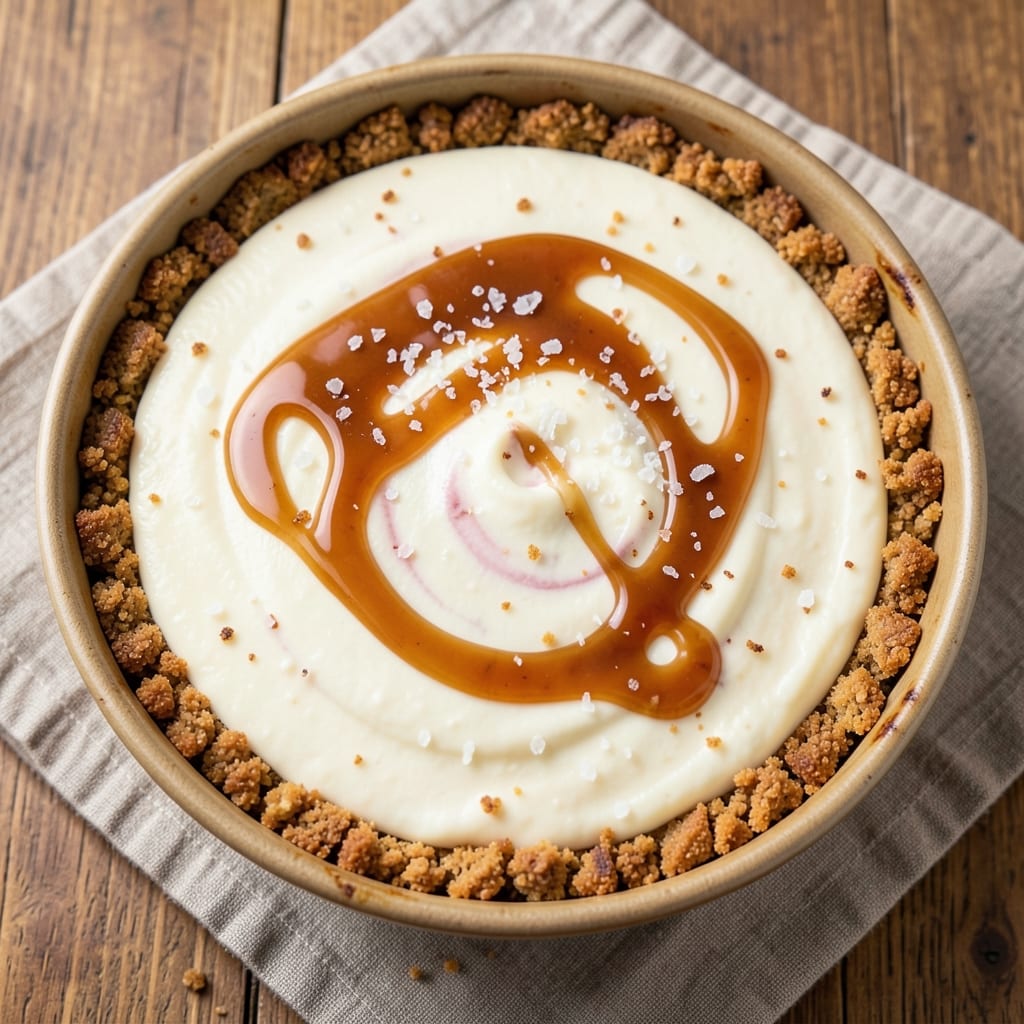
An 8-inch baked cheesecake delivers the perfect balance of a crispy crust and a silky, jiggly filling—no water bath or springform pan required. The secret lies in precise ingredient ratios and careful baking techniques that prevent cracks or sinking. After years of testing, this method consistently yields a cheesecake with a golden, buttery crust and a velvety center that sets just enough to hold its shape.
What sets this recipe apart is the one-tin approach, eliminating the need for specialized equipment. A simple graham cracker crust forms a sturdy base, while the filling combines cream cheese, sour cream, and eggs in a way that ensures smooth texture without overmixing. The key to success is baking at the right temperature and avoiding common pitfalls like opening the oven too soon.
By the time it emerges from the oven, you’ll have a cheesecake with a crispy, caramelized crust and a filling that’s creamy yet firm enough to slice cleanly. The cooling process is just as important as baking—allowing it to set gradually prevents cracks and ensures a perfect texture. This is the kind of dessert that impresses guests while feeling approachable for home bakers.
Whether you’re serving it at a dinner party or treating yourself to a special dessert, this recipe delivers restaurant-quality results with minimal effort. The versatility of the crust and filling means you can customize it with flavors like chocolate swirl or berry compote. Let’s get started on creating your perfect cheesecake.
Ingredients for 8 inch baked cheesecake
Twelve ingredients transform into a showstopping cheesecake with crispy crust and velvety filling.
| Ingredient | Amount | Notes |
|---|---|---|
| Graham Cracker Crumbs 🍪 | 1 ½ cups | Finely crushed, no soft bits |
| Unsalted Butter 🧈 | ½ cup | Melted, full-fat preferred |
| Granulated Sugar 🍚 | ¼ cup | For crust sweetness |
| Large Eggs 🥚 | 3 whole | Room temperature, separated |
| Cream Cheese 🧀 | 16 oz | Full-fat, room temperature |
| Sour Cream 🥛 | ½ cup | Full-fat for richness |
| Granulated Sugar 🍚 | 1 cup | For filling sweetness |
| Vanilla Extract 🌿 | 2 tsp | Pure, high-quality preferred |
| Light Corn Syrup 🍯 | ½ cup | Prevents cracking |
| Salt 🧂 | ½ tsp | Kosher or sea salt |
| All-Purpose Flour 🌾 | ¼ cup | For filling stability |
| Lemon Juice 🍋 | 1 tbsp | Freshly squeezed |
The graham crackers make or break the crust—Honey Maid or Pepperidge Farm are my go-to for consistent texture. Toast them lightly before crushing to enhance flavor and prevent sogginess. For the butter, Land O'Lakes or Plugrá work best; avoid margarine substitutes. The cream cheese must be room temperature—cold lumps ruin the silky texture, so let it sit for 2-3 hours. If you're in a hurry, microwave it in 20-second bursts until just soft. The corn syrup is non-negotiable for preventing cracks; Karo is the gold standard but any light corn syrup works.
No graham crackers? Oreos or digestive biscuits crushed finely will work in a pinch. Substituting Neufchatel for cream cheese lightens the texture slightly, but stick with full-fat for that classic richness. The lemon juice brightens the flavor—bottled works, but fresh is noticeably better. For a chocolate twist, fold in 1/4 cup cocoa powder with the dry ingredients. The flour stabilizes the filling; if you're gluten-free, swap for 1/4 cup gluten-free flour blend. And trust me on the room-temperature eggs—they whip up fluffier and prevent dense filling.
Prep the crust first—press it firmly into the tin and chill for at least 30 minutes before baking. The filling can be made a day ahead and refrigerated, then baked straight from the fridge for even texture. Once baked, let it cool completely before refrigerating—this prevents cracks. Store leftovers in the fridge for up to 5 days, but it's best enjoyed fresh. For serving, a light dusting of powdered sugar or fresh berries elevates the presentation. The one-tin method means no springform needed—just a sturdy 8-inch pan, and you're golden.
Why You'll Love This Recipe
- No Mixer Needed: I swear by this recipe because it’s one of those rare desserts that doesn’t demand a mixer—just a whisk and elbow grease. The cream cheese and butter blend effortlessly with sugar until smooth, and the graham cracker crust comes together in minutes with just melted butter and crumbs. Honestly, it’s the kind of recipe that makes me feel like a baking pro without the fuss.
- Crust That Crunches: That buttery graham cracker crust? It’s the star. The moment the cheesecake slices out, the contrast between the crispy edges and the velvety filling is chef’s kiss—no soggy bottom here. I’ll be real: I’ve tried fancier crusts, but this one’s my go-to because it’s foolproof and always delivers that perfect texture.
- Weeknight Dessert Ready: Here’s what sold me—this cheesecake bakes in under an hour, then chills while you finish dinner. No waiting around, no last-minute stress. I’ve served it warm (yes, even on a Tuesday night) straight from the oven with a drizzle of honey, and it’s still a hit. It’s basically my secret weapon for when I want something special but don’t have time to fuss.
- Leftovers That Last: Between us, this recipe makes just enough for a small crowd—so you’ll have leftovers, and they’re the best kind. The texture stays perfect for days, and it’s one of those desserts that actually tastes better the next day (no sad, dry cheesecake here). Plus, it’s budget-friendly—cream cheese and graham crackers stretch further than you’d think, and no one will guess it’s not homemade.
Step-by-step instructions for 8-Inch baked cheesecake
Here's how to craft a showstopping cheesecake with a buttery crust and velvety filling—no water bath needed!
Prepare the Crust for Perfect Crispiness
Preheat your oven to 325°F and generously butter an 8-inch springform pan. In a medium bowl, combine the 1.5 cups graham cracker crumbs with the 0.5 cup melted unsalted butter and 0.25 cup granulated sugar. Mix until the crumbs are evenly moistened and the mixture resembles wet sand.
Press the crumb mixture firmly into the bottom of the prepared pan, using the back of a measuring cup to create an even layer. Bake the crust for 10 minutes until it's set and the edges begin to turn golden. Remove from the oven and let it cool slightly—this prevents the filling from sinking when you add it later. Here's the thing: a chilled crust holds its shape better, so don't skip this step even if it feels like waiting.
Whip the Filling to Silky Perfection
While the crust bakes, beat the 16 oz cream cheese and 0.5 cup sour cream together in a large mixing bowl using an electric mixer on medium speed until completely smooth. This step is crucial—any lumps will translate to graininess in your final cheesecake. Gradually add the 1 cup granulated sugar, 2 tsp vanilla extract, and 0.5 tsp salt, mixing on medium-high speed until fully incorporated and the mixture is light and fluffy.
In a separate bowl, whisk together the 3 whole large eggs, 0.5 cup light corn syrup, and 1 tbsp lemon juice. The corn syrup prevents cracking, while the lemon juice adds brightness that balances the richness. With the mixer running on low speed, slowly pour the egg mixture into the cream cheese mixture, being careful not to overmix. Here's where it gets fun—you'll see the batter thicken slightly as it comes together. This is the moment that matters: the filling should be smooth, thick, and ribbon-like when you lift the beaters.
Assemble and Bake for a Silky Texture
Pour the filling over the cooled crust, spreading it evenly with a spatula. Tap the pan gently on the counter a few times to release any air bubbles that may have formed. Place the pan on a baking sheet lined with parchment paper—this makes it easier to transfer the hot cheesecake later. Bake at 325°F for 50-55 minutes, until the edges are set and the center still jiggles slightly when gently shaken.
I know it seems weird, but trust me when I say the center should still have a slight wobble—this ensures a creamy texture rather than a dense one. If it looks too firm, it's overbaked. The reason we wait until the oven temperature is fully stabilized before baking is that cold pans can cause uneven cooking. Real talk: your oven might run hot, so start checking at the 45-minute mark. If it starts to brown too quickly, tent it with foil to prevent over-browning.
Cool and Set for Maximum Stability
Remove the cheesecake from the oven and let it cool in the pan for 1 hour at room temperature. This gradual cooling prevents cracking as the filling sets. After the hour, transfer the pan to the refrigerator and chill for at least 4 hours, or preferably overnight. Patience is key here—this resting period allows the flavors to meld and the texture to become truly silky.
When you're ready to serve, run a knife around the edge of the pan to loosen the cheesecake. Release the springform clamp gently and slide the parchment paper underneath before removing the side of the pan. The cheesecake should release cleanly if it's been chilled properly. If it sticks, don't panic—add a splash of warm water to the knife and try again. Serve slices with fresh berries or a drizzle of caramel for an extra touch of elegance.
Pro Tips For Making 8 Inch Baked Cheesecake
- Preheat the Pan: Slide your 8-inch springform pan into the oven right as you preheat—425°F for 10 minutes. This ensures the crust sets instantly when you pour the batter, preventing that dreaded soggy bottom. I learned this the hard way after scraping up a gooey mess from a cold pan.
- Whip Cream Cheese First: Beat the cream cheese until completely smooth before adding sugar or eggs—no streaks, no lumps. I used to rush this, and the texture always felt grainy. Take the 5 extra minutes; your cheesecake will thank you with a silky finish.
- Skip the Water Bath: Bake this cheesecake uncovered for the first 20 minutes to let the top set, then tent with foil if it browns too fast. Water baths make the crust soggy and add unnecessary cleanup. The oven’s dry heat is your friend here.
- Chill the Crust: Press the graham cracker crust into the pan and refrigerate it while you prep the filling—at least 20 minutes. Cold crust = firm base = no crumbling when you pour the batter. Yes, it’s an extra step, but it’s the thing that matters most.
Common mistakes when making perfect results
Overmixing the Filling
I’ve seen countless cheesecakes ruined by overmixing the filling—it’s the fastest way to turn your silky dream into a dense brick. Once you’ve combined the egg mixture with the cream cheese base, stop mixing immediately after it just comes together. Overmixing incorporates too much air, which causes the cheesecake to sink or develop large cracks as it bakes. 💡 The filling should be smooth and ribbon-like, not frothy or bubbly.
Skipping the Cooling Phase
Rushing the cooling process is a surefire way to end up with cracks or a collapsed center. After baking, let the cheesecake cool at room temperature for at least 1 hour before refrigerating. This gradual temperature drop prevents thermal shock, which causes the filling to contract too quickly. I’ve learned this the hard way—skipping this step means your cheesecake might develop a web of cracks or even sink in the middle.
Incorrect Oven Rack Placement
Baking the cheesecake too high in the oven can lead to uneven browning and a dry top, while placing it too low may result in a soggy bottom. The middle rack is your best bet for even heat distribution. If your oven runs hot, position the pan slightly lower and tent it with foil after 40 minutes to prevent over-browning. I always double-check my oven’s hot spots—some ovens have uneven heating that can ruin an otherwise perfect cheesecake.
Using Cold Ingredients
Cold cream cheese, eggs, or butter can wreak havoc on your cheesecake’s texture. Room-temperature ingredients blend smoothly and create a lighter, more stable filling. For the cream cheese, let it sit out for 2-3 hours or microwave it in 20-second bursts until just soft. Cold eggs won’t whip properly, leading to a dense filling, and cold butter can make the crust greasy instead of crispy. Trust me, this small step makes a huge difference in the final result. ⏰
Opening the Oven Too Soon
Peeking at your cheesecake too early can cause the filling to sink or develop cracks as the heat escapes. The first 45 minutes are critical—resist the urge to check! If you’re worried about over-browning, tent it with foil instead. I’ve seen many bakers open the oven early and end up with a cheesecake that looks more like a science experiment than dessert. Patience here ensures a smooth, jiggly center every time.
Not Using Corn Syrup
Skipping the corn syrup is a classic mistake that leads to cracks. The syrup acts as a moisture barrier, preventing the filling from drying out too quickly as it bakes. Without it, the cheesecake’s surface can harden while the center remains undercooked, creating a brittle top. Karo light corn syrup is my go-to, but any light corn syrup will work. It’s a small ingredient with a big impact—don’t skip it! 🍯
Nutrition facts
Frequently asked questions
Can I make this cheesecake in a different-sized pan?
Yes, but you'll need to adjust baking times and ingredient ratios. For a 9-inch pan, increase crust crumbs and filling by about 25% and bake for 55-60 minutes. For a 6-inch pan, reduce ingredients by 50% and bake for 40-45 minutes. Always use the middle rack and check for doneness with a slight jiggle in the center.
Why does my cheesecake crack?
Cracking usually happens from rapid cooling or temperature changes. Let the cheesecake cool at room temperature for 1 hour before refrigerating to prevent thermal shock. The corn syrup in the recipe helps prevent cracks by maintaining moisture. If cracks do appear, cover them with whipped cream or fruit topping—they won't affect the flavor!
Can I bake this cheesecake without a springform pan?
Use a sturdy 8-inch metal or ceramic pan with a removable bottom. Grease it well and line the bottom with parchment paper for easy removal. After baking, let it cool completely before attempting to release. For extra insurance, chill the pan in the freezer for 10 minutes before removing the sides—this helps loosen stubborn cheesecakes.
How do I store leftovers?
Store your cheesecake in an airtight container in the refrigerator for up to 5 days. For longer storage, wrap individual slices in plastic wrap and freeze for up to 2 months. Thaw overnight in the fridge before serving. The texture holds up well, though it's best enjoyed fresh when possible.
Can I add mix-ins like chocolate or fruit?
Yes! For a chocolate version, fold in 1/4 cup cocoa powder with the dry ingredients. For fruit, gently swirl in 1 cup berries or 1/2 cup melted chocolate chips before baking. Just be careful not to overmix—stir gently to maintain the silky texture. Add mix-ins after the filling is combined with the egg mixture to preserve the structure.