
Desserts
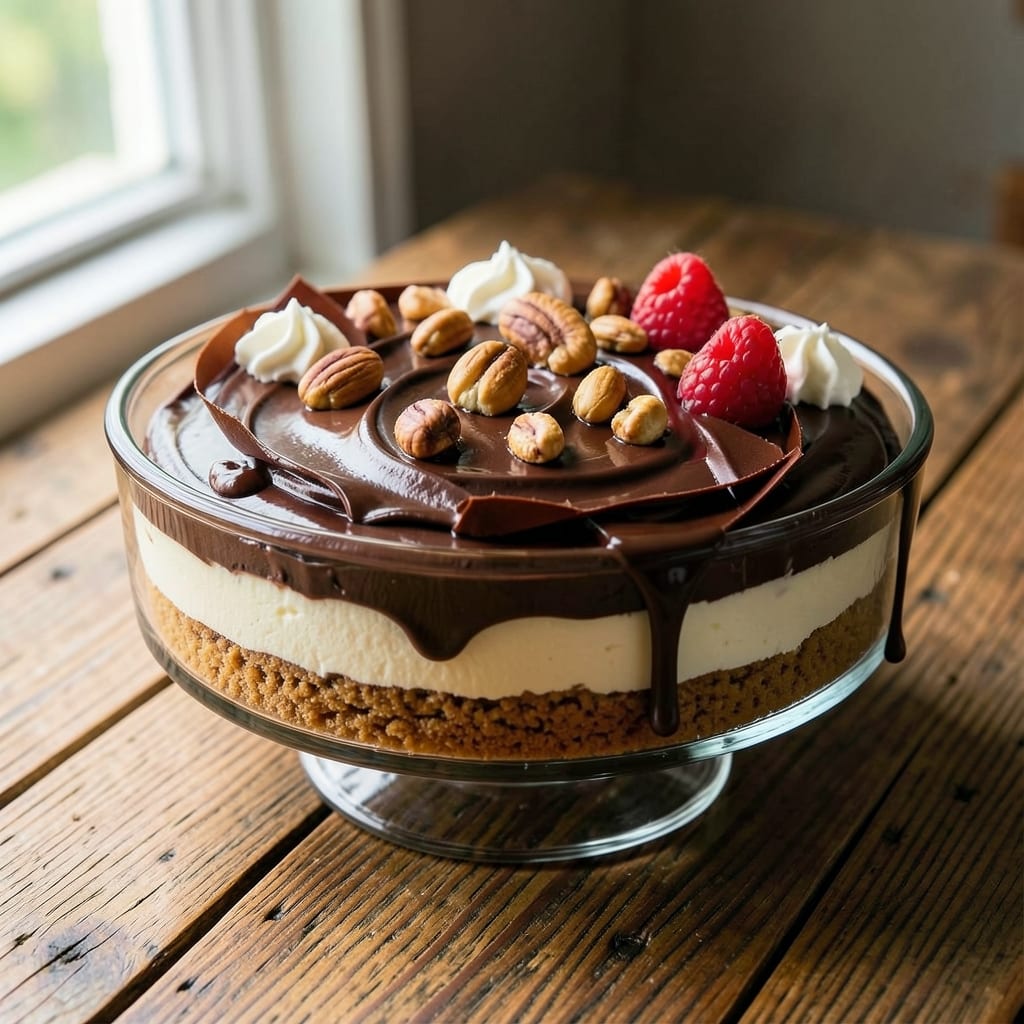
This amazing chocolate cheesecake recipe delivers that perfect balance of a velvety crust and a rich, fudgy center that’ll make you the star of any dessert spread. 💛 The secret lies in a simple yet foolproof technique that ensures a creamy texture without a single crack in sight—no fancy equipment or baking skills required.
What sets this recipe apart is the combination of a buttery graham cracker crust and a velvety filling that’s both decadent and surprisingly easy to make. The key steps—whipping the cream cheese properly, baking at the right temperature, and chilling overnight—transform a basic dessert into something restaurant-worthy. Trust me, once you try this, you’ll never buy store-bought again.
By the time you’re done, you’ll have a creamy, fudgy masterpiece that’s smooth, rich, and topped with a glossy chocolate ganache for that extra touch of indulgence. The best part? It’s beginner-friendly, with clear instructions that make it impossible to mess up—just follow the steps, and you’ll end up with a cheesecake that looks (and tastes) like it came from a bakery.
Serve it chilled with fresh berries, a dollop of whipped cream, or even a sprinkle of sea salt for contrast. This recipe is all about making dessert feel like a celebration, no matter the occasion. Let’s get baking!
Ingredients for amazing chocolate cheesecake
Eight essential ingredients transform into a velvety chocolate cheesecake masterpiece.
| Ingredient | Amount | Notes |
|---|---|---|
| Graham Cracker Crumbs 🍪 | 2 cups | Finely crushed, no soft bits |
| Unsalted Butter 🧈 | ½ cup | Melted, full-fat preferred |
| Granulated Sugar 🍚 | ¼ cup | For crust sweetness |
| Large Eggs 🥚 | 3 whole | Room temperature, separated |
| Cream Cheese 🧀 | 16 oz | Full-fat, room temperature |
| Powdered Sugar 🍚 | 1 cup | For smooth filling |
| Vanilla Extract 🌿 | 1 tbsp | Pure, high-quality |
| Sour Cream 🥛 | ½ cup | Full-fat for creaminess |
| Dark Chocolate Chips 🍫 | 1 cup | 70% cocoa or higher |
| Heavy Whipping Cream 🥛 | ½ cup | Chilled for ganache |
| Semisweet Chocolate Bars 🍫 | 4 oz | High-quality, chopped |
| Salted Butter 🧈 | 2 tbsp | For ganache richness |
| Kosher Salt 🧂 | ¼ tsp | Fine grain preferred |
| Fresh Berries 🍓 | 1 ½ cups | For garnish (optional) |
The cream cheese is non-negotiable—Philadelphia brand is my go-to, but any full-fat works. Grab a 16-ounce block (that’s two 8-ounce packages) and let it sit at room temperature for at least 2 hours before whipping. The graham crackers? Honey Maid or Keebler from the bakery section—none of that pre-crumbled stuff. Crush them finely in a food processor or by hand with a rolling pin. For the chocolate ganache, Ghirardelli or Lindt bars melt beautifully—avoid the generic store brands. Fresh berries for garnish? Strawberries or raspberries from the farmers market have the best flavor, but frozen works in a pinch if you're prepping ahead.
No cream cheese on hand? Neufchâtel cheese is a decent substitute, but the texture won’t be identical. Swapping powdered sugar for granulated? Add 1 tablespoon of cornstarch to prevent graininess. The chocolate chips can be chopped chocolate bars if that’s what you’ve got—just make sure it’s at least 70% cocoa. For the ganache, melted coconut oil can replace butter if you’re making it vegan-style, though the texture will differ. The eggs must be room temperature—cold eggs won’t whip properly and can cause cracks. If you’re worried about cracks, bake at 325°F for 5 minutes longer than the recipe calls for, then turn off the oven and let it cool inside.
This cheesecake tastes even better the next day—chill it overnight for perfect texture. Store leftovers in an airtight container in the fridge for up to 5 days, though I’ve never had any last that long. For the ganache, pour it over the warm cheesecake right after baking while it’s still slightly warm—this helps it set smoothly. The crust keeps well in the freezer for up to 2 months if you wrap it tightly in plastic wrap and foil. Garnish with fresh berries or a sprinkle of flaky sea salt just before serving to elevate the flavors. Portion into slices for easy serving—trust me, it disappears fast.
Why You'll Love This Recipe
- No-Bake Magic: Between us, this cheesecake never hits the oven. Just blend, mix, and chill—no stress, no waiting for the house to smell like a bakery for hours. The graham cracker crust stays perfectly crisp, even after days in the fridge.
- Rich Without Guilt: That first bite? Smooth, velvety cream cheese folded with just enough sugar to balance the deep chocolate flavor. Honestly, the eggs and butter make it impossibly creamy, but it’s still lighter than most bakery slices.
- Party Ready: Slice it for birthdays, potlucks, or just because—it’s always a crowd-pleaser. The crust holds up perfectly, and the chocolate layer? Everyone reaches for seconds. (Yes, even on a Tuesday night.)
- Leftovers That Last: This recipe actually tastes better the next day. Store it covered, and you’ll have a dessert ready for impromptu guests or late-night cravings. Plus, the ingredients stretch far—no wasted cream cheese here.
Step-by-step instructions for velvet crust and fudgy chocolate cheesecake
Here's how to build the perfect chocolate cheesecake with a velvety crust and rich, fudgy center.
👨🍳 Step 1: Prepare the Chocolate Graham Cracker Crust
Preheat your oven to 350°F and melt the 0.5 cup unsalted butter in a microwave-safe bowl in 30-second intervals, stirring between each, until fully liquid. In a separate bowl, combine the melted butter with the 2 cups graham cracker crumbs and 0.25 cup granulated sugar until evenly moistened.
Press the mixture firmly into a 9-inch springform pan, creating an even layer along the bottom and up the sides. Use the back of a spoon to compact it tightly—this prevents crumbling later. Bake for 10 minutes until lightly golden. Let cool completely before adding the filling, as a warm crust can cause the cheesecake to slide.
🍳 Step 2: Mix the Cheesecake Filling
In a large mixing bowl, beat the 16 oz cream cheese and 1 cup powdered sugar together on medium speed until completely smooth and creamy. Add the 3 whole large eggs one at a time, mixing just until each is incorporated—don't overmix or the texture will become grainy.
Stir in the 1 tbsp vanilla extract, 0.5 cup sour cream, and 0.25 tsp kosher salt until fully combined. The batter should be thick but pourable. Fold in the 1 cup dark chocolate chips gently to maintain even distribution. Here's the thing—don't skip the sour cream; it adds that signature tang and prevents a cakey texture.
🥘 Step 3: Bake the Cheesecake
Pour the filling over the cooled crust, spreading it evenly with a spatula. Place the springform pan in a large roasting pan and add hot water to create a water bath—this helps prevent cracking. Bake at 325°F for 50-55 minutes until the edges are set but the center still jiggles slightly when shaken.
I know it looks underdone, but the center will firm up as it cools. The key is patience—don't overbake or you'll end up with a dense, dry cheesecake. When you pull it out, the top should be slightly puffed but not browned. Let it cool at room temperature for 1 hour, then refrigerate uncovered for 4 hours or overnight.
🍫 Step 4: Prepare the Chocolate Ganache
While the cheesecake chills, melt the 4 oz semisweet chocolate bars and 2 tbsp salted butter together in a heatproof bowl set over a saucepan of simmering water. Stir until completely smooth, then remove from heat and whisk in the 0.5 cup heavy whipping cream until fully incorporated. Let cool slightly until it thickens but remains pourable.
This ganache should be glossy and thick enough to coat the back of a spoon. If it's too thin, chill for 10 minutes to thicken. The ganache should coat the cheesecake smoothly without dripping—this is your signature fudgy layer that makes this recipe amazing.
🍽️ Step 5: Assemble and Garnish
Once the cheesecake is fully chilled, carefully remove it from the springform pan. Spoon the chocolate ganache over the top and spread it evenly with an offset spatula. Press gently to create a smooth surface—this ensures every bite has that rich chocolate layer.
Top with the 1.5 cups fresh berries arranged in an attractive pattern. The berries add freshness that cuts through the richness of the chocolate. Let the ganache set for 30 minutes before slicing—this gives you clean slices with no messy drips. Serve chilled for the perfect balance of creamy, fudgy, and fresh flavors.
Pro Tips For Making Amazing Chocolate Cheesecake
- Preheat Pan First: I learned this the hard way—skipping it makes the crust soggy. Place your springform pan in the oven before mixing the crust, then let it sit for 5 minutes. The butter melts faster and the crumbs get properly toasted, not just damp.
- Use Room-Temp Eggs: Cold eggs? Big mistake. Let them sit in warm water for 10 minutes before cracking—this keeps the batter smooth and prevents lumps. No time? Stick them in the fridge overnight; they’ll be perfect by morning.
- Avoid Overmixing the Batter: After beating cream cheese and sugar, add eggs one at a time and mix just until combined. I used to whip it like I was making meringue, and the cheesecake ended up dense. Gentle folds are your friend.
- Bake Low and Slow: 325°F isn’t just a suggestion—it’s non-negotiable. High heat makes the top brown too fast while the center stays runny. If yours cracks, it’s because you rushed it. Cover the edges with foil after 30 minutes to keep them from overcooking.
Storing and reheating this amazing chocolate cheesecake
Refrigerator Storage
Your freshly baked chocolate cheesecake will keep beautifully in the fridge for up to 5 days when stored properly. After the ganache sets, transfer the whole cake to an airtight container or cover it tightly with plastic wrap pressed directly against the surface. This prevents drying and preserves that luscious texture. I like to use a glass pie dish with a tight lid—it keeps the cheesecake fresh and makes slicing easier later. 🥧
Freezer Prep
For longer storage, this cheesecake freezes wonderfully for up to 2 months. First, let it cool completely at room temperature, then wrap it tightly in plastic wrap followed by aluminum foil to protect against freezer burn. I recommend freezing the whole cake rather than individual slices to maintain texture. When ready to serve, thaw in the fridge overnight—never at room temperature to prevent condensation. The texture remains creamy, though the ganache may soften slightly.
Reheating Slices
If you've stored leftovers, reheating is simple but optional—this cheesecake tastes best cold! For slightly warmed slices, microwave individual portions on medium power for 10-15 seconds. Cover with a damp paper towel to prevent drying. Alternatively, place slices on a baking sheet and warm in a 250°F oven for 5-7 minutes—this gently reheats without making the ganache runny. I usually serve it straight from the fridge for that perfect cool, creamy bite. 🍫
Reviving Dried Ganache
If your ganache looks dry after storage, don't worry—it's an easy fix. Gently reheat the cheesecake slice in the microwave for 5-8 seconds, then top with a fresh dollop of warmed ganache (simmer the original chocolate and cream mixture again). The contrast between the creamy ganache and the rich cheesecake will remind you why you love this dessert. For extra indulgence, sprinkle with flaky sea salt or a dusting of cocoa powder before serving. ✨
Crust Refresh
The graham cracker crust stays crisp for about 3 days in the fridge, but after that, it may soften slightly. To revive it, place the cheesecake on a baking sheet and warm in a 300°F oven for 5-7 minutes until the crust firms up again. This works especially well if you're serving it to guests who prefer a firmer texture. The filling will stay creamy while the crust regains its perfect crunch. 💪
Make-Ahead Ganache
Prepare the ganache 1 day ahead and store it in an airtight container at room temperature. It'll keep for up to 3 days without refrigeration, making it perfect for stress-free baking. When ready to use, simply reheat gently in a double boiler until smooth and glossy again. This trick saves time on baking day—just pour and spread when the cheesecake is fully chilled. The ganache will set beautifully without any texture changes. 🔥
Nutrition facts
Frequently asked questions
Why does my cheesecake crack even when I use a water bath?
Cracking often happens from sudden temperature changes or overmixing. First, ensure your oven is fully preheated and the pan is placed on the middle rack. Second, don't overmix the batter—just combine ingredients until smooth. Finally, let the cheesecake cool gradually at room temperature for 1 hour before refrigerating. If cracks appear, cover them with extra ganache or whipped cream before serving.
Can I make this recipe without a springform pan?
Yes, but you'll need to adapt. Use a 9-inch round cake pan with a removable bottom, lined with parchment paper for easy removal. Press the crust firmly into the pan and grease the sides with butter or cooking spray. After baking, chill for 4 hours before unmolding. The texture will be just as creamy, though the edges might be slightly denser without the springform's flexibility.
How do I make this cheesecake vegan?
Swap the cream cheese for 16 oz vegan cream cheese (like Kite Hill) and use 1 cup coconut cream instead of sour cream. Replace eggs with 3 tbsp ground flaxseed mixed with 9 tbsp water (let sit for 5 minutes to thicken). For the ganache, use coconut oil instead of butter. The texture will be slightly denser but still rich and fudgy!
What’s the best way to serve this cheesecake?
This decadent dessert shines with a few simple toppings! Serve chilled with fresh berries (strawberries or raspberries pair perfectly), a dollop of whipped cream, or a sprinkle of flaky sea salt to balance the sweetness. For a restaurant-style touch, drizzle with raspberry sauce or crushed peppermint. Always let the ganache set for 30 minutes before slicing to avoid messy drips.
Can I bake this cheesecake in a convection oven?
Yes, but reduce the baking time by 5-10 minutes and increase the temperature to 335°F**. Convection ovens circulate hot air more efficiently, so monitor closely to avoid overbaking. The center should still jiggle slightly when shaken. Let it cool completely before refrigerating, as convection can speed up the cooling process.