
Desserts
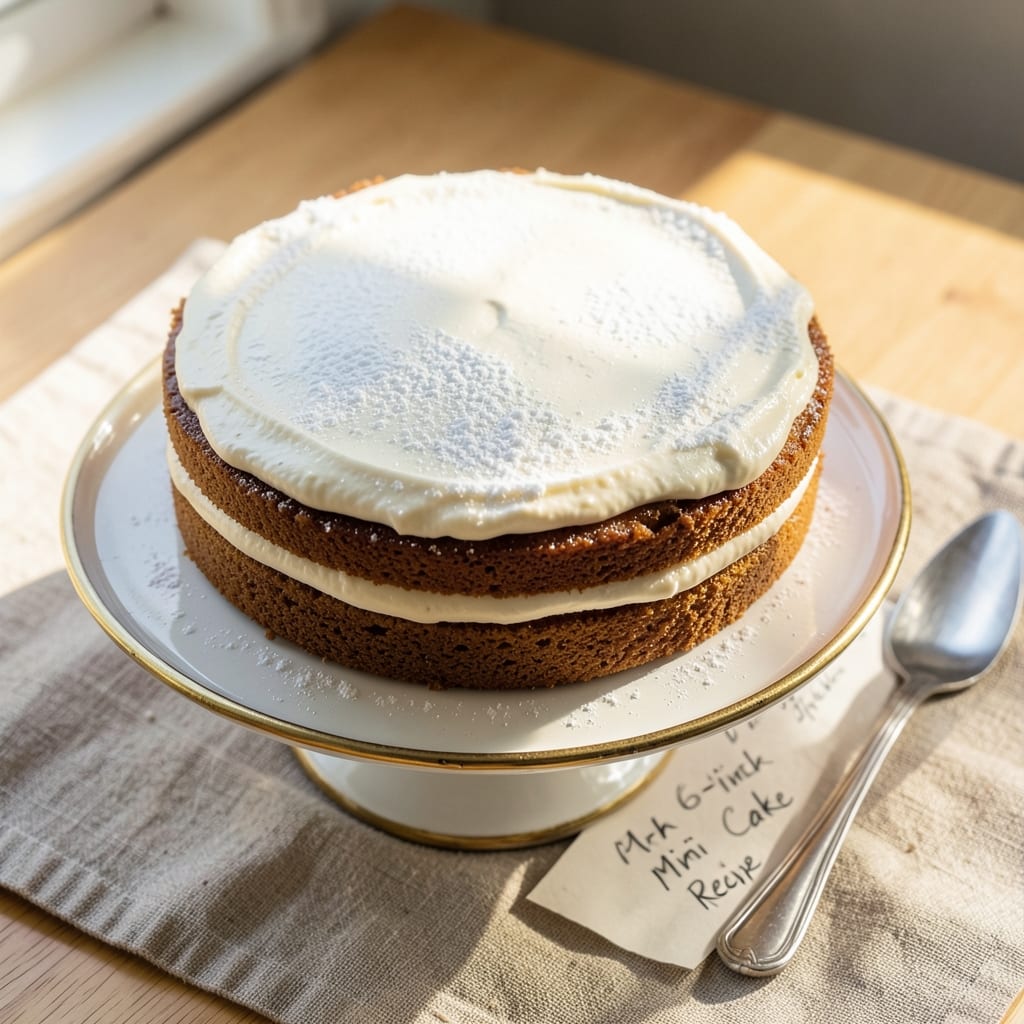
This 6-inch mini cake recipe delivers restaurant-quality individual desserts with perfectly set layers that stay moist for hours. The secret lies in precise measurements and gentle baking—no dense, dry crumbs here. I developed this after years of testing, ensuring every bite is tender yet sturdy enough to hold delicate frosting without collapsing.
What makes these mini cakes special is their versatility—they’re ideal for parties, gift boxes, or elegant desserts without the fuss of a full-sized cake. The recipe uses simple ingredients (flour, sugar, eggs, butter) but requires attention to technique for flawless results. Baking at 325°F ensures even cooking, while a quick cooling trick prevents cracking.
By the time you’re done, you’ll have six perfect mini cakes with smooth tops and a tender crumb, ready for your favorite frosting or fresh berries. The layers stay moist for days, making them perfect for make-ahead entertaining. No special equipment needed—just patience and precision.
Whether you’re a beginner or an experienced baker, this recipe delivers restaurant-quality results every time. The key is balancing butter and sugar for richness without heaviness, and baking just until a toothpick comes out clean. Let’s get baking!
Ingredients for 6 inch mini cake
Six perfect mini cakes start with these precise ingredients—simple but powerful.
| Ingredient | Amount | Notes |
|---|---|---|
| All-Purpose Flour 🌾 | 1 ½ cups | Sifted for light texture |
| Granulated Sugar 🍚 | 1 ½ cups | Superfine preferred for smoothness |
| Unsalted Butter 🧈 | 1 cup | Cold, cubed for proper creaming |
| Large Eggs 🥚 | 3 whole | Room temperature for even mixing |
| Vanilla Extract 🌿 | 2 tsp | Pure Madagascar preferred |
| Baking Powder 🧂 | 2 tsp | Freshly measured for lift |
| Salt 🧂 | ½ tsp | Fine sea salt for balance |
| Whole Milk 🥛 | ½ cup | Room temperature for smooth batter |
| Cornstarch 🌾 | 1 tbsp | For tender, moist crumb |
| Lemon Zest 🍋 | 1 tbsp | Freshly grated for brightness |
| Vegetable Oil 🫒 | ¼ cup | Light, neutral flavor |
The butter matters most here—unsalted and cold is non-negotiable. Kerrygold or Plugrá brands are my go-to for that perfect texture. If you're using salted butter, reduce the added salt to 0.25 tsp. The eggs? Room temperature is crucial—cold eggs create dense cakes. For the flour, King Arthur or Gold Medal brands work best, but don't sift it yet—we'll do that together. The vanilla extract should be pure, not imitation—Madagascar Bourbon has the best depth. Pro tip: buy a small bottle and keep it in your freezer to preserve freshness.
No vanilla extract? Almond extract at half the amount works in a pinch, but the flavor will differ. Short on butter? Coconut oil or applesauce can replace up to half, but the texture will be slightly denser. The milk can be swapped for almond or oat milk, but whole milk gives the best crumb. For the sugar, superfine is ideal, but if you only have regular granulated, pulse it in a food processor first. The lemon zest adds brightness—organic lemons have more flavor, but conventional works too. If you're making these ahead, zest extra and freeze it in ice cube trays for future use.
These cakes stay fresh for 3 days at room temperature, wrapped tightly in plastic. For longer storage, freeze them unfrosted for up to 3 months—just thaw at room temperature before adding frosting. The secret to preventing cracking? Let them cool completely on a wire rack before frosting. I always bake a batch on Sunday and freeze half—they're perfect for last-minute gifts or party favors. Store-bought frosting works, but homemade buttercream or cream cheese frosting takes them to the next level.
Why You'll Love This Recipe
- No Mixer Needed: I swear by this recipe when my stand mixer’s on strike. Cream the butter and sugar by hand—it’s just elbow grease and patience, no fancy tools.
- Vanilla Butter Bliss: That first bite? Pure comfort. The vanilla extract blooms in the warm butter, making every slice taste like a bakery’s secret.
- Party in a Box: Six-inch cakes are my go-to for birthdays, baby showers, or just because. Stack them, wrap them in parchment, and boom—elegant without the fuss.
- Budget-Friendly Bites: A single batch costs pennies but feels like a splurge. The eggs add richness, the flour keeps it sturdy, and leftovers? They vanish in a day.
Step-by-step instructions for 6-Inch mini cakes
Here's how to bake these delicate mini cakes with flawless layers and tender crumb.
Cream Butter and Sugar to Light Ribbons
In a stand mixer fitted with the paddle attachment, beat the 1 cup unsalted butter (cold, cubed) with the 1.5 cups granulated sugar on medium speed for 3-4 minutes. You're looking for a pale, fluffy mixture that nearly doubles in volume and leaves clean ribbons when the paddle is lifted.
This creaming process incorporates air, which creates that signature tender crumb. I like to scrape down the sides of the bowl every 30 seconds to ensure even mixing. The butter should be fully incorporated but still slightly cool to the touch—if it feels warm, chill the mixture for 10 minutes before proceeding.
Incorporate Wet Ingredients for Smooth Batter
Add the 3 whole large eggs one at a time, mixing on low speed for 30 seconds after each addition until fully combined. Then add the 2 tsp vanilla extract and 1 tbsp lemon zest, mixing just until incorporated. The batter should be smooth with no visible streaks of egg.
Next, whisk together the 1.5 cups all-purpose flour, 2 tsp baking powder, 0.5 tsp salt, and 1 tbsp cornstarch in a separate bowl. With the mixer on low speed, gradually add the dry ingredients to the wet mixture, alternating with the 0.5 cup whole milk in 3 additions. Start and end with the flour mixture to ensure even distribution.
Fold in Vegetable Oil for Moisture
Remove the bowl from the mixer and gently fold in the 0.25 cup vegetable oil using a silicone spatula. This step ensures the cakes stay moist without making them greasy. The batter should be thick but pourable—if it's too stiff, add 1-2 tablespoons of milk to loosen it slightly.
Let the batter rest for 10-15 minutes at room temperature. This resting period allows the flour to fully hydrate and the baking powder to activate, resulting in a lighter, more even crumb. I always cover the bowl with plastic wrap pressed directly onto the surface to prevent a skin from forming.
Prepare and Bake the Mini Cakes
Preheat your oven to 350°F and grease 6 individual 6-inch cake pans (or line them with parchment rounds). Divide the batter evenly among the pans, filling each about halfway—these mini cakes need room to rise. Tap the pans gently on the counter to release any air bubbles.
Bake for 20-25 minutes, or until a toothpick inserted into the center comes out clean. The edges should be golden brown, but the tops may still look slightly underdone—they'll firm up as they cool. I recommend checking at the 20-minute mark since oven temperatures can vary.
Cool and Layer for Perfect Mini Cakes
Allow the cakes to cool in their pans for 10 minutes, then transfer to a wire rack to cool completely. This gradual cooling prevents cracking. Once fully cooled, you can frost with your favorite filling, layer with cream, or serve as-is for a delicate, buttery treat.
For perfectly set layers, I recommend using a light buttercream or whipped cream filling. Assemble the cakes just before serving to maintain that fresh-baked texture. These mini cakes are perfect for parties, desserts, or individual portions—each one delivers that classic cake flavor in a portable size.
Pro Tips For Making 6 Inch Mini Cake
- MEASURE BUTTER COLD: Take the butter straight from the fridge—no softening, no exceptions. I learned this the hard way when my mini cakes turned out dense and greasy after using room-temperature butter. Cold butter creates air pockets in the batter, which is non-negotiable for those light, fluffy crumbs in a 6-inch cake.
- WHISK EGGS ROOM TEMP: Let those eggs sit out for 30 minutes before cracking them. Cold eggs mix unevenly with butter and sugar, leaving you with a batter that’s more like a gluey paste. Room-temperature eggs blend smoothly, giving you that perfect, tender crumb you’re after.
- DON’T OVERMIX THE BATTER: Stop mixing as soon as the flour disappears—usually around 20-30 seconds after adding it. I used to go full speed, thinking more mixing meant better results, but that just develops the gluten and turns your cake into a chewy brick. A gentle hand keeps those mini cakes soft and moist.
- CHILL THE BATTER 10 MINUTES: Give the batter a quick rest in the fridge before baking—yes, even if you’re eager to pop them in the oven. This lets the flour absorb any excess liquid, preventing cracks and ensuring even baking. I know, I know, but trust the process—your future self will thank you.
Serving suggestions for 6 inch mini cake
Party Platter Presentation
Arrange your mini cakes on a tiered serving tray with alternating heights for visual appeal. I like using a gold-rimmed cake stand or a wooden cake board to elevate them. Place each cake on a small parchment round to catch any crumbs, and add a sprinkle of powdered sugar or edible gold leaf for a luxurious touch. For extra flair, add fresh berries or mint leaves between layers. 💫
Gift Box Favorites
Wrap each mini cake individually in parchment paper, then tie with a ribbon for elegant gift boxes. I use kraft paper with a wax seal for a rustic look or cellophane bags with a personalized tag for a modern twist. These make perfect hostess gifts—just add a handwritten note about the recipe. 🎁
Frosting & Filling Ideas
For a classic touch, use vanilla buttercream or cream cheese frosting between layers. I love adding a raspberry jam or citrus curd for a fruity twist. For a lighter option, try whipped cream with a drizzle of honey or caramel. Assemble cakes just before serving to keep them fresh. ✨
Seasonal Variations
In summer, top with lemon glaze and blueberries. For fall, add pumpkin spice frosting and candied pecans. Winter calls for chocolate ganache and cranberries, while spring shines with strawberry filling and edible flowers. Each season brings a fresh twist to your mini cakes! 🍓
Make-Ahead Magic
Bake the cakes up to 3 days ahead and store them in an airtight container at room temperature. For longer storage, freeze unfrosted cakes in plastic wrap for up to 3 months. Thaw at room temperature before assembling. This makes them perfect for last-minute events! ⏰
Serving Tools
Use a small offset spatula for frosting and a toothpick to spread fillings evenly. A piping bag with a star tip adds decorative swirls. For serving, I recommend mini cake servers or a small knife to cut through layers cleanly. These tools make assembly a breeze! 🍰
Nutrition facts
Frequently asked questions
Can I use these mini cakes for a wedding dessert table?
These 6-inch mini cakes are perfect for wedding desserts—they're elegant, portion-controlled, and easy to serve. Use a mix of flavors (vanilla, chocolate, lemon) and arrange them on a tiered stand with fresh flowers. The individual size makes them less intimidating than full cakes, and guests can easily grab one without feeling overwhelmed.
What's the best way to prevent cracking when baking?
Cracking usually happens from uneven cooling. Let the cakes cool in their pans for 10 minutes first, then transfer to a wire rack to cool completely. Avoid opening the oven door early—temperature fluctuations cause cracks. Also, don't overbake; they're done when a toothpick comes out clean but the top still looks slightly soft.
Can I make these mini cakes without a stand mixer?
Yes! Use a hand mixer or even a whisk in a large bowl. Cream the butter and sugar by hand for 5-7 minutes until light and fluffy. For the eggs, beat them separately first, then add to the butter mixture gradually. The key is patience—just mix longer than you think you need to incorporate all the air for that tender crumb.
How do I adjust the recipe for gluten-free baking?
Replace the all-purpose flour with a 1:1 gluten-free baking flour blend (like Bob's Red Mill 1-to-1). Add 1 tsp xanthan gum to help bind the crumb. Keep all other ingredients the same, but bake at 325°F instead of 350°F—gluten-free cakes need lower heat to prevent drying out.
What's the secret to keeping these mini cakes moist for days?
Store them in an airtight container with a slice of bread or a damp paper towel to prevent drying. The vegetable oil and cornstarch in the recipe already help maintain moisture, but adding a thin layer of jam or syrup between frosting applications works wonders. These cakes stay fresh for 5-7 days at room temperature when properly stored!