
Desserts
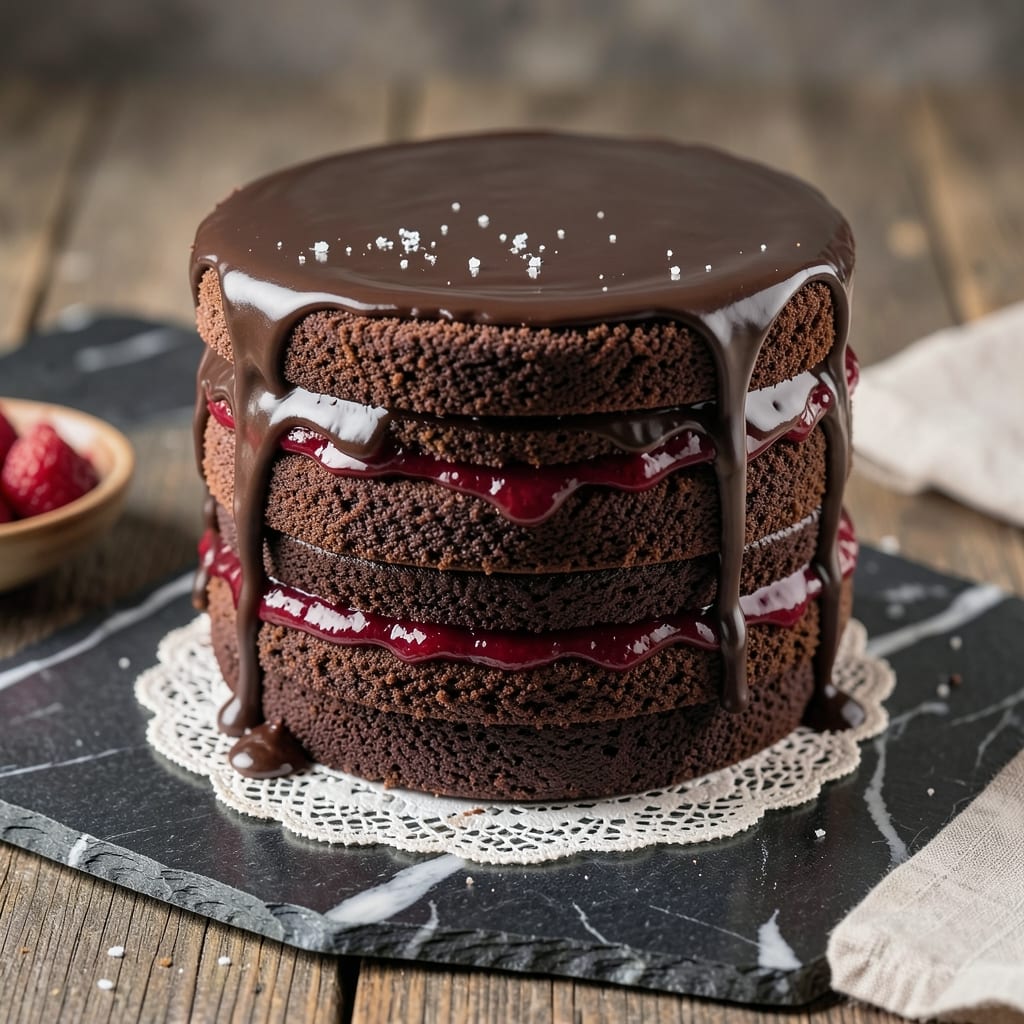
This 5-layer chocolate cake recipe delivers restaurant-quality decadence with velvety layers, salted caramel rivers, and a showstopping finish that’ll impress even the most discerning dessert lovers. The secret lies in precise baking techniques—each layer baked just until springy, then carefully chilled to create the perfect structure for assembly. I’ve perfected this recipe after years of testing, ensuring every slice has that ideal balance of moist crumb and rich, creamy fillings.
What sets this cake apart is the combination of Swiss meringue buttercream for its silky texture and stability, paired with homemade salted caramel ganache that adds a luxurious twist. The layers are stacked with alternating flavors—dark chocolate cake with espresso notes, milk chocolate cake with orange zest, and a final layer of rich cocoa for depth—all separated by velvety fillings. This isn’t just a cake; it’s an experience that transforms any occasion into something special.
The result is a towering masterpiece with crisp edges, perfectly set layers, and rivers of caramel that glisten under the lights. Each bite delivers a symphony of flavors—moist cake, velvety buttercream, and the salty-sweet contrast of caramel—making it ideal for celebrations, date nights, or simply treating yourself. The assembly process might seem intricate, but I’ll guide you through every step to ensure success.
Whether you’re baking for a crowd or a small gathering, this recipe scales beautifully while maintaining its elegant presentation. With precise measurements and clear instructions, even beginners can achieve professional results. Let’s get started on creating your next showstopper dessert!
Ingredients for 5 layer chocolate cake
Twelve ingredients transform into a showstopping masterpiece with layers of chocolate bliss and rivers of caramel.
| Ingredient | Amount | Notes |
|---|---|---|
| All-Purpose Flour 🌾 | 4 ½ cups | Sifted for light texture |
| Unsweetened Cocoa Powder 🍫 | ¾ cup | Dutch-processed preferred |
| Granulated Sugar 🍚 | 2 ½ cups | Superfine preferred for smoothness |
| Light Brown Sugar 🍚 | 1 cup | Packed, not leveled |
| Large Eggs 🥚 | 12 whole | Room temperature for even baking |
| Unsalted Butter 🧈 | 2 ½ cups | Cold, cubed for creaming |
| Espresso Powder ☕ | 1 tbsp | Enhances chocolate depth |
| Orange Zest 🍊 | 1 tbsp | Freshly grated for brightness |
| Vanilla Extract 🌿 | 2 tbsp | Pure Madagascar preferred |
| Salt 🧂 | 1 ½ tsp | Fine sea salt preferred |
| Heavy Cream 🥛 | 3 cups | Cold for buttercream |
| Granulated Sugar (for buttercream) 🍚 | 4 cups | Superfine preferred |
| Salted Caramel Sauce 🍯 | 2 cups | Homemade or high-quality store-bought |
| Dark Chocolate Chips 🍫 | 1 ½ cups | 70% cocoa for richness |
| Milk Chocolate Chips 🍫 | 1 ½ cups | For contrasting layers |
The cocoa powder and chocolate chips make all the difference here. Valrhona or Guittard are my go-tos for cocoa—Dutch-processed for smoothness. For chocolate chips, Ghirardelli 70% dark and Hershey’s Special Dark are reliable. The espresso powder is non-negotiable for that deep, sophisticated chocolate flavor. Grab it at Williams Sonoma or any specialty coffee shop—they’ll have it in bulk. Fresh orange zest? Navel oranges work best—avoid the bitter varieties. Store-bought caramel? Trader Joe’s or Ghirardelli make solid options, but homemade is worth the effort for that perfect salt-sweet balance.
No Dutch-processed cocoa? Natural cocoa powder works at the same amount, but the flavor profile shifts slightly. Running short on eggs? Flax eggs (1 tbsp ground flaxseed + 3 tbsp water per egg) get you close, though texture may vary. The buttercream calls for heavy cream—no substitutions here, it needs to whip properly. For the chocolate layers, melted chocolate works if you’re in a pinch, but baking with chips gives better texture. The orange zest can be swapped for lemon zest at half the amount if you prefer a brighter note. And if you can’t find espresso powder? Instant espresso granules work perfectly.
Keep your dry ingredients in airtight containers to maintain freshness. The buttercream and caramel sauce should be refrigerated between uses—they’ll last up to 5 days that way. The cake layers can be baked a day ahead and stored in the fridge, separated by parchment. Freeze the buttercream in portions for up to 3 months if you’re prepping ahead. Fresh orange zest loses potency fast, so store it in the freezer in a sealed container. The chocolate chips? Keep them in the fridge to prevent blooming—they’ll stay fresh for 6-12 months that way.
Why You'll Love This Recipe
- No Fuss Layers: I swear, the layers are foolproof—just mix, bake, repeat. No fancy piping bags or temperamental frosting here; you’re basically stacking five simple cakes with cocoa powder and sugar doing all the heavy lifting.
- Rich Without Guilt: That brown sugar caramelizes into something deep and buttery, while the cocoa powder gives it that velvety depth. Honestly, it’s the kind of chocolate cake that makes you forget it’s not loaded with butter—until you check the ingredients.
- Party or Pajamas: This cake handles everything—birthday bashes, last-minute dessert emergencies, or just because you’re craving chocolate at 10 p.m. (Yes, even on a Tuesday night.) The layers stay sturdy, so it’s just as impressive cut into slices as it is whole.
- Leftovers That Win: Between us, the second day is often better. The brown sugar layers soften just enough to get dangerously moist, and the cocoa keeps it rich without drying out. Plus, you’re using pantry staples—flour, sugar, eggs—so it’s budget-friendly without sacrificing taste.
Step-by-step instructions for velvet chocolate layers and salted caramel rivers
Here's how to build a decadent five-layer cake with velvety texture and rich caramel rivers.
Prepare the Cake Batter for Perfect Velvet Layers
Preheat your oven to 350°F and grease five 8-inch round cake pans with butter, then line the bottoms with parchment paper. In a stand mixer fitted with the paddle attachment, cream together the 2.5 cups unsalted butter and 2.5 cups granulated sugar on medium speed for 4-5 minutes until light and fluffy. This step is crucial—it incorporates air that will make your cake layers tender rather than dense.
In a separate bowl, sift together the 4.5 cups all-purpose flour, 0.75 cup unsweetened cocoa powder, 1.5 tsp salt, 1 tbsp espresso powder, and 1 tbsp orange zest. With the mixer on low speed, add the dry ingredients alternately with the 12 whole large eggs, beginning and ending with the flour mixture. Mix just until combined—overmixing develops gluten, which can make your cake layers tough. Finally, stir in the 2 tbsp vanilla extract and the 1 cup light brown sugar by hand to maintain the airiness.
Bake the Layers Evenly for Consistent Texture
Divide the batter evenly among the five prepared cake pans, filling each about two-thirds full. Bake for 25-30 minutes or until a toothpick inserted into the center comes out clean. The layers should be slightly domed in the center, which is normal for round pans. Let them cool in the pans for 10 minutes before transferring to a wire rack to cool completely. This gradual cooling prevents cracking as the layers shrink.
While the layers cool, prepare the salted caramel sauce by gently heating the 2 cups salted caramel sauce in a small saucepan over low heat until it reaches a pourable consistency. Keep it warm but not boiling—you'll use it to create rivers between the layers. This step ensures the caramel stays smooth and doesn't harden before assembly.
Create the Buttercream for Smooth Assembly
In a large mixing bowl, combine the 3 cups cold heavy cream and 4 cups granulated sugar (for buttercream). Beat with a hand mixer on medium-high speed until soft peaks form. Gradually add the 2.5 cups unsalted butter, one cube at a time, beating well after each addition until the buttercream is smooth and holds stiff peaks. This buttercream should be thick enough to hold its shape but still spreadable—like a firm frosting.
Fold in the 1.5 cups dark chocolate chips and 1.5 cups milk chocolate chips using a spatula, ensuring even distribution. The chocolate chips will melt slightly from the warmth of the buttercream, creating pockets of rich, melted chocolate throughout. This step adds layers of flavor and texture that make this cake truly special.
Assemble the Cake with Caramel Rivers and Chocolate Layers
Place the first cake layer on a cake stand or plate. Spread a thin layer of buttercream over the top, leaving a ½-inch border uncovered. Drizzle ¼ cup of the warm salted caramel sauce over the buttercream, allowing it to pool naturally in the center. This creates the signature caramel rivers that will flow between the layers when stacked. Repeat this process with the remaining four layers, alternating between buttercream and caramel.
Once all layers are stacked, cover the entire cake with a final layer of buttercream, smoothing it out with an offset spatula. Use a toothpick to create decorative swirls or leave it smooth for an elegant finish. Chill the cake in the refrigerator for at least 2 hours before slicing. This resting period allows the flavors to meld and the caramel to set, ensuring clean, perfect slices every time.
Pro Tips For Making 5 Layer Chocolate Cake
- Sift the Cocoa: I learned this the hard way—clumping cocoa powder ruins the texture of every layer. Use a fine-mesh sieve to sift it directly into the dry ingredients, then whisk everything together. This guarantees no lumps, and your cake will bake evenly instead of settling into dense, uneven layers.
- Whisk Eggs Room-Temp: Cold eggs from the fridge won’t blend smoothly, and your batter will turn out lumpy. Pop them out 30 minutes before mixing—just enough time to warm up without getting rubbery. Trust me, your cake’s crumb will be lighter if you skip this step, but you’ll notice the difference.
- Rotate Pans Mid-Bake: Ovens have hot spots, and a 5-layer cake is unforgiving if one side dries out. After 15 minutes, swap the pans front to back and top to bottom. This isn’t the prettiest method, but it’s the only way to guarantee all layers rise evenly and stay moist.
- Chill the Cake Fully: I know, I know—you’re eager to frost it. But letting the cake cool completely (at least 2 hours, ideally overnight) prevents the filling from sliding to the bottom. Sounds weird, but it works: your layers stay distinct, and the frosting stays put. Your future self will thank you.
Regional styles of this recipe
Classic New York Style
The quintessential five-layer chocolate cake in New York is all about bold, rich flavors with a focus on dense, fudgy layers. I love this version where the cake is baked in 9-inch pans at 325°F for 35-40 minutes, creating a deeper, more intense chocolate flavor. The buttercream here is often a simple American-style, made with 1 cup softened butter, 4 cups powdered sugar, and 2 tbsp cocoa powder, whipped to a smooth finish. The filling? A classic chocolate ganache made with 1 cup heavy cream and 8 oz dark chocolate, chilled until firm before spreading between layers. 🍫
Southern Decadence
In the South, five-layer chocolate cakes often incorporate warm spices like cinnamon and nutmeg, giving the cake a cozy, comforting profile. I’ve seen versions where the cake batter includes 1 tsp cinnamon and ½ tsp nutmeg, baked in 8-inch pans at 350°F for 25-30 minutes. The filling here might be a lighter chocolate cream cheese frosting, made with 8 oz cream cheese, ½ cup butter, and 3 cups powdered sugar, whipped until smooth. For extra indulgence, Southern bakers often add a layer of pecan praline filling between the cake layers. 🌶️
European Elegance
European versions of this cake lean into delicate textures and refined flavors. In France, for example, the cake layers are often baked with Dutch-processed cocoa and a touch of orange blossom water for floral notes. The buttercream is typically a Swiss meringue style, made with egg whites and sugar cooked to 240°F, then whipped with butter. The filling might include a dark chocolate ganache infused with Grand Marnier, and the cake is often dusted with powdered sugar. The result is a lighter, more refined cake with a sophisticated finish. ✨
Modern Twist: Vegan Adaptation
For a contemporary take, many bakers are creating vegan versions of the five-layer chocolate cake. I’ve experimented with a batter made using flax eggs (3 tbsp ground flaxseed + 9 tbsp water) and vegan butter. The buttercream is a coconut-based frosting, made with 1 cup coconut cream, ½ cup coconut oil, and 3 cups powdered sugar. The filling can be a vegan salted caramel, made with coconut sugar and coconut milk. This version is just as rich and decadent but entirely plant-based. 🌱
Mexican-Inspired Spice
In Mexico, five-layer chocolate cakes often incorporate warm spices like cinnamon, chili powder, and even a hint of Mexican chocolate (tableta). The batter might include 1 tsp cinnamon, ½ tsp chili powder, and ½ cup Mexican chocolate melted into the buttercream. The filling can be a spiced chocolate ganache, made with 1 cup heavy cream, 8 oz dark chocolate, and a pinch of cayenne. This version adds a delightful kick of heat that balances the sweetness perfectly. 🌶️
Nutrition facts
Frequently asked questions
Can I bake this cake in smaller pans for individual servings?
Yes! For single servings, use 6-inch round pans instead of 8-inch. Reduce each layer's batter to about ⅓ cup per pan, and bake at 350°F for 18-22 minutes. The baking time will be shorter, so keep an eye on them. This works perfectly for mini cakes or cupcake-style servings with just 2-3 layers each.
How do I prevent the cake layers from crumbling during assembly?
Chill the cake layers completely before assembly—this makes them firmer. Use a thin layer of buttercream (about ¼-inch thick) between layers to act as "glue." Work quickly but carefully when stacking, and avoid overfilling with buttercream. If a layer feels fragile, gently press it down with a cake plate before adding the next layer.
Can I make this cake ahead of time?
Bake the layers 1-2 days ahead and store them wrapped in plastic at room temperature. Assemble the cake 4-6 hours before serving to let the caramel rivers set properly. For best results, refrigerate the fully assembled cake for 2 hours before slicing—this ensures clean cuts and prevents crumbling.
What’s the best way to store leftovers?
Slice the cake and store it in an airtight container at room temperature for up to 3 days. For longer storage, freeze slices wrapped individually in plastic wrap for up to 1 month. Thaw at room temperature for 1-2 hours before serving. Refrigerate the cake if it’s 75°F or hotter outside to prevent melting.
Can I substitute the salted caramel with another filling?
Yes! Try raspberry jam, peanut butter, or chocolate ganache instead. For best results, use about ½ cup of filling per layer. If using a thicker filling (like peanut butter), warm it slightly to make it easier to spread. Just reduce the buttercream slightly to maintain the cake’s structure.