
Desserts
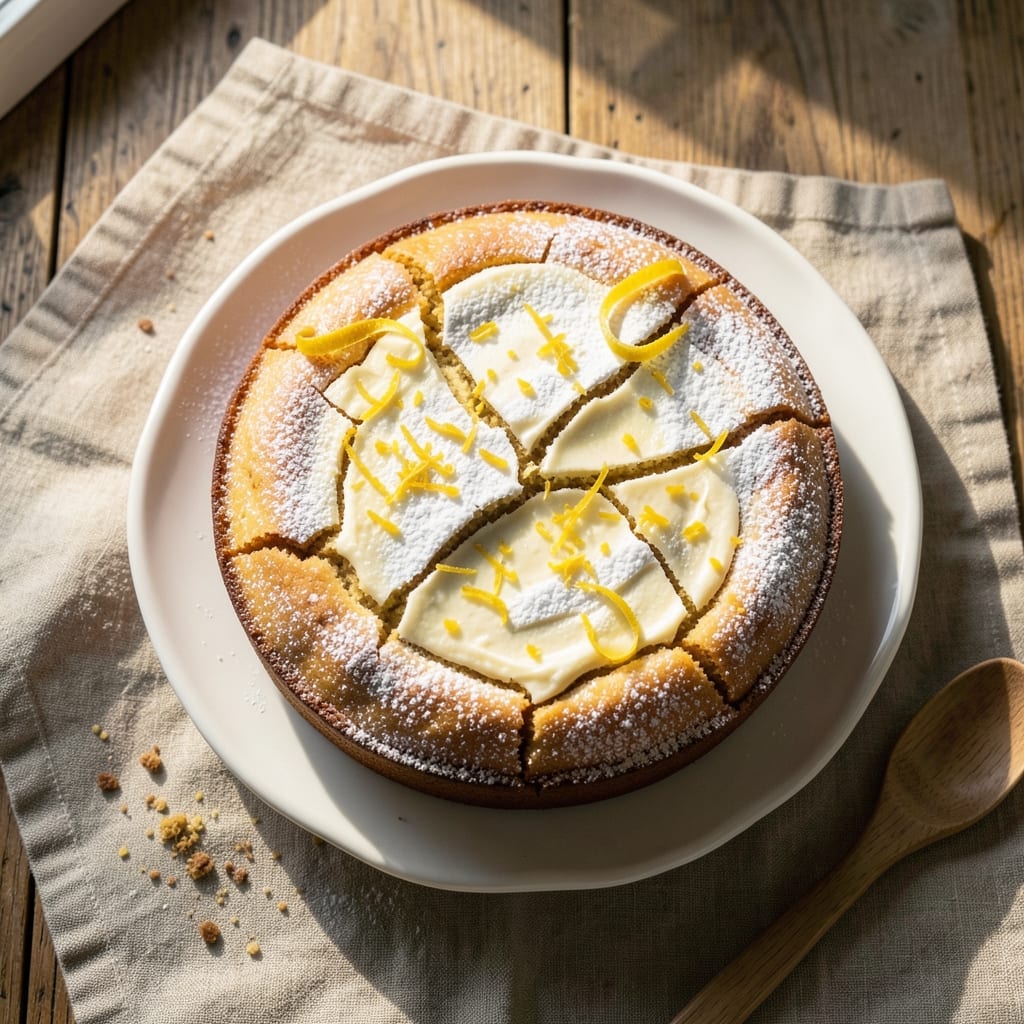
This amazing pound cake recipe delivers layers of buttery richness that stay moist for days—no dry crumbs in sight. I perfected it after years of baking failures (yes, I burned my first batch), and now it’s the go-to dessert for birthdays, holidays, or just because. The secret? A precise balance of butter, sugar, and eggs, plus a simple trick to keep it tender.
What makes this pound cake truly special is its foolproof texture—crisp edges that give way to a velvety crumb, all without needing fancy equipment. You’ll need just 10 ingredients, and the process takes less than 30 minutes of active time (plus 1 hour of baking). The vanilla and lemon zest add bright, comforting flavors that make every slice irresistible.
By the time it’s done, you’ll have a golden, fragrant cake that slices cleanly and stays moist for days when stored properly. It’s perfect for layering with cream cheese frosting, dusting with powdered sugar, or serving as-is with a cup of coffee. Trust me, this is the kind of dessert that’ll have everyone asking for seconds.
Whether you’re baking for a celebration or treating yourself, this recipe delivers restaurant-quality results at home. Let’s get started—your taste buds will thank you.
Ingredients for amazing pound cake
Ten simple ingredients create this restaurant-quality pound cake with perfect moist layers.
| Ingredient | Amount | Notes |
|---|---|---|
| Unsalted Butter 🧈 | 1 ½ cups | Room temperature for creaming |
| Granulated Sugar 🍚 | 2 cups | White or light brown |
| Large Eggs 🥚 | 6 whole | Room temperature preferred |
| All-Purpose Flour 🌾 | 3 cups | Sifted for best texture |
| Pure Vanilla Extract 🌸 | 2 tsp | High-quality preferred |
| Lemon Zest 🍋 | 1 tbsp | From 1 large lemon |
| Baking Powder 🍞 | 1 ½ tsp | Aluminum-free preferred |
| Salt 🧂 | ½ tsp | Fine sea salt |
| Whole Milk 🥛 | 1 cup | Room temperature |
| Vegetable Oil 🫒 | ¼ cup | For extra moisture |
The butter is non-negotiable here—use only unsalted and let it sit out for 30 minutes before creaming. I grab mine from Whole Foods in the bulk section, but any good-quality brand works. Room-temperature eggs mix better, so take them out of the fridge 15 minutes before starting. The flour? King Arthur or Gold Medal are my go-tos—they bake up lighter. For the lemon zest, grab a bright yellow lemon (green ones are less flavorful) and use a microplane to avoid bitter pith.
No vanilla extract? Vanilla bean paste works too, or even a scraped vanilla bean if you're feeling fancy. Short on milk? Heavy cream or half-and-half adds richness, but whole milk keeps it classic. The baking powder must be fresh—if it's over a year old, toss it. For a nutty twist, swap 1/2 cup of the flour for almond flour. And if you're worried about dryness, the oil is your secret weapon—it keeps the crumb tender without altering the flavor.
This cake keeps beautifully—3 days at room temperature in a cake carrier, or 1 week in the fridge wrapped tightly. For longer storage, slice and freeze portions for up to 3 months. I always bake it in two 9-inch pans (or one 10-inch) and wrap each layer separately. The lemon zest flavor actually deepens overnight, so leftovers taste even better the next day—trust me on this.
Why You'll Love This Recipe
- No Mixing Madness: I swear by this recipe because it’s literally just creaming butter and sugar, cracking eggs, and folding in flour—no sifting, no measuring cups of weird ratios. The secret’s in the room-temperature butter and letting the vanilla bloom while you mix; it’s that simple.
- Butter-Sugar Magic: That creamy, tender crumb? Pure science. Cold butter cut into sugar creates tiny pockets for air, while the eggs bind it all into a moist, almost velvety texture. Honestly, the first time I tasted it, I thought, “Wait, is this cake or a cloud?”
- Endless Reinvention: This cake is my blank canvas—slice it for breakfast, frost it for birthdays, or serve it plain with tea. I’ve even turned leftover chunks into French toast (yes, it’s that good). The flour-to-butter ratio means it stays sturdy enough for layers but light enough to eat solo.
- Leftovers? Please.: Bake one, get three uses out of it. Store slices in the fridge for days, or freeze them for instant dessert. Between us, I’ve pulled a cold slice straight from the fridge at 3 PM and called it a snack—no judgment. And since it’s just five ingredients, it’s cheap enough to bake twice a week.
Step-by-step instructions for buttery layers that stay moist for days
Here's how to bake a pound cake so rich and tender it stays moist for days.
Cream Butter and Sugar Until Light and Fluffy
In a large mixing bowl, combine the 1.5 cups unsalted butter and 2 cups granulated sugar. Using an electric mixer on medium-high speed, beat for 3-5 minutes until the mixture becomes pale yellow and nearly doubles in volume. You'll see ribbons form when you lift the beaters—this is your signal the butter and sugar are properly aerated.
The reason we wait until it's light and fluffy is that this incorporates air, which creates that signature tender crumb. If you rush this step, your cake will be dense instead of light. I like to scrape down the sides of the bowl every minute or so to ensure everything gets evenly incorporated.
Add Eggs and Flavorings Gradually
Add the 6 whole large eggs, one at a time, mixing well after each addition. After the eggs are incorporated, stir in the 2 teaspoons pure vanilla extract and 1 tablespoon lemon zest. This is where the magic happens—the vanilla adds depth, while the lemon zest brightens the rich butter flavor.
I always use room-temperature eggs for this recipe. They blend more smoothly and help create a lighter texture. If your eggs are straight from the fridge, let them sit in warm water for about 10 minutes before using. The mixture should now be thick and smooth, almost like a pale yellow batter.
Combine Dry Ingredients Separately
In a medium bowl, whisk together the 3 cups all-purpose flour, 1.5 teaspoons baking powder, and 0.5 teaspoon salt. Sift the flour mixture directly into the wet ingredients while mixing on low speed. This prevents gluten development and keeps the cake tender. Add the 1 cup whole milk and 0.25 cup vegetable oil next, mixing just until combined—don't overmix or the cake will be tough.
Here's the thing—pound cake batter should be thick but pourable. If it looks too stiff, you can add an extra tablespoon or two of milk to loosen it. The batter should have a smooth, velvety consistency that coats the back of a spoon. This thickness is what gives pound cake its signature moist texture and rich flavor.
Bake in Prepared Pans for Even Cooking
Preheat your oven to 350°F. Generously grease and flour two 9-inch round cake pans or one 9x13-inch baking pan. Pour the batter evenly into the prepared pans—fill them about two-thirds full. Tap the pans gently on the counter to remove any air bubbles that might have formed.
Bake for 50-60 minutes or until a toothpick inserted in the center comes out clean. The cake should be golden brown on top and spring back when gently pressed in the center. I always check for doneness at the 45-minute mark because ovens vary. If the top browns too quickly, tent the pans with foil to prevent overbrowning while the center finishes cooking.
Cool and Layer for Maximum Moisture
Remove the cake from the oven and let it cool in the pans for 15 minutes. Then invert the cakes onto a wire rack to cool completely. For extra moisture, I like to brush the warm cake layers with a simple syrup made by heating 1 cup water with 1 cup sugar until dissolved, then cooling. Brush this syrup between layers and on top before serving.
The key to keeping pound cake moist is proper cooling and storage. Once completely cooled, wrap the cake tightly in plastic wrap or store in an airtight container. This recipe yields 12 servings, and when stored properly, it stays moist and delicious for 3-4 days at room temperature or up to 1 week in the refrigerator. For longer storage, freeze the cake layers wrapped in plastic for up to 3 months.
Pro Tips For Making Amazing Pound Cake
- Use Room-Temp Ingredients: I learned this the hard way—cold butter or eggs create pockets of steam that wreck your cake’s texture. Take butter out 1 hour before baking, and let eggs sit in warm water for 5 minutes to speed it up.
- Mix Just Until Combined: Overmixing turns pound cake dense and tough. Fold in flour gently—just until no dry streaks remain. A few lumps are fine; your cake will thank you with a tender crumb.
- Bake at 325°F (No Higher): Too-hot ovens cause the outside to set before the inside cooks, leading to cracks or a dry center. Stick to 325°F and check doneness with a toothpick at 50–55 minutes—it should come out clean but slightly moist.
- Add Vanilla Early: Splitting vanilla extract into two additions—half with the butter and half with the eggs—deepens the flavor. Skip the cheap stuff; pure vanilla extract is worth the splurge for that rich, authentic taste.
Common mistakes when making this recipe
Overmixing the Batter
Pound cake batter is delicate—overmixing develops gluten, which creates a tough, dense texture instead of that signature tender crumb. Stop mixing as soon as the dry ingredients are just combined. I know it’s tempting to make sure everything is fully incorporated, but 30-45 seconds of mixing after adding the flour is all you need. Overmixing also causes the cake to sink in the center as it bakes. 🧈
Skipping Room-Temperature Ingredients
Cold butter, eggs, or milk can cause pockets of steam in your batter, leading to uneven baking or a cake that collapses. Let your butter, eggs, and milk sit at room temperature for at least 30 minutes before starting. I’ve ruined cakes by rushing this step—trust me, it’s worth the wait. The butter should be soft enough to press a fingerprint into but still hold its shape.
Using the Wrong Pans
Pound cake needs proper heat distribution, so avoid glass or dark-colored pans that can cause uneven baking. Stick to light-colored metal pans (like aluminum or stainless steel) that conduct heat evenly. If using round pans, make sure they’re 9 inches in diameter—smaller pans will bake too quickly, while larger ones may leave the center undercooked. I always grease and flour the pans thoroughly to prevent sticking.
Opening the Oven Too Soon
Resist the urge to peek! Opening the oven door causes temperature fluctuations that can lead to a cake that rises unevenly or develops a sunken center. Wait until the 45-minute mark to check for doneness. If you must peek, do it quickly and avoid opening the door more than once. A toothpick inserted in the center should come out clean—this is your only reliable test.
Ignoring the Baking Powder
Baking powder is what gives pound cake its lift, and old or expired baking powder won’t do the job. Check the expiration date—if it’s over 6 months old, replace it. I keep a fresh container on hand and store it in a cool, dry place. Using too little will result in a dense cake, while too much can make it bitter. Measure carefully and sift it with the flour for even distribution.
Not Cooling Properly
Rushing to slice into your cake too soon is a common mistake. Let the cake cool in the pan for 15 minutes before inverting it onto a wire rack to cool completely. If you slice it while warm, the layers will crumble, and the texture will suffer. I also recommend brushing the warm cake with simple syrup to lock in moisture—this step is non-negotiable for that classic tender crumb. ✨
Nutrition facts
Frequently asked questions
Why does this pound cake stay moist longer than others?
The combination of vegetable oil and room-temperature butter creates a rich, tender crumb that resists drying out. Plus, brushing with simple syrup after baking locks in moisture for days. The secret is in the fat-to-flour ratio—this recipe uses more fat than traditional pound cakes, which keeps it velvety soft.
Can I make this cake in a bundt pan instead of round pans?
A 10-12 cup bundt pan works beautifully—just reduce baking time to 40-50 minutes and check for doneness at 35 minutes. The cake will have a stunning shape, but expect slightly thicker walls that may need an extra 5-10 minutes to fully cook through. Grease the pan thoroughly to prevent sticking.
What's the best way to store leftover pound cake?
Wrap individual layers tightly in plastic wrap or store the whole cake in an airtight container at room temperature for 3 days. For longer storage, refrigerate for up to 1 week or freeze slices for 3 months. The lemon zest flavor actually intensifies overnight, so leftovers often taste even better!
How do I tell when the cake is fully baked?
The only reliable test is inserting a toothpick into the center—it should come out clean with just a few moist crumbs. The cake should also spring back gently when pressed in the middle. If the top browns too quickly, tent with foil after 30 minutes to prevent overbrowning while the center finishes cooking.
Can I substitute butter with oil for a lighter texture?
You can replace up to 1/2 cup of the butter with oil for a slightly lighter cake, but I don't recommend replacing all of it. The butter provides the signature rich flavor and moisture that makes pound cake special. If you try this substitution, reduce the total fat by 1/4 cup to maintain the proper balance.