
Desserts
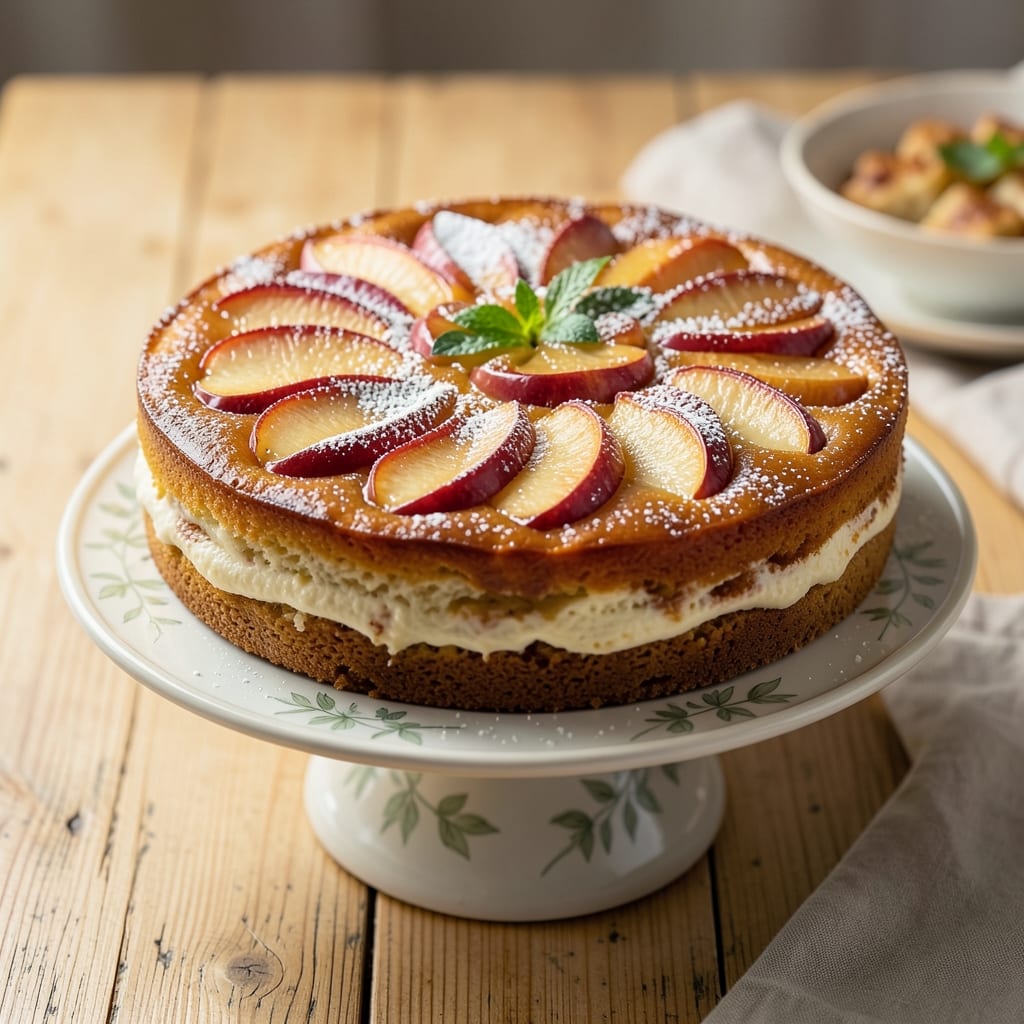
This amazing apple cake recipe transforms simple ingredients into layers of spiced apple goodness with a buttery crust that'll have everyone asking for seconds. 🍏 The secret? Caramelizing the apples just enough to bring out their natural sweetness while keeping the cake moist and tender. I perfected this recipe after years of baking—no dry crumbs or bland flavors here.
What makes this cake truly special is the balance of flavors: warm cinnamon, nutmeg, and cardamom in the filling complement the buttery crust perfectly. The apples stay juicy, not soggy, thanks to a few clever techniques I’ll share. Plus, it’s easier than you think—no fancy equipment, just a few key steps that guarantee success every time.
Imagine pulling a golden cake from the oven with layers of spiced apples peeking through a buttery crust, still warm and fragrant. The aroma alone will have your kitchen feeling like a cozy bakery. Each bite delivers tender cake, caramelized apples, and just the right amount of spice—it’s the kind of dessert that feels like a hug.
Whether you're baking for a family gathering or treating yourself to a weekend project, this cake delivers restaurant-quality results with minimal effort. The best part? It tastes even better the next day, making it perfect for meal prep or gifting. Let’s get baking!
Ingredients for amazing apple cake
Simple pantry staples plus juicy apples make this cake feel like a hug in every bite.
| Ingredient | Amount | Notes |
|---|---|---|
| All-Purpose Flour 🌾 | 3 cups | Sifted for light texture |
| Granulated Sugar 🍚 | 2 cups | White or light brown |
| Unsalted Butter 🧈 | 1 ½ cups | Cold, cubed for crust |
| Large Eggs 🥚 | 2 whole | Room temperature |
| Vanilla Extract 🌿 | 1 tbsp | Pure extract preferred |
| Baking Powder 🧂 | 2 tsp | Aluminum-free recommended |
| Ground Cinnamon 🌶️ | 2 tsp | Freshly ground for warmth |
| Ground Nutmeg 🌿 | ½ tsp | Freshly grated preferred |
| Ground Cardamom 🌶️ | ¼ tsp | Optional but recommended |
| Salt 🧂 | ½ tsp | Fine sea salt preferred |
| Apples 🍏 | 4 medium | Honeycrisp or Granny Smith |
| Lemon Juice 🍋 | 1 tbsp | Freshly squeezed |
The apples are the star—Honeycrisp or Granny Smith hold up best during baking. Local farmers markets often have the freshest, but grocery store apples work too if they're firm and vibrant. Peel them first (I use a peeler for speed), then slice into even 1/4-inch pieces. Toss with lemon juice right away to keep them from browning while you prep the crust. If your apples are on the tart side, a pinch of sugar in the bowl helps balance the flavor. I always buy extra—some get tossed in oatmeal the next morning.
No vanilla extract? Vanilla bean paste works too, or even a scraped vanilla bean. Short on cardamom? Skip it—cinnamon and nutmeg still shine. The butter needs to be cold for that perfect flaky crust, so take it out of the fridge 30 minutes before mixing. For the filling, if you can't find Granny Smith, Fuji or Braeburn are great backups. Just make sure they're not too soft. The baking powder should be fresh—if it's over a year old, test it first (mix with water to see if it bubbles).
This cake keeps beautifully—best served at room temperature after 24 hours. Wrap tightly in plastic wrap and store at room temp for up to 3 days, or freeze for 3 months. I like to slice it thin and serve with a dollop of whipped cream or a scoop of vanilla ice cream. The crust stays crisp for about 2 hours after baking, so enjoy it fresh if you can. Leftovers? Toast slices and top with extra butter for a cozy breakfast treat.
Why You'll Love This Recipe
- No Mixer Needed: I swear by this one—just fold the flour into the butter and sugar with a wooden spoon until it’s crumbly. The eggs and vanilla tie it all together in seconds, no stand mixer required. Honestly, my lazy Sunday mornings love this.
- Butter-Sugar Magic: That rich, creamy butter mixed with sugar? It’s the secret weapon here. The cake stays moist for days, and the vanilla deepens the flavor without overpowering the apples. Between us, it’s the kind of taste that makes people ask for the recipe mid-slice.
- Crowd-Pleaser Any Day: Bring it to a potluck, pack slices for lunch, or serve it warm with ice cream—this cake handles everything. The apples add natural sweetness, so you can even skip extra frosting if you’re feeling minimal. My in-laws still text me for the recipe after three years.
- Fridge-Friendly & Frugal: Bake a big pan, and you’ll have perfect leftovers for days. The flour and sugar stretch far, and the butter keeps it rich without breaking the bank. I’ll be real: I’ve reheated a slice in the microwave for breakfast, and no one’s complained. (Yes, even on a Tuesday night.)
Step-by-step instructions for spiced apple cake layers
Here's how to create a tender crumb with perfect spiced apple layers—no shortcuts, just foolproof technique.
👨🍳 Step 1: Prepare the Apples for Maximum Flavor
Peel, core, and slice the 4 medium apples into ¼-inch thick rounds. Toss them immediately with 1 tablespoon lemon juice—this prevents browning and brightens the natural sweetness. I like to sprinkle the apples with 1 teaspoon granulated sugar from the recipe while they sit, letting them macerate for 10 minutes in a bowl. This jumpstarts the flavor infusion and keeps them juicy during baking.
Here's the thing—don't skip the lemon juice. The acidity cuts through the apples' natural tartness and creates that signature "apple pie" taste. If you're using particularly sweet apples like Honeycrisp, you can add up to 1 extra teaspoon sugar to the macerating bowl. Let them sit while you prep the rest of the batter.
🍳 Step 2: Cream Butter and Sugar for Light Texture
In a stand mixer fitted with the paddle attachment, beat the 1.5 cups unsalted butter (cold, cubed) and 2 cups granulated sugar on medium speed for 3-4 minutes. You're looking for a pale, fluffy mixture that nearly doubles in volume—the butter should be completely creamed with no visible lumps. This step incorporates air, which gives your cake that signature tender crumb.
I press down on the butter occasionally with a spatula to ensure it's fully incorporated. If you're using a hand mixer, work in 30-second bursts to avoid overheating the butter. The reason we use cold butter is that it creates a more stable fat structure in the batter, preventing a dense cake. Don't rush this—under-creaming leads to tough layers.
👨🍳 Step 3: Combine Dry Ingredients and Alternate with Eggs
In a separate bowl, whisk together the 3 cups all-purpose flour, 2 teaspoons baking powder, 2 teaspoons ground cinnamon, ½ teaspoon ground nutmeg, ¼ teaspoon ground cardamom, and ½ teaspoon salt. Sift the flour mixture over the creamed butter mixture in 3 parts, alternating with the 2 whole large eggs (room temperature) added 1 at a time. Start and end with flour to prevent a gloopy batter.
After each addition, mix on low speed for 10-15 seconds just until combined. Overmixing develops gluten and makes the cake tough. Here's my trick: I use a silicone spatula to gently fold in the final flour addition by hand to maintain that light texture. Add the 1 tablespoon vanilla extract and mix for 10 seconds until just combined.
🥘 Step 4: Fold in Apples and Prepare the Pan
Gently fold the prepared apples into the batter using a spatula, being careful not to crush them. The apples should be evenly distributed but still visible throughout the batter. Preheat your oven to 350°F and grease two 9-inch round cake pans with butter or line them with parchment paper. I like to use round pans because they create a beautiful presentation and even baking.
Divide the batter evenly between the two pans—you should have about 1½ cups batter per pan. Tap each pan gently on the counter to remove any air bubbles. The batter will look thick, but that's normal. The apples will release their juices during baking, creating that perfect moist crumb with pockets of spiced apple throughout.
🔥 Step 5: Bake Until Golden and Set
Bake the cakes for 35-40 minutes, or until a toothpick inserted into the center comes out clean with just a few moist crumbs clinging to it. The edges should be golden brown, and the tops should spring back when gently pressed. Rotate the pans halfway through baking for even heat distribution.
I know it's tempting to open the oven door to check, but resist! Every time you open the oven, you lose heat and steam, which can cause the cakes to sink. If the tops are browning too quickly, tent them loosely with aluminum foil. Once done, let the cakes cool in the pans for 10 minutes, then transfer to a wire rack to cool completely before layering.
Pro Tips For Making Amazing Apple Cake
- Cream Butter Properly: Beat the butter and sugar until it’s pale yellow and ribbon-like—not just fluffy. I used to stop when it looked light, but this step guarantees a tender crumb. (Yes, it takes 3-5 minutes, but your cake will thank you.) ---
- Use Cold Apples: Slice apples just before folding them in and store them in ice water for 10 minutes. Warm apples release moisture and make the cake dense. (I learned this after my first batch turned into a soggy mess.) ---
- Don’t Overmix the Batter: Mix the wet and dry ingredients until just combined—lumps are fine. Overmixing develops gluten and turns your cake tough. (I now set a timer for 20 seconds after the flour disappears.) ---
- Bake Until Golden: Check doneness at 325°F (160°C) with a toothpick—it should come out with moist crumbs, not wet batter. Overbaking dries out the cake, and underbaking leaves it gummy. (I now bake 5-10 minutes longer than the recipe says.)
Serving suggestions for leftovers
Classic Presentation
Slice the cake into even layers and stack them on a platter with a dusting of powdered sugar or a light sprinkle of ground cinnamon. I like to add a few fresh apple slices on top for a pop of color and freshness. Serve with a dollop of vanilla bean ice cream or a scoop of whipped cream—it adds a cool contrast to the warm spiced cake. For an elegant touch, arrange slices on a cake stand with a few scattered candied pecans or toasted walnuts on the side. 🍰
Warm Serving Style
For a cozy, restaurant-worthy presentation, serve the cake warm from the oven. Slice it thin and place each piece on a small plate with a pat of softened butter and a sprinkle of flaky sea salt. The warmth of the cake melts the butter beautifully, enhancing the apple flavors. Pair with a cup of hot chai tea or spiced apple cider for a comforting dessert experience. This works especially well during fall or winter gatherings. 🍂
Make-Ahead Slices
Prepare individual servings ahead of time by wrapping slices in parchment paper and storing them in an airtight container. Reheat them in the oven at 300°F for 5-7 minutes to restore the crust's crispness. I often make a batch on Sunday to enjoy throughout the week. For a quick breakfast, toast the slices and top with a drizzle of caramel sauce or a sprinkle of crushed graham crackers. This is a great way to repurpose leftovers creatively. ✨
Gift-Worthy Packaging
Wrap individual slices in parchment paper, then tie them with a ribbon and place them in a decorative box or cellophane bag. Add a handwritten note about how the cake was made with love—it makes an unforgettable gift. For extra flair, include a small jar of spiced apple compote on the side. This presentation is perfect for birthdays, holidays, or just because. Your recipients will feel the warmth and effort you put into it. 💛
Seasonal Variations
In fall, add a drizzle of maple syrup or a sprinkle of pumpkin pie spice to complement the apple flavors. During winter, serve with a scoop of eggnog ice cream or a dusting of nutmeg. For spring or summer, swap the spices for a lighter touch with vanilla and lemon zest. Each season brings a new twist to this versatile cake. 🌸
Nutrition facts
Frequently asked questions
Can I use tart apples like Granny Smith instead of sweet varieties?
Granny Smith apples work beautifully—their tartness balances perfectly with the warm spices. Just toss the sliced apples with 1 extra teaspoon sugar while macerating to enhance their natural sweetness. The acidity also prevents the cake from tasting too heavy.
Why does my apple cake turn out dry? How do I fix it?
Dry cake usually happens from overbaking or underestimating the moisture from apples. Bake until a toothpick comes out with moist crumbs (not completely clean), and never exceed 40 minutes. For extra moisture, brush warm layers with applesauce glaze after baking.
Can I make this cake in a single 9x13-inch pan instead of two rounds?
Yes, but reduce baking time to 30-35 minutes—the thinner layer bakes faster. Line the pan with parchment paper for easy removal, and consider adding a crumb topping (mix ½ cup flour + ¼ cup brown sugar + ¼ cup cold butter) to prevent drying.
What's the secret to keeping the apples juicy, not soggy?
The key is tossing apples with lemon juice before mixing and baking at 350°F (not higher). The acidity preserves their texture, while the moderate heat caramelizes them just enough. Avoid overfilling pans—use 1½ cups batter per 9-inch pan maximum.
Can I substitute butter with oil for a lighter texture?
Not recommended—this cake relies on butter's flavor and fat content for that signature tender crumb. If you must, use 1 cup melted butter + ½ cup vegetable oil, but the texture will be slightly denser. For a lighter version, try Greek yogurt instead of half the butter.