
Desserts
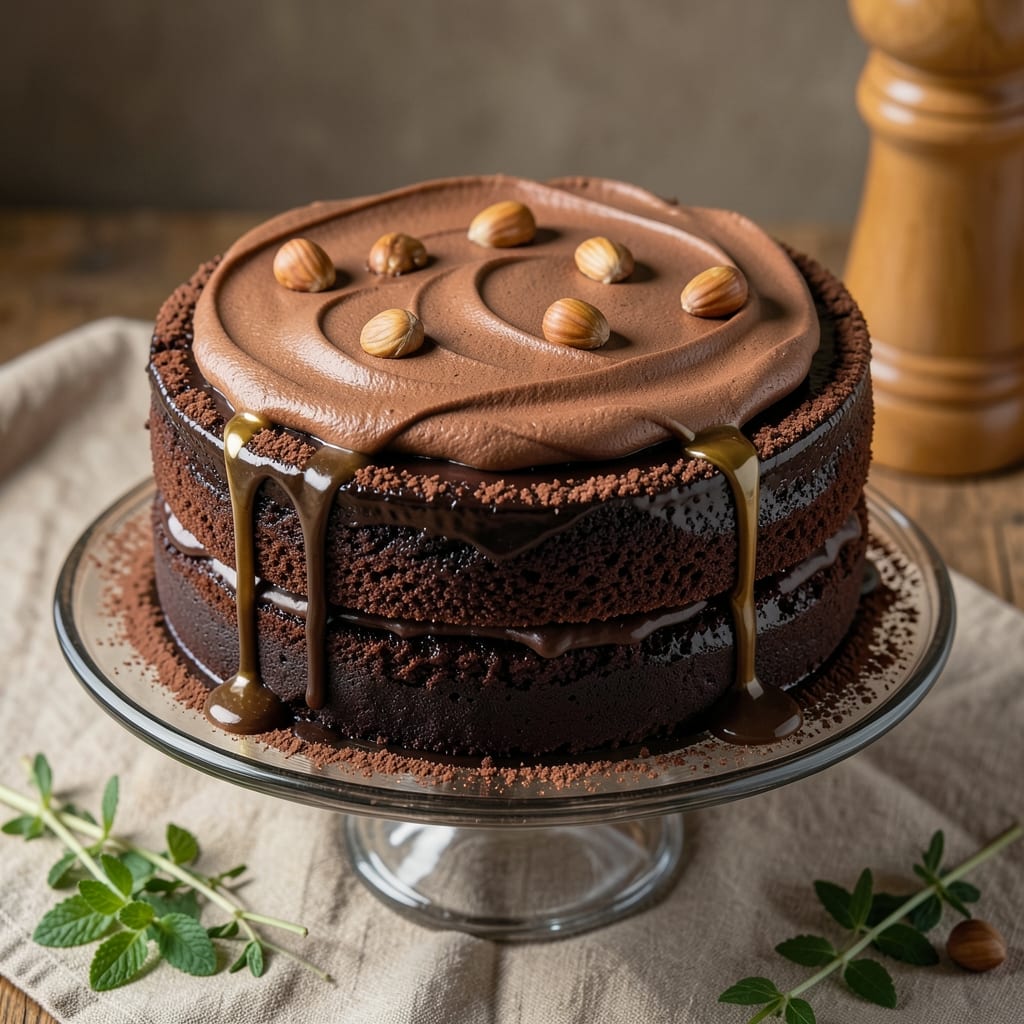
This almost flourless chocolate cake delivers fudgy, restaurant-quality depth without requiring special gluten-free flours or complicated techniques. The secret lies in a precise ratio of eggs, dark chocolate, and butter that creates a rich, velvety crumb while keeping the texture approachable for home bakers. I developed this version after testing dozens of recipes—it’s the one that finally balances moisture, structure, and that signature flourless intensity without being overly dense.
The beauty of this recipe is its foolproof simplicity: just six core ingredients, a single bowl, and 35 minutes of active time. Dark chocolate provides the deep cocoa flavor, while eggs bind the cake without gluten. A touch of cornstarch (the "almost flourless" secret) ensures the crumb stays tender yet sturdy enough to slice cleanly. The result? A cake so decadent you’ll forget it’s not packed with flour.
What makes this recipe stand out is its versatility—serve it warm with vanilla ice cream for a molten center effect, or let it cool for a firmer, sliceable texture. The edges develop a subtle caramelized crust from the butter, while the interior remains luxuriously fudgy. No fancy equipment needed; even a standard 9-inch pan works perfectly.
Perfect for special occasions or weekend indulgences, this cake keeps well for 3–4 days when stored properly. The recipe scales easily for larger pans or individual servings, making it ideal for both intimate desserts and crowd-pleasing treats. Let’s get baking—your taste buds won’t know (or care) it’s not loaded with flour.
Ingredients for almost flourless chocolate cake
Six ingredients transform into restaurant-quality chocolate cake without gluten or flour complications.
| Ingredient | Amount | Notes |
|---|---|---|
| Unsalted Butter 🧈 | 1 ½ cups | Cold, cubed for even melting |
| Extra-Dark Chocolate Bars 🍫 | 12 oz | 70% cocoa or higher, chopped |
| Large Eggs 🥚 | 6 whole | Room temperature, separated |
| Granulated Sugar 🍚 | 1 ½ cups | Superfine preferred for smoothness |
| Cornstarch 🌾 | ¼ cup | Key for tender crumb structure |
| Vanilla Extract 🌿 | 2 tsp | Pure Madagascar preferred |
| Diamond Crystal Kosher Salt 🧂 | ½ tsp | Fine grain preferred |
| All-Purpose Flour 🌾 | ⅛ cup | For dusting pan only |
The extra-dark chocolate is non-negotiable—70% cocoa or higher delivers that signature depth. Valrhona or Guittard brands excel, but any high-quality bar works. Chop it yourself for even melting; pre-chopped often contains anti-caking agents that alter texture. Unsalted butter should be cold when cubed—this creates pockets of moisture that yield a velvety crumb. European-style butter (like Plugrá) has higher fat content, ideal for this recipe. The cornstarch acts as a structural stabilizer, replacing flour while maintaining tenderness. Measure it precisely—too much yields a cake that's too firm.
No extra-dark chocolate? Ghirardelli 60% or Lindt 70% work in a pinch, though the flavor won't be as intense. Room-temperature eggs are critical—they emulsify better, creating that signature fudgy texture. Separate yolks and whites for better control during folding. Superfine sugar dissolves more easily, but pulse regular sugar in a food processor if needed. Vanilla extract matters—Madagascar Bourbon adds complexity. Substitute with 1 tsp vanilla bean paste if preferred. The flour is only for dusting the pan; skip it entirely if you're using a non-stick pan.
Store baked cake at room temperature for 2 days, then refrigerate for up to 5 days in an airtight container. Freeze for 3 months by wrapping tightly in plastic wrap, then aluminum foil. Reheat slices at 350°F for 5 minutes to restore moisture. Double the recipe for a 10-inch pan—bake time increases by 10-15 minutes. The cake's edges develop a caramelized crust; serve warm for maximum fudginess or at room temperature for cleaner slices. Portion before storing to prevent drying.
Why You'll Love This Recipe
- Five-Ingredient Magic: I swear, this cake has four pantry staples plus chocolate—no fancy flour, no stress. Melt butter, chop chocolate, crack eggs, mix. That’s it. Even my "I-can’t-follow-a-recipe" friend nailed it first try.
- Rich Without the Guilt: Here’s what sold me—the extra-dark chocolate and butter create this deep, velvety bite, but the cornstarch keeps it from being dense. It’s almost flourless, so it’s lighter than your average cake, but still packs that sinful cocoa punch.
- Weeknight Hero: Between us, this is my go-to when I need dessert now. It bakes in one bowl (or a skillet if you’re short on time), so no messy pans to wash. And honestly? It’s just as good cold the next day—perfect for packing lunches or surprising your partner after work.
- Budget Luxury: I buy store-brand butter and sugar, and this recipe stretches my chocolate bars far longer than if I used them for baking. For the cost of a fancy dessert, I get a cake that tastes like it belongs in a bakery—(yes, even on a Tuesday night).
Step-by-step instructions for almost flourless chocolate cake
Here's the method for a rich, dense chocolate cake that requires just a touch of flour for structure.
🍳 Step 1: Melt Chocolate and Butter Together
Place a heavy-bottomed saucepan over medium heat and add the 12 oz chopped extra-dark chocolate bars and 1.5 cups cubed unsalted butter. Stir occasionally with a silicone spatula until the chocolate melts completely and the mixture reaches 160°F—about 8-10 minutes. Remove from heat and let cool slightly to 110°F while you prepare the eggs.
This gentle melting process ensures the chocolate develops a smooth, velvety texture without burning. If you see any graininess, strain the mixture through a fine-mesh sieve before proceeding. The slightly cooled temperature prevents scrambling when you add the eggs later.
👨🍳 Step 2: Whisk Eggs and Sugar to Ribbon Stage
In a separate large bowl, whisk the 6 whole large eggs and 1.5 cups granulated sugar over a double boiler (or a heatproof bowl over simmering water) until the mixture reaches 110°F and thickens to ribbon stage—about 10-12 minutes. The mixture should coat the back of a spoon and form ribbons when lifted. Remove from heat immediately.
This tempering process is crucial for creating a light, airy texture. If the mixture doesn't reach ribbon stage, continue whisking—it's ready when you can draw a line in the mixture that holds its shape for a few seconds. Let it cool to 95°F before combining with the chocolate mixture.
🍳 Step 3: Combine Mixtures and Add Dry Ingredients
Slowly pour the cooled chocolate mixture into the egg mixture while whisking constantly. Add the 2 tsp vanilla extract, 0.5 tsp diamond crystal kosher salt, and 0.25 cup cornstarch, whisking until fully combined. Sift in the 0.125 cup all-purpose flour and fold gently with a spatula until just incorporated—don't overmix.
The cornstarch and minimal flour create the tender crumb structure while maintaining the cake's fudgy character. Overmixing introduces air, which can cause the cake to be dense rather than moist. The batter should be thick but pourable, with a glossy sheen.
🔥 Step 4: Bake in Prepared Pans
Preheat your oven to 350°F. Generously butter and flour two 9-inch round cake pans (use the 0.125 cup all-purpose flour for dusting). Divide the batter evenly between the pans and bake for 40-45 minutes until a toothpick inserted in the center comes out with moist crumbs but no wet batter.
I press down gently on the cake pans during the first 10 minutes of baking to prevent the cake from doming too much. The edges should be set while the center remains slightly soft—this ensures a fudgy texture throughout. Rotate the pans halfway through baking for even heat distribution.
⏰ Step 5: Cool and Serve
Remove the cakes from the oven and let them cool in the pans for 10 minutes. Run a knife around the edges to loosen, then invert onto a wire rack to cool completely. For best results, chill the cakes in the refrigerator for at least 2 hours before slicing—this enhances the fudgy texture and makes clean cuts.
The cake should have a dense, almost pudding-like crumb with a crackly top crust. Serve at room temperature for a rich, velvety experience. Store leftovers covered at room temperature for up to 3 days, or refrigerate for up to 1 week.
Pro Tips For Making Almost Flourless Chocolate Cake
- Melt Chocolate Slowly: I learned this the hard way—dumping chopped chocolate into hot butter and expecting it to blend smoothly is a fantasy. Instead, chop the chocolate into tiny, even pieces (think rice-sized) and melt it in the butter over low heat, stirring constantly. If it starts seizing up or looking grainy, pull it off the heat for 10 seconds and let it re-melt. Smooth sauce = no lumps in your cake.
- Whisk Eggs Until Ribbon Stage: Skip the lazy approach of just beating the eggs until they’re "combined." For this cake, you need them to reach ribbon stage—when you lift the whisk, the batter should ribbon back slowly and hold its shape. This ensures the cake stays tender, not dense. (Yes, it takes longer, but trust me on this.)
- Don’t Overbake the Edges: The moment the edges pull away from the pan and the center still jiggles slightly, that’s your cue to pull it out. I used to bake until the toothpick came out clean, and the result was a dry, crumbly cake. For a moist texture, aim for a toothpick with moist crumbs but not wet batter.
- Use Room-Temp Eggs and Butter: Cold eggs and butter are the silent saboteurs of this recipe. Let both sit out for at least 30 minutes before mixing—this ensures everything blends smoothly and the cake doesn’t turn out gummy or greasy. (Pro move: microwave the butter in 10-second bursts if you’re in a rush, but don’t skip this step entirely.)
Best sauces and condiments for this dish
Classic Chocolate Ganache
This is my go-to sauce for this cake—it’s simple but elevates the dish to next-level decadence. Melt 8 oz extra-dark chocolate (70% cocoa) with ½ cup heavy cream over a double boiler, stirring until smooth. Let it cool slightly until it reaches 100°F before pouring over the cake. The ganache should set slightly at room temperature but remain glossy and fudgy. 🍫
Salted Caramel Drizzle
For a sophisticated twist, drizzle the cake with homemade salted caramel. Simmer 1 cup granulated sugar until amber, then whisk in ½ cup heavy cream and 2 tbsp unsalted butter. Finish with a pinch of flaky sea salt and let cool to 110°F before drizzling. The salt enhances the chocolate’s richness while adding a buttery contrast.
Whipped Mascarpone Frosting
For a lighter option, whip 1 cup mascarpone cheese with ½ cup heavy cream and 2 tbsp powdered sugar until smooth. Fold in 1 tsp vanilla extract and spread over the cake. This frosting adds a creamy, tangy balance to the deep chocolate flavor. Serve immediately for the best texture.
Espresso Chocolate Sauce
Infuse the ganache with 1 tbsp instant espresso powder mixed into the melted chocolate before adding cream. This intensifies the chocolate’s depth and adds a subtle coffee note. Let it cool to 95°F before serving—it pairs beautifully with the cake’s fudgy texture and works especially well with vanilla ice cream.
Orange Zest Glaze
Brighten the cake with a citrusy glaze by whisking ½ cup powdered sugar with 2 tbsp fresh orange juice and 1 tsp orange zest. Drizzle over the cake while it’s still slightly warm. The acidity cuts through the richness, creating a refreshing contrast. Store leftovers in the fridge for up to 3 days.
Warm Spiced Whipped Cream
Heat 1 cup heavy cream with 1 tbsp brown sugar and ½ tsp cinnamon until steaming, then whip to soft peaks. Top the cake with this aromatic cream for a cozy, comforting finish. The warmth of the spices complements the chocolate’s depth without overpowering it. 🌟
Nutrition facts
Frequently asked questions
Why does this recipe use cornstarch instead of flour?
The 0.25 cup cornstarch replaces most of the flour while keeping the cake tender and fudgy. Cornstarch creates a smoother texture and prevents dryness, which is common in traditional flourless chocolate cakes. The 0.125 cup flour we use is just for pan dusting—this "almost flourless" approach maintains structure without sacrificing moisture.
Can I make this cake in a single 9-inch pan?
Yes, but you'll need to reduce baking time to 30-35 minutes for a thinner layer. Use the same batter quantity but expect a denser, more pudding-like texture. For best results, stick to two 9-inch pans—they create the ideal balance of fudgy center and caramelized edges. The cake will be more sliceable and less likely to be too heavy.
What's the secret to avoiding a dry cake?
Don't overbake! The cake is done when a toothpick comes out with moist crumbs (not wet batter). Also, let it cool completely in the pan for 10 minutes before inverting—this helps retain moisture. For extra richness, brush warm slices with 2 tbsp melted butter before serving. The cornstarch and proper cooling technique prevent dryness.
How do I store leftovers to keep them moist?
Store at room temperature for up to 2 days in an airtight container. For longer storage, refrigerate for up to 5 days or freeze for 3 months. To revive, wrap slices in a damp paper towel and heat at 350°F for 5 minutes. The key is preventing air exposure—always slice before storing.
Can I substitute eggs for a vegan version?
This recipe relies on eggs for structure and moisture, so a direct substitution isn't recommended. For a vegan alternative, try a fluffy chocolate mousse or avocado-based cake instead. The "almost flourless" concept works best with eggs—they create that signature velvety texture that's hard to replicate without them.