
Desserts
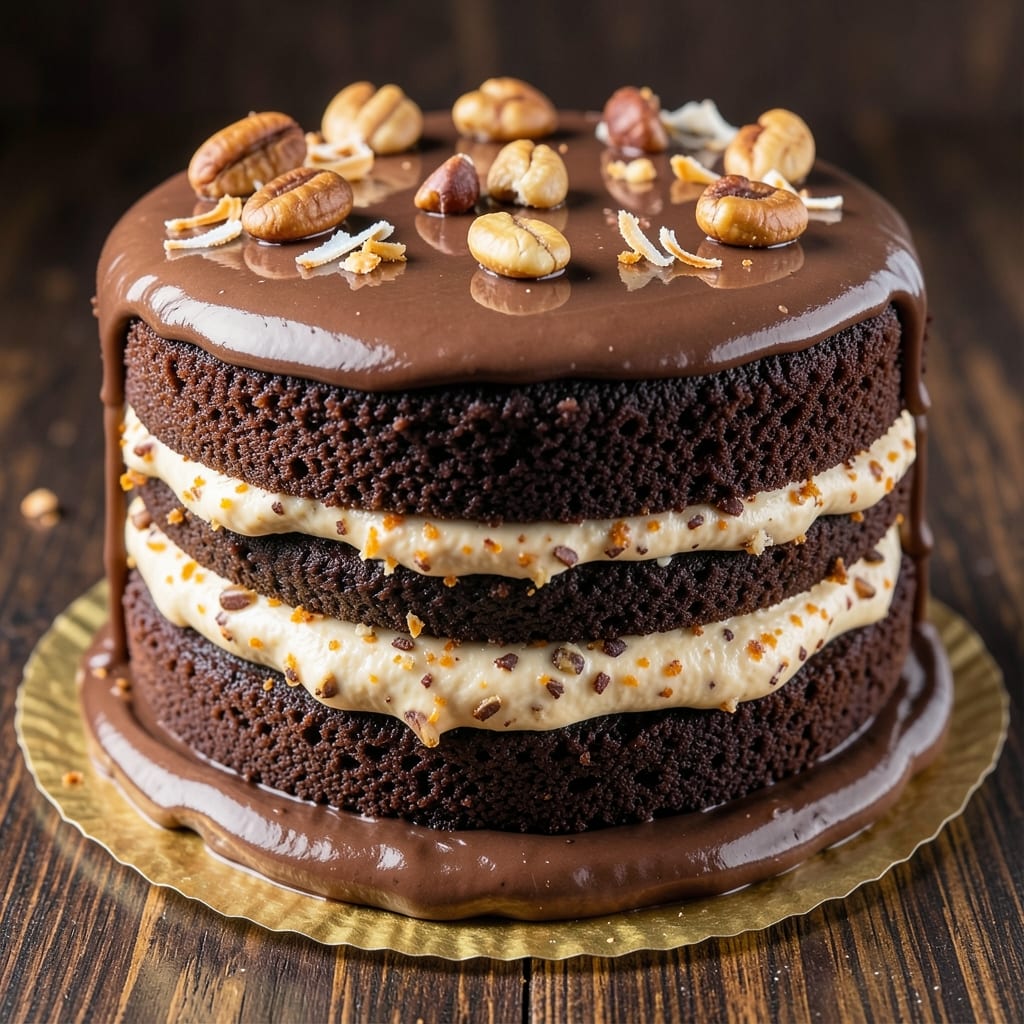
This Almond Joy layer cake delivers all the tropical sweetness of your favorite candy bar in every bite—rich chocolate layers swirled with toasted coconut and almond buttercream that melts in your mouth. The secret lies in balancing dense chocolate cake with a filling that captures Almond Joy’s signature crunch and caramelized coconut flavor, all crowned with a glossy ganache finish. I’ve perfected this recipe over years of baking for holidays and special occasions, ensuring each slice is as visually stunning as it is delicious.
The cake itself is a foolproof combination of cocoa powder and brown sugar, baked just until tender for easy slicing. Between each layer, a luscious coconut-almond buttercream—infused with crushed Almond Joy bars—creates a swirl effect that mimics the candy’s iconic layers. Toasted coconut flakes add texture, while a final drizzle of chocolate ganache ties everything together for a restaurant-quality finish. Every step is designed to minimize fuss while maximizing flavor and presentation.
What you’ll end up with is a showstopping dessert that’s perfect for birthdays, holidays, or simply treating yourself. The contrast of moist chocolate cake, creamy swirls, and toasted coconut creates a symphony of textures and flavors that’s impossible to resist. This cake holds its shape beautifully, stays fresh for days, and tastes even better the next day as the flavors meld. It’s the kind of dessert that makes you look like a baking pro without requiring advanced techniques.
Whether you’re baking for a crowd or just craving a slice of nostalgia, this recipe delivers all the comfort and indulgence of an Almond Joy candy bar—just in cake form. The best part? You can customize it with additional coconut flakes, chocolate shavings, or even a sprinkle of sea salt for extra depth. Let’s get baking!
Ingredients for almond joy layer cake
Twelve ingredients, three layers of tropical chocolate magic—this cake tastes like nostalgia.
| Ingredient | Amount | Notes |
|---|---|---|
| All-Purpose Flour 🌾 | 3 cups | Sifted for light texture |
| Unsweetened Cocoa Powder 🍫 | ¾ cup | Natural or Dutch-processed |
| Granulated Sugar 🍚 | 2 ½ cups | White or light brown |
| Packed Brown Sugar 🍚 | 1 cup | Light or dark variety |
| Large Eggs 🥚 | 4 whole | Room temperature preferred |
| Unsalted Butter 🧈 | 1 ½ cups | Room temperature, cubed |
| Vanilla Extract 🌿 | 2 tsp | Pure, high-quality extract |
| Baking Soda 🧂 | 1 tsp | Pure baking soda |
| Salt 🧂 | ½ tsp | Fine sea salt |
| Shredded Coconut 🥥 | 2 cups | Sweetened, toasted |
| Crushed Almond Joy Bars 🍫 | 1 cup | About 8 oz package crushed |
| Heavy Whipping Cream 🥛 | 1 ½ cups | Cold for whipping |
| Powdered Sugar 🍚 | 3 cups | For buttercream |
| Semisweet Chocolate Chips 🍫 | ½ cup | For ganache |
| Vegetable Oil 🫒 | ½ cup | For cake layers |
The cocoa powder is non-negotiable here—Hershey's Special Dark or Dutch-processed gives the richest flavor. Whole Foods or King Arthur always have the best quality. For the shredded coconut, toast it first—spread on a baking sheet at 350°F for 8-10 minutes until golden. The Almond Joy bars? Use the full-size ones—mini bars won’t give enough flavor. If you can’t find them, substitute with a mix of white chocolate chips and crushed macadamia nuts.
No Almond Joy bars? Crush a mix of white chocolate and toasted coconut for a similar effect. Short on butter? Vegetable oil works in a pinch, though butter gives the best texture. The powdered sugar for buttercream should be sifted to avoid lumps. For extra decadence, add a pinch of sea salt to the buttercream—trust me, it makes everything better. And if you’re feeling fancy, use guaranteed vanilla extract instead of imitation.
This cake keeps beautifully—3-4 days covered at room temperature or 1 week in the fridge. For holidays, freeze layers between parchment paper for up to 3 months. The ganache stays glossy if you reheat it gently—just microwave in 20-second bursts until smooth. I always make a double batch of buttercream and ganache so I can decorate extra layers for gifts.
Why You'll Love This Recipe
- No Mixer Needed: I swear by this recipe when I’m in a rush—just whisk the eggs with the sugars until they’re light and airy, then fold in the dry ingredients. The cocoa and brown sugar blend creates this rich, fudgy texture without a single drop of oil, and honestly? My stand mixer stays off for this one.
- Crowd-Pleasing Duet: That perfect balance of cocoa and almond? It’s like the chocolate cake and Almond Joy bar had a baby. The brown sugar keeps it moist while the cocoa gives it depth, and between us, it’s the one dessert I can always count on to disappear fast—no one turns it down.
- Party in a Box: Between us, this cake is my go-to for birthdays, potlucks, or even a last-minute office celebration. It layers beautifully, stays fresh for days, and the almond filling (if you add it) turns it into a showstopper. I’ve even made mini versions for holiday cookie swaps—just bake in a muffin tin and watch them vanish.
- Budget Magic: Here’s what sold me—the ingredients are all pantry staples. A bag of cocoa, a cup of sugar, a few eggs? That’s it. And the leftovers? I slice them up for breakfast toast or freeze them for emergency treats. Not the prettiest, but the taste makes up for it every time.
Step-by-step instructions for Almond Joy layer cake
Here's how to create a decadent cake with layers of moist chocolate cake, swirls of Almond Joy goodness, and rich coconut flavor.
Prepare the Cake Batter
Preheat your oven to 350°F and grease three 8-inch round cake pans, lining the bottoms with parchment paper. In a large mixing bowl, sift together the 3 cups all-purpose flour, 0.75 cup unsweetened cocoa powder, 1 tsp baking soda, and 0.5 tsp salt. Set aside.
In a separate large bowl, cream together the 1.5 cups unsalted butter, 2.5 cups granulated sugar, and 1 cup packed brown sugar on medium speed until light and fluffy, about 3-4 minutes. Add the 4 whole large eggs, one at a time, mixing well after each addition. Stir in the 2 tsp vanilla extract.
Gradually add the dry ingredients to the wet mixture, alternating with the 0.5 cup vegetable oil, beginning and ending with the flour mixture. Mix on low speed until just combined—don't overmix. Fold in the 2 cups shredded coconut and 1 cup crushed Almond Joy bars by hand until evenly distributed.
Bake the Cake Layers
Divide the batter evenly among the prepared cake pans. Bake for 30-35 minutes or until a toothpick inserted into the center comes out clean. The cakes should be slightly domed at the top and spring back gently when touched.
Let the cakes cool in the pans for 10 minutes, then transfer them to a wire rack to cool completely. This cooling step is crucial—warm cakes will crumble when you try to frost them. While the cakes cool, prepare the filling and frosting.
Make the Chocolate Ganache
Place the 0.5 cup semisweet chocolate chips in a microwave-safe bowl. Microwave in 30-second intervals, stirring between each interval, until the chocolate is completely melted and smooth. Let it cool slightly until it reaches a spreadable consistency but is still warm.
In a separate bowl, whip the 1.5 cups heavy whipping cream to soft peaks. Gently fold the whipped cream into the melted chocolate until fully combined. This ganache will serve as both a filling and part of the frosting.
Assemble the Cake
Once the cake layers are completely cool, level the tops if necessary. Place the first cake layer on a cake stand or plate. Spread a generous layer of the chocolate ganache over the top, leaving a ½-inch border unfrosted. Repeat with the second layer.
For the top layer, spread a thin layer of ganache over the entire cake, then add the third layer. Chill the assembled cake in the refrigerator for 20 minutes to help the ganache set slightly and make frosting easier.
Frost and Decorate
In a large mixing bowl, beat the 1.5 cups heavy whipping cream (if not already used in the ganache) to stiff peaks. Gradually add the 3 cups powdered sugar, beating until smooth and fluffy. Fold in any remaining ganache to create a creamy frosting.
Spread the frosting over the chilled cake, creating a smooth base. Use a spatula to create decorative swirls or a smooth finish, then return the cake to the refrigerator for 30 minutes to set. Before serving, sprinkle additional shredded coconut and crushed Almond Joy bars on top for extra texture and flavor.
Pro Tips For Making Almond Joy Layer Cake
- Weigh Your Cocoa: I learned this the hard way—scooping cocoa powder from the bag packs in too much air, making your cake dense and muddy. Use a kitchen scale for 3 ounces (85g) of unsweetened cocoa, then level it off with a knife. That’s the difference between a cake that’s rich but light and one that’s a brick.
- Fold in the Almond Joy Filling Gently: This isn’t the prettiest method, but it’s the tastiest: after baking and cooling your layers, spread the filling with a spatula in thin, even strokes. Then, use a long knife to gently drag through the center, stopping just before the bottom. Press lightly—you’re not frosting a wedding cake, just marrying flavors. Overmixing here turns your layers into a sad, crumbly mess.
- Bake Until the Center Springs Back: Your cake might look done at 325°F (165°C) internal temp, but resist pulling it out. The center should spring back slowly when pressed—like a memory foam mattress, not a trampoline. I used to pull them too soon, and the middle stayed gummy. Let them bake 2–3 minutes past that point, then tent with foil if the tops brown too fast.
- Use Room-Temp Eggs and Butter: Cold eggs and butter are the silent saboteurs of layer cakes. Whip your eggs and softened butter (not melted) until they’re pale and thick—about 3–4 minutes with a mixer. Room temperature (about 70°F/21°C) means everything emulsifies smoothly, giving you a tender crumb instead of a dry, crumbly disaster. Yes, even if you’re impatient like me.
Storing and reheating your almond joy layer cake
Room-Temp Storage
Keep your Almond Joy layer cake at room temperature for up to 3 days if your kitchen stays below 75°F. Store it in an airtight container with a layer of parchment paper between layers to prevent drying. I like using Pyrex glass containers with tight-sealing lids—they keep the cake moist and prevent that dreaded "cake board" texture. 🥥
Fridge Preservation
For longer storage, refrigerate the cake for up to 1 week in the same airtight container. The cold helps preserve the ganache's glossy finish, but let it sit at room temperature for 30 minutes before serving to restore the perfect texture. I always wrap the cake in plastic wrap first to create a moisture barrier against the fridge's dry air.
Freezer-Friendly Layers
Freeze individual cake layers between parchment paper for up to 3 months—this is perfect for holiday prep! Wrap each layer tightly in plastic wrap, then place them in a ziplock freezer bag to prevent freezer burn. Thaw overnight in the fridge before assembling with fresh frosting. The layers stay moist and dense, just like fresh-baked.
Reheating Ganache
If the ganache loses its shine after storage, gently reheat it in 20-second microwave bursts until smooth. Stir between bursts to avoid overheating. For stovetop reheating, use a double boiler with low heat—never boil the ganache or it'll seize. I keep a small batch of ganache in the fridge separately for quick touch-ups on the cake's surface.
Reviving Texture
If the cake feels dry after refrigeration, brush the top with a simple syrup made from ¼ cup water and 2 tbsp granulated sugar heated until dissolved. This restores moisture without altering flavors. For extra decadence, add a thin layer of fresh whipped cream between cake layers before reassembling—it acts like a moisture lock. 💫
Nutrition facts
Frequently asked questions
Can I make this cake without Almond Joy bars?
For a similar flavor, crush ½ cup white chocolate chips and ½ cup toasted coconut flakes to mimic the candy's texture. Add a pinch of sea salt to the buttercream for that caramelized kick. The cake will still taste delicious—just with a slightly different texture profile.
How do I prevent the cake layers from cracking when frosting?
Chill the assembled cake for 20 minutes before adding the final frosting—this helps the ganache set slightly. Use a spatula to spread frosting smoothly, and work in thin layers. If cracks appear, simply fill them with extra ganache or whipped cream for a seamless finish.
Is this cake gluten-free or dairy-free?
This recipe isn't naturally gluten-free or dairy-free, but you can adapt it! Use a 1:1 gluten-free flour blend and substitute butter with dairy-free margarine or coconut oil. For dairy-free frosting, replace heavy cream with coconut cream and butter with vegan butter. The flavors will still shine through with these swaps.
Can I use this recipe for a 6-inch or 10-inch cake?
For a 6-inch cake, reduce batter to ⅓ of the recipe and bake in one layer. For a 10-inch cake, increase batter to 1.5x and bake in two layers. Adjust baking time by 5-10 minutes—always check with a toothpick. The frosting quantities should scale proportionally to the cake size.
Why does my cake taste more chocolatey than coconut?
The cocoa powder and chocolate chips dominate the flavor, but you can balance it by increasing the shredded coconut to 2.5 cups and adding ½ cup extra crushed Almond Joy (or substitute) to the frosting. Toast the coconut longer (12 minutes) for deeper caramelization. The key is in the filling—make sure your ganache has enough coconut flavor!