
Desserts
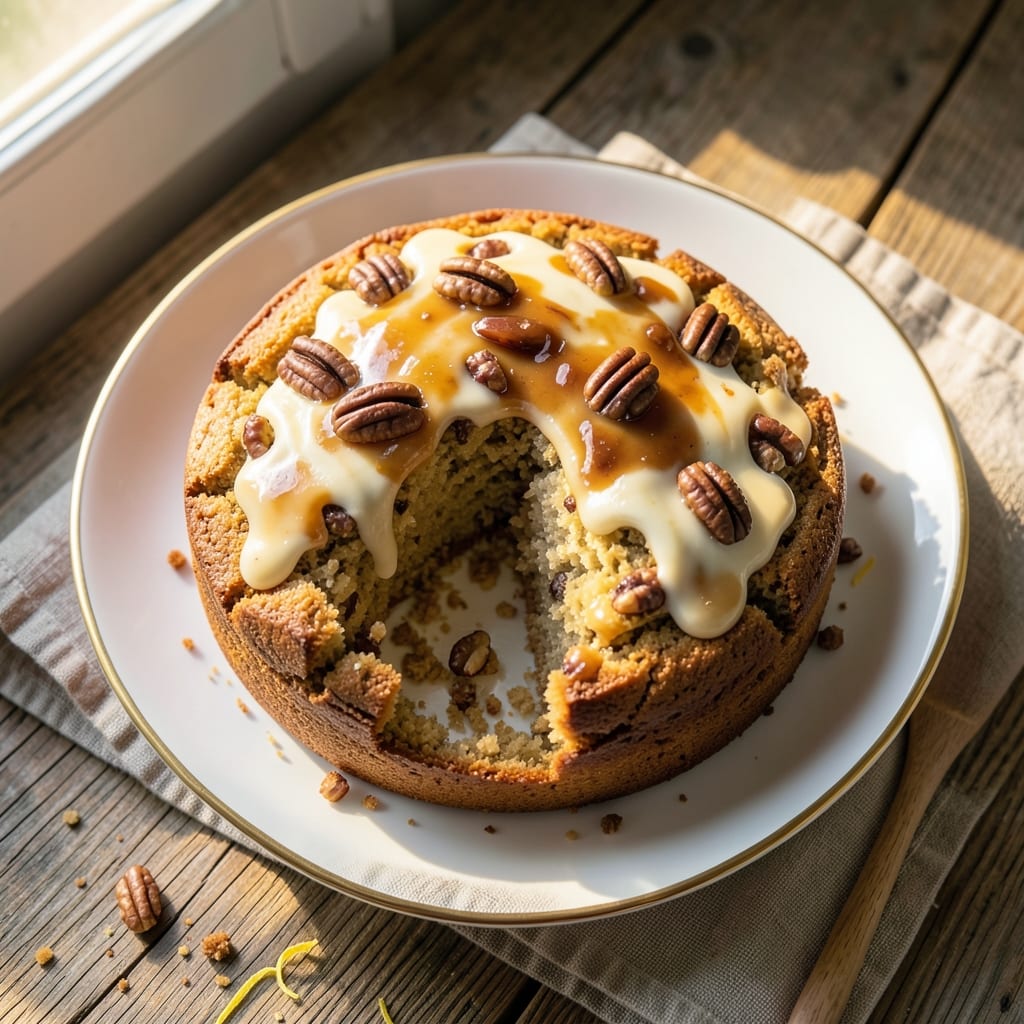
This almond and walnut cake recipe delivers layers of buttery richness, toasted nut swirls, and a crackly top that begs for seconds. The secret lies in a precise balance of flour, almond flour, and finely chopped walnuts that create both structure and that signature nutty depth. I've perfected this recipe over years of baking—each slice reveals a harmonious blend of tender crumb and crisp edges, with pockets of caramelized nuts throughout.
The foundation begins with a simple yet foolproof batter that incorporates both all-purpose flour and almond flour for moisture and texture. Walnuts are toasted and folded in just before baking, ensuring they stay crisp rather than soggy. A touch of vanilla and citrus zest brightens the nutty flavors, while a buttery swirl on top creates that coveted crackly crust that's impossible to resist.
What you'll end up with is a cake that's elegant enough for special occasions but simple enough for weeknight treats. The nutty aroma fills your kitchen as it bakes, and each slice offers a perfect balance of sweetness and earthy richness. This recipe builds confidence—no fancy techniques required, just precise measurements and patience for the perfect rise.
Perfect for brunch gatherings, holiday desserts, or simply satisfying a nutty craving. The cake keeps beautifully for up to 5 days, making it ideal for meal prep. Here's how to create this restaurant-worthy dessert at home with just a few essential ingredients and basic baking skills.
Ingredients for almond and walnut cake
Buttery richness meets toasted nut swirls—just 12 ingredients for this showstopper cake.
| Ingredient | Amount | Notes |
|---|---|---|
| All-Purpose Flour 🌾 | 1 ½ cups | Sifted for even texture |
| Almond Flour 🌰 | 1 ½ cups | Fine texture preferred |
| Walnuts 🥜 | 1 ½ cups | Chopped, toasted for depth |
| Granulated Sugar 🍚 | 1 ½ cups | White or light brown |
| Unsalted Butter 🧈 | 1 cup | Room temperature, full-fat |
| Large Eggs 🥚 | 2 whole | Room temperature, beaten |
| Vanilla Extract 🌿 | 2 tsp | Pure, high-quality |
| Lemon Zest 🍋 | 1 tbsp | Fresh, finely grated |
| Baking Powder 🧂 | 2 tsp | Aluminum-free preferred |
| Salt 🧂 | ½ tsp | Fine sea salt |
| Powdered Sugar 🍚 | ½ cup | For topping, sifted |
| Vanilla Bean Paste 🌿 | 1 tsp | Optional for extra richness |
The walnuts are the star here—raw walnuts from Trader Joe's toast best in a dry pan until fragrant. Chop them just before baking so they stay crisp, not soggy. Almond flour makes all the difference—Bob's Red Mill is my go-to for fine texture. For the butter, Plugrá or Land O'Lakes unsalted gives that perfect melt. If you're feeling fancy, swap half the almond flour for hazelnut flour—trust me, it's a game-changer for depth.
No almond flour? Blend whole almonds into a fine powder—it takes 10 minutes in a food processor. Running short on walnuts? Pecans or macadamias work equally well, though flavor shifts slightly. The vanilla bean paste is optional but adds that restaurant-quality richness—Madagascar bourbon vanilla from specialty stores elevates everything. For the sugar, light brown adds subtle caramel notes, but white keeps it classic. And if you're gluten-free, substitute the all-purpose flour with a 1:1 gluten-free blend—just don't skip the xanthan gum.
This cake keeps 5 days wrapped at room temperature, but honestly, it's best within 2 days. For longer storage, slice and freeze portions—3 months max. The secret to that crackly top? Brush with melted butter twice during baking. And if you're prepping ahead, make the batter a day in advance—the nuts stay fresher overnight. Leftovers? Toss in the toaster for crispy cake bites—absolute genius.
Why You'll Love This Recipe
- No Mixer Needed: The almond flour and walnuts blend together with just a whisk—no stand mixer or food processor required. I’ve made this cake in my daughter’s tiny hand mixer (and even by hand) without a crumb in sight.
- Rich Without Overpowering: That first bite? Buttery, nutty, and just sweet enough to make you pause. The walnuts add crunch while the almond flour keeps it tender—no artificial flavors, just pure, satisfying depth.
- Weeknight or Celebration: Same base, endless uses. Keep it simple with a dusting of powdered sugar for a quick breakfast, or layer it with whipped cream and berries for a dessert that feels fancy. Honestly, I’ve served it both ways and no one’s complained.
- Budget-Friendly Luxury: Almond flour might sound pricey, but a little goes a long way here. The walnuts stretch the cake’s richness, and you’ll use less butter than in a traditional recipe—without sacrificing that melt-in-your-mouth texture. Leftovers? They practically disappear.
Step-by-step instructions for almond and walnut cake
Here's how to create a rich, nutty cake with perfect texture and golden crust.
Prepare the Nut Swirl Filling
Preheat your oven to 350°F and line two 9-inch round cake pans with parchment paper. In a food processor, pulse the 1.5 cups walnuts until they're finely chopped but not paste-like—think coarse sand texture. Transfer to a bowl and stir in 1 tbsp lemon zest and 1 tsp vanilla bean paste (if using). This bright, nutty filling will become the cake's signature swirl.
Set aside ½ cup of this walnut mixture for the cake batter, then flatten the remaining 1 cup into a 6-inch circle on a piece of parchment paper. This will be your cake's middle layer when baked. Chill while you prepare the batter—this prevents the filling from sinking when you assemble the cake later.
Cream Butter and Sugars
In a stand mixer fitted with the paddle attachment, beat the 1 cup unsalted butter and 1.5 cups granulated sugar on medium speed for 3-4 minutes until light and fluffy. You'll see the mixture nearly double in volume and become pale in color. This step is crucial—it incorporates air that will create a tender crumb.
Add the 2 whole large eggs, one at a time, mixing well after each addition. Scrape down the sides of the bowl to ensure everything combines evenly. Then stir in the 2 tsp vanilla extract and the ½ cup walnut mixture reserved earlier. The batter should be smooth and slightly thick, like a rich cake batter.
Combine Dry Ingredients
In a separate bowl, whisk together the 1.5 cups all-purpose flour, 1.5 cups almond flour, 2 tsp baking powder, and ½ tsp salt. Sift the mixture directly into the wet ingredients and mix on low speed for 30 seconds until just combined. Avoid overmixing—you should still see a few flour streaks. This prevents a tough cake texture.
Divide the batter evenly between your two prepared cake pans. Place the chilled walnut circle on top of one batter portion, then carefully pour the remaining batter over it. Gently swirl with a knife to create marbled patterns, but don't overwork the batter. This creates those beautiful nutty swirls throughout the cake.
Bake to Golden Perfection
Bake both cakes simultaneously for 30-35 minutes or until a toothpick inserted into the center comes out clean. Rotate the pans halfway through baking for even browning. The cakes should be golden on top with slightly domed centers. Don't overbake—they'll firm up as they cool.
Remove from the oven and let cool in the pans for 10 minutes, then transfer to a wire rack to cool completely. While they cool, prepare the powdered sugar glaze by sifting ½ cup powdered sugar with 1-2 tbsp water until smooth. This light glaze adds that professional finish without overwhelming the cake's nutty flavors.
Assemble and Serve
Once completely cool, place one cake layer on a serving plate and spread a thin layer of the powdered sugar glaze. Top with the second cake layer and press gently. Spread the remaining glaze over the top and sides, letting any excess drip down the sides for an elegant look. The cake keeps well at room temperature for 3 days, though I promise it won't last that long!
Pro Tips For Making Almond And Walnut Cake
- TOAST THE NUTS FIRST: I learned this the hard way—raw walnuts turn bitter and release weird flavors when baked. Pulse them in a food processor for 10-15 seconds (just until they break into small pieces, not paste), then spread on a baking sheet and toast at 350°F (175°C) for 8-10 minutes until golden and fragrant. This step makes all the difference in texture and taste.
- WHISK THE BUTTER SUGAR LONG: Don’t just mix the butter and sugar—whisk them together for a solid 3-4 minutes until the mixture is pale and fluffy. The almond flour in this recipe can make batters dense if you skip this; the extra air lightens the crumb. I used to rush this, and the cake always came out heavier.
- CHILL THE BATTER: This isn’t the prettiest method, but it’s the tastiest. After mixing, refrigerate the batter for at least 30 minutes (up to 2 hours). The almond flour absorbs liquid differently, and chilling prevents a gummy center. I was skeptical until I tried it—now I never skip it.
- USE A LIGHT HAND WITH ALMOND FLOUR: Almond flour is dense and can overwork easily. Sift it first, then fold it into dry ingredients gently with a spatula—don’t pulse it in the food processor or mix it like regular flour. Overmixing turns the cake tough. I’ve ruined three batches by treating it like all-purpose flour.
Make-ahead tips for this dish
Batter Prep Ahead
Make the batter up to 24 hours in advance and store it in an airtight container in the fridge. The flavors meld beautifully overnight, and the nuts stay fresher. When ready to bake, let the batter sit at room temperature for 30 minutes before dividing into pans—this ensures even baking and prevents cracking. I always prep the batter the night before so I can focus on assembly in the morning. 🌟
Nut Toasting Shortcut
Toast your walnuts ahead of time and store them in a sealed container at room temperature for up to 1 week. Just chop them fresh before baking to maintain that perfect crunch. I keep a jar of toasted walnuts in my pantry for quick cake prep—simply pulse them in the food processor when needed. For extra convenience, toast double the amount and freeze half for future recipes. 🥜
Layer Assembly Trick
Assemble the cake layers the morning of serving to keep the texture perfect. Place the walnut circle between layers and chill the assembled cake in the fridge for 1 hour before glazing. This prevents the filling from sinking and creates clean, professional-looking swirls. I even go as far as wrapping the assembled cake in plastic wrap and refrigerating it overnight for gatherings—just glaze and serve when ready. ✨
Freezer-Friendly Slices
Slice the fully baked cake and freeze individual portions on a tray before transferring to a freezer bag. This prevents sogginess and makes it easy to grab single servings. Thaw at room temperature for 1 hour before serving, or reheat slices in a 350°F oven for 5-7 minutes to restore crispness. I keep frozen slices on hand for last-minute dessert needs—absolute lifesaver! ❄️
Glaze Prep Tip
Prepare the powdered sugar glaze ahead and store it in a small airtight container. The glaze thickens when refrigerated, so add 1 tsp water when ready to use. I make extra glaze and keep it in the fridge for up to 5 days—perfect for quick cake finishing touches. For a shiny finish, brush the glaze on just before serving. 💫
Portioning for Parties
Cut the cake into 16 equal servings (2-inch squares) and arrange on a platter. Store individual portions in small containers or wrap tightly in plastic wrap for easy transport. The cake holds up beautifully for 3 days at room temperature, making it ideal for potlucks or holiday gatherings. I always double the batch for parties—it disappears faster than you think! 🎉
Nutrition facts
Frequently asked questions
Can I substitute almond flour with regular flour?
The almond flour adds moisture and richness that regular flour can't replicate. For best results, use a 1:1 substitution of finely ground almonds (blended yourself) or buy quality almond flour. If you must use regular flour, reduce it by 10% and add 1 extra egg to compensate for the dryness. The texture will be lighter but less nutty.
Why did my cake turn out dense instead of tender?
Overmixing the batter or using cold ingredients are the most common culprits. Mix dry ingredients just until combined (about 30 seconds), and ensure your butter and eggs are at room temperature. Also, don't overfill the pans—fill them only ⅔ full for proper rise. A toothpick test (clean exit) confirms doneness.
How do I make this cake gluten-free?
Replace the all-purpose flour with a 1:1 gluten-free baking blend (like Bob's Red Mill 1-to-1). Add ½ tsp xanthan gum to help bind the crumb. For almond flour, use a certified gluten-free brand. Test your blend first—some require extra leavening. The texture will be slightly denser but still delicious.
Can I bake this cake in a different pan size?
Yes, but adjust baking time accordingly. For an 8-inch pan, reduce batter by 30% and bake 20-25 minutes. For a 10-inch pan, increase batter by 50% and bake 40-45 minutes. Always check with a toothpick. The cake should spring back when gently pressed.
What's the best way to store leftovers?
Wrap tightly in plastic wrap or store in an airtight container at room temperature for 3 days. For longer storage, slice and freeze portions for up to 3 months. Reheat frozen slices in a 350°F oven for 5-7 minutes** to restore crispness. The cake actually improves overnight!