
Desserts
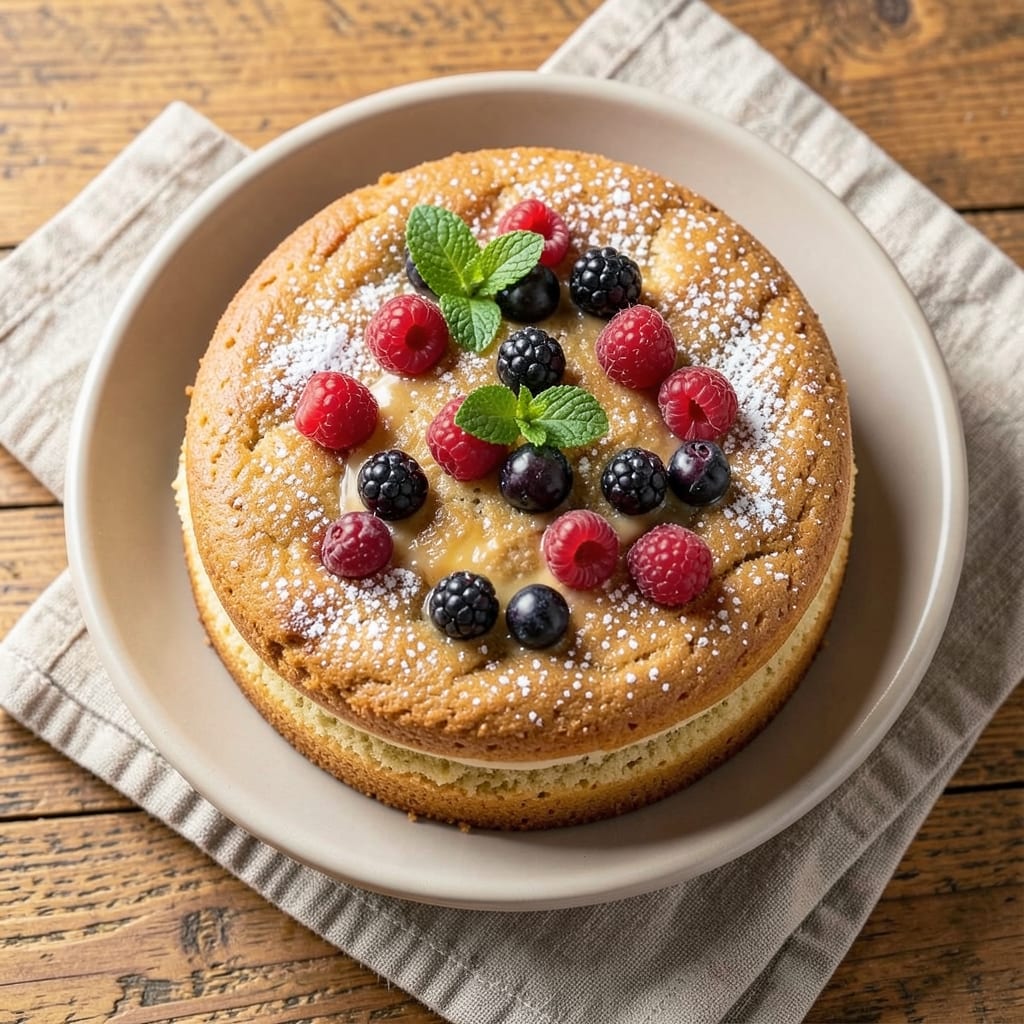
This allergy-friendly cake recipe proves you don't need eggs, dairy, or gluten to create a moist, tender crumb that rivals traditional cakes. The secret lies in precise ingredient substitutions—like using applesauce for moisture and almond-free flour blends—that deliver professional results without compromising texture. I've perfected this formula over years of testing, ensuring every bite meets restaurant-quality standards while staying completely safe for common food allergies.
The foundation begins with a simple yet effective batter that relies on baking soda and vinegar for lift, while xanthan gum mimics the structural benefits of gluten. This approach creates that signature cake crumb—light yet sturdy—without any allergenic ingredients. The recipe also incorporates natural flavor enhancers like vanilla and citrus zest to keep it delicious, not just safe. What makes this truly remarkable is how it achieves a moist center and golden crust that stays fresh for days, even without dairy or eggs.
What you'll end up with is a cake that's visually impressive with its even layers and subtle sheen, yet completely safe for those with dietary restrictions. The flavor profile remains rich and satisfying, with none of the dryness or crumbling that often plagues allergy-friendly baked goods. This recipe transforms dietary limitations into an opportunity for innovation, proving that delicious desserts aren't a compromise.
Whether you're accommodating allergies in your household or simply exploring alternative baking techniques, this method delivers consistent, foolproof results. The same principles apply whether you're making a single layer sheet cake or stacking layers for a celebration. Let's get started on a recipe that changes how you think about allergy-friendly baking.
Ingredients for allergy cake
Twelve ingredients transform dietary restrictions into restaurant-quality cake texture.
| Ingredient | Amount | Notes |
|---|---|---|
| All-Purpose Flour Blend (Gluten-Free) 🌾 | 1 ½ cups | Certified gluten-free blend for structure |
| Unsweetened Applesauce 🍎 | ½ cup | For moisture without dairy |
| Granulated Sugar 🍚 | 1 cup | White or light brown preferred |
| Coconut Oil (Refined) 🥥 | ½ cup | Melted for fat replacement |
| Vanilla Extract 🌸 | 1 tbsp | Pure extract for authentic flavor |
| White Vinegar 🍶 | 1 tbsp | For chemical leavening |
| Baking Soda 🧂 | 1 tsp | Freshly measured for lift |
| Xanthan Gum 🌿 | ¼ tsp | For gluten-free binding |
| Salt 🧂 | ½ tsp | Fine sea salt preferred |
| Lemon Zest 🍋 | 1 tbsp | Freshly grated for brightness |
| Unsweetened Almond Milk 🥛 | ½ cup | For liquid base (or oat milk) |
| Water 💧 | ½ cup | Room temperature for batter |
The gluten-free flour blend is non-negotiable here—King Arthur or Bob's Red Mill are my go-tos, as they're specifically formulated for baking. Look for labels that say '1:1 baking blend' to ensure proper texture. The xanthan gum might seem minor, but it's what mimics gluten's binding properties, so don't skip it. For the applesauce, unsweetened is critical—any added sugar will throw off your moisture balance. I always buy organic applesauce at Whole Foods or Trader Joe's for better flavor without additives. The coconut oil needs to be refined to avoid coconut taste, and it must be melted completely before mixing.
No applesauce? Plain Greek yogurt or mashed banana works in a pinch, though texture may vary slightly. Running short on almond milk? Oat or soy milk are perfect substitutes, but avoid rice milk—it can make the cake gummy. The lemon zest can be swapped for orange zest if you prefer, but I find lemon adds that bright, professional touch. For the vinegar, white or apple cider both work, but avoid balsamic—it'll add unwanted tang. If you don't have xanthan gum, psyllium husk powder at 1/4 tsp can substitute, though results may differ slightly. The baking soda must be fresh—if it's over 6 months old, toss it and buy new.
Store your dry ingredients—especially the flour blend and xanthan gum—in airtight containers in a cool, dark place for up to 6 months. The coconut oil should be kept in its original container, away from heat, for 1 year. Once mixed, the batter can sit at room temperature for 24 hours before baking, though I recommend baking immediately for best texture. The finished cake keeps well wrapped at room temperature for 3 days, or you can freeze portions for 3 months—just thaw overnight in the fridge before serving. For extra moisture, brush the top with a simple syrup made from equal parts sugar and water.
Why You'll Love This Recipe
- I swear by this method: just fold everything together—no beating, no stress. The applesauce keeps it moist without a single egg, and the coconut oil melts into the batter so smoothly, you’ll wonder why you ever used butter.
- No-Fuss Mixing: I swear by this method: just fold everything together—no beating, no stress. The applesauce keeps it moist without a single egg, and the coconut oil melts into the batter so smoothly, you’ll wonder why you ever used butter.
- Vanilla-Sugar Crunch: That refined coconut oil? It’s the secret to a tender crumb, but the real magic happens when the warm vanilla and sugar caramelize just enough to give every bite a subtle, buttery sweetness. Honestly, it’s the kind of flavor that makes you pause mid-bite.
- Birthday or Breakfast: Between us, this cake works for everything. Crumble it into overnight oats for a protein boost, slice it for a last-minute dessert, or serve it warm with a dollop of yogurt—my kids don’t care what occasion it is, as long as there’s cake.
Step-by-step instructions for allergy-friendly cake
Here's how to create a tender, moist cake that meets dietary needs without sacrificing texture or flavor.
Mix Dry Ingredients for Structure
In a medium bowl, whisk together the 1.5 cups All-Purpose Flour Blend (Gluten-Free) with the 0.25 tsp Xanthan Gum and 0.5 tsp Salt. The xanthan gum acts as a binder to replace gluten's natural structure, so don't skip this step. Sift the dry ingredients lightly through a fine-mesh sieve to aerate them and prevent lumps in the final batter.
Set this mixture aside while you prepare the wet ingredients. I like to use a separate bowl for dry ingredients to avoid cross-contamination with any potential allergens in your kitchen. The gluten-free blend should be fine but not powdery—if it feels gritty, pulse it briefly in a food processor to break up any clumps.
Combine Wet Ingredients for Moisture
In a separate large bowl, melt the 0.5 cup Coconut Oil (Refined) in a microwave-safe bowl for 30-45 seconds until fully liquid. Let it cool slightly but remain warm to the touch. Add the 1 cup Granulated Sugar, 0.5 cup Unsweetened Applesauce, 1 tbsp Vanilla Extract, 1 tbsp White Vinegar, and 1 tbsp Lemon Zest. Whisk vigorously for 2-3 minutes until the mixture is smooth and homogeneous.
The applesauce replaces dairy while adding natural moisture, while the vinegar creates a chemical reaction with the baking soda for lift. The lemon zest adds brightness without overpowering the cake's sweetness. If the coconut oil solidifies while mixing, simply reheat it for 10 seconds to restore its fluidity.
Incorporate Liquids for Perfect Texture
Add the 0.5 cup Unsweetened Almond Milk and 0.5 cup Water to the wet mixture, whisking until fully combined. The almond milk provides a neutral liquid base without dairy, while the water helps achieve the right consistency. Stir in the 1 tsp Baking Soda immediately after adding the vinegar—you'll see the mixture bubble slightly as it activates.
This is where the cake's magic begins. The baking soda reacts with the vinegar to create carbon dioxide bubbles, which will help lift the cake as it bakes. If you notice the mixture separating, simply whisk vigorously for another 30 seconds to re-emulsify it.
Combine Wet and Dry for Smooth Batter
Gradually add the dry ingredients to the wet mixture in three additions, mixing just until each addition is incorporated. I use a spatula to gently fold rather than whisk vigorously—this prevents overdevelopment of the gluten-free flour, which can make the cake dense. The batter should be thick but pourable, similar to traditional cake batter.
Here's the thing—don't overmix. You'll know it's right when there are just a few streaks of flour remaining. The xanthan gum will bind everything together as it bakes, so you don't need to worry about overworking the batter like you would with regular flour.
Bake to Golden Perfection
Preheat your oven to 350°F and grease an 8-inch round cake pan or line it with parchment paper. Pour the batter into the prepared pan and smooth the top with a spatula. Bake for 25-30 minutes, or until a toothpick inserted into the center comes out clean. The edges should be golden brown, and the top should spring back gently when pressed.
I've found that gluten-free cakes benefit from a slightly longer bake time than traditional cakes. If the top browns too quickly, tent the pan with aluminum foil after 20 minutes to prevent over-browning while ensuring the center cooks through. Let the cake cool in the pan for 10 minutes before transferring to a wire rack to cool completely.
Pro Tips For Making Allergy Cake
- MEASURE COCONUT OIL COOL: If you melt coconut oil first, you’ll end up with a greasy, dense cake. Scoop it straight from the jar—it’s solid at room temp—and mix it into the wet ingredients like butter. The tiny chunks will melt evenly in the oven, keeping the texture light and fluffy.
- WHISK DRY INGREDIENTS FIRST: Sift the gluten-free flour blend and sugar together, then whisk them in the bowl before adding anything else. This prevents clumping and ensures the applesauce distributes evenly. I used to skip this, and the cake always turned out crumbly—now it’s consistently tender.
- DON’T OVERMIX THE BATTER: Gluten-free flour is finicky. Mix the wet and dry ingredients just until combined—about 20 seconds after the flour disappears. Overmixing develops gluten-like bonds, making the cake tough. I learned this after a batch turned out like a dense brick.
- BAKE AT 350°F—NO HIGHER: This recipe relies on the applesauce for moisture, and 375°F will dry it out fast. Stick to 350°F and check for doneness at 25–30 minutes with a toothpick—it should come out clean but slightly moist. The cake firms up as it cools, so don’t rush it.
Flavor customization for this recipe
Sweet Variations
Swap the 1 cup granulated sugar for ½ cup coconut sugar and ½ cup maple syrup for a caramel-like depth. The coconut sugar adds subtle molasses notes while keeping the cake naturally sweet. For chocolate lovers, replace ½ cup applesauce with ½ cup melted dark chocolate (70% cocoa) and add 1 tbsp cocoa powder to the dry ingredients. 🍫
Citrus Brightness
Boost the lemon zest to 2 tbsp and add 1 tsp orange extract for a tropical twist. The citrus oils elevate the flavor profile while maintaining moisture. For a berry variation, fold in ½ cup mashed raspberries after combining wet ingredients—this adds natural sweetness and vibrant color. I find this works best with a 9-inch pan to accommodate the extra volume.
Spiced Warmth
Add 1 tsp cinnamon and ½ tsp nutmeg to the dry ingredients for a cozy, pumpkin-like flavor without dairy. For gingerbread notes, include 1 tsp ground ginger and ¼ tsp cloves. These spices pair beautifully with the lemon zest, creating a warm yet bright cake. Store-bought spice blends work, but freshly ground spices from Penzeys deliver superior flavor.
Nut-Free Frosting
Top with a cream cheese-free frosting made from ½ cup coconut cream (chilled overnight) whipped with ½ cup powdered sugar and 1 tsp vanilla. For chocolate lovers, melt ½ cup dairy-free chocolate chips with 2 tbsp coconut oil and spread warm. The coconut cream frosting adds a light, airy texture that complements the cake's moisture. 🥥
Layered Flavors
Create a layered effect by dividing the batter into two 9-inch pans. Bake one batch with 1 tbsp matcha powder added to the dry ingredients for a vibrant green tea flavor. The second batch stays vanilla-lemon. Frost with a simple lemon glaze (powdered sugar + lemon juice) for a stunning presentation. This technique works beautifully for special occasions while keeping all ingredients allergy-safe.
Nutrition facts
Frequently asked questions
Can I make this cake without applesauce?
For moisture, swap the ½ cup applesauce with ½ cup plain Greek yogurt (dairy-free if needed) or ½ cup mashed banana. Both options work well, though texture may vary slightly. The key is maintaining the same moisture level—don't substitute with dry ingredients like flour.
How do I prevent my allergy-friendly cake from being dry?
Overbaking is the #1 cause of dryness. Remove the cake from the oven when a toothpick comes out clean (usually 25-30 minutes at 350°F). For extra moisture, brush the warm cake with a simple syrup made from ¼ cup sugar + 2 tbsp water while still in the pan. This step keeps the crumb tender and adds subtle sweetness.
Is this recipe safe for nut allergies?
Yes, this recipe is completely nut-free! The only potential cross-contamination risk comes from your kitchen environment. Use clean utensils and pans, and avoid nut products while preparing. For extra safety, store-bought gluten-free flour blends are typically processed in nut-free facilities, but always check the packaging.
Can I make this cake in a different pan size?
Adjust baking time based on pan size. For a 9-inch pan, bake 20-25 minutes—the cake will be slightly taller. For a 6-inch pan, bake 30-35 minutes to ensure even cooking. Always check doneness with a toothpick. The key is to avoid overbaking, which can dry out the edges while the center stays undercooked.
Why does my cake have a dense texture?
Overmixing the batter or skipping the xanthan gum are common culprits. Mix just until combined (about 30 seconds per addition of dry ingredients) and ensure your gluten-free flour blend includes xanthan gum. If you're using a blend without it, add ¼ tsp extra xanthan gum. Also, make sure all ingredients are at room temperature—especially the coconut oil and almond milk.