
Desserts
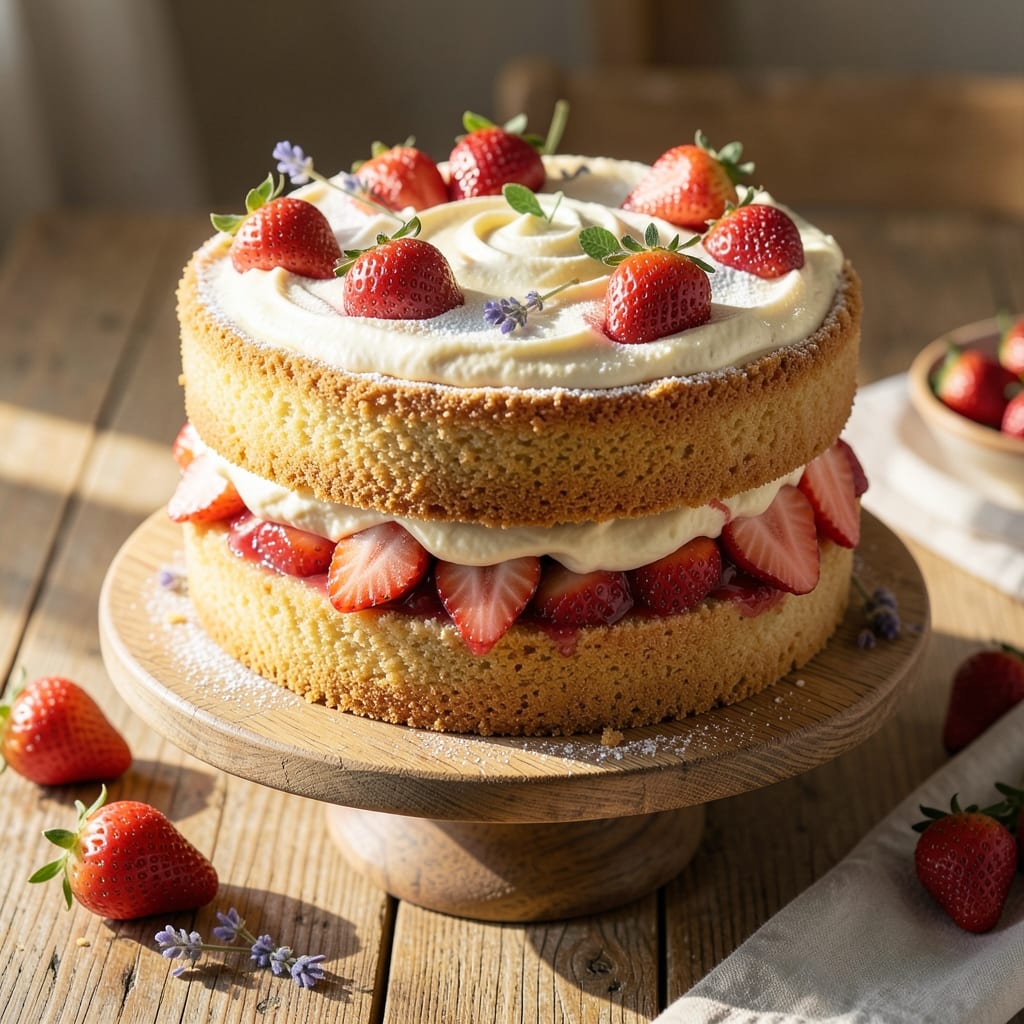
This all natural strawberry cake recipe delivers layers of homemade joy with fresh fruit that tastes like summer in every bite. 🌞 The secret lies in using real strawberries—not syrup or artificial flavors—to create a moist, tender crumb that practically melts in your mouth. I've perfected this recipe over years of baking, ensuring each slice is packed with natural sweetness and vibrant color without a single artificial additive.
The cake's magic comes from a simple yet effective technique: folding fresh strawberries into the batter and layering them between moist almond flour cake layers. This approach ensures the fruit stays juicy and vibrant, not soggy or overcooked. The result is a cake that's light, tender, and bursting with real strawberry flavor—no artificial shortcuts needed.
What you'll end up with is a stunning dessert that's perfect for celebrations or a special treat. The layers are perfectly balanced—moist, not dry, with a delicate crumb that holds up beautifully. The strawberries add natural sweetness and a pop of color that makes every slice look as good as it tastes.
Serve it warm with a dollop of whipped cream or a scoop of vanilla ice cream for the full experience. This cake is simple enough for a weeknight dessert but elegant enough for any occasion. Let's get baking!
Ingredients for all natural strawberry cake
Fresh strawberries and simple pantry staples create a naturally sweet, vibrant cake bursting with summer flavor.
| Ingredient | Amount | Notes |
|---|---|---|
| Fresh Strawberries 🍓 | 1 ½ lb | Hulled, sliced into chunks |
| All-Purpose Flour 🌾 | 2 cups | Sifted for light texture |
| Almond Flour 🌰 | 1 cup | Fine, for moist crumb |
| Granulated Sugar 🍚 | 1 ½ cups | Organic preferred |
| Unsalted Butter 🧈 | 1 cup | Softened to room temp |
| Large Eggs 🥚 | 3 whole | Room temperature |
| Vanilla Extract 🌿 | 1 tbsp | Pure, high-quality |
| Baking Powder 🧂 | 2 tsp | Aluminum-free |
| Salt 🧂 | ½ tsp | Fine sea salt |
| Lemon Juice 🍋 | 1 tbsp | Freshly squeezed |
| Heavy Cream 🥛 | 1 cup | Cold for whipped cream |
| Powdered Sugar 🍚 | ½ cup | For dusting |
The strawberries are the star—pick ripe, vibrant ones with no bruises. Local farmers markets or organic sections at Whole Foods usually have the sweetest varieties. If using frozen, thaw and pat dry to avoid excess moisture in the batter. Almond flour is key for that delicate crumb; Bob's Red Mill or Anthony's Goods brands work best. For the butter, Plugrá or Land O'Lakes unsalted is my go-to—never use salted here. The sugar should be fine granulated; Domino or C&H brands are reliable, but organic makes a subtle difference in flavor.
No fresh strawberries? Frozen works in a pinch—just thaw and drain well. Running short on almond flour? Substitute 3/4 cup all-purpose flour plus 1/4 cup cornstarch for a similar texture. The vanilla extract matters—Nielsen-Massey or McCormick Pure are worth the splurge. For the whipped cream, heavy cream at 36-38% fat whips best; Store brand often works just as well as name brands. If you're avoiding dairy, coconut cream whipped with powdered sugar gives a similar texture. The lemon juice brightens the flavor—Meyer lemons add extra sweetness if you can find them.
Store the cake layers in an airtight container between parchment paper for up to 3 days. Assemble fully only when ready to serve—this keeps the layers perfectly moist. The whipped cream should be made fresh; it holds up for 2 hours in the fridge if covered tightly. For make-ahead convenience, bake the layers a day ahead, cool completely, then wrap individually in plastic. The strawberries can be prepped in advance too—toss the sliced fruit with a sprinkle of sugar and store in the fridge for 24 hours before using.
Why You'll Love This Recipe
- No Fuss Layers: I swear, this cake comes together like a dream—just mix the wet ingredients (butter, sugar, strawberries), fold in the dry (flours, a pinch of salt), and bake. The almond flour keeps it tender without needing a mixer, and those fresh strawberries add natural sweetness with zero fuss.
- Strawberry Buttercream Magic: That buttercream? Just whipped butter, sugar, and a splash of strawberry puree from the leftover fruit. It’s rich but not cloying, with a bright, fruity kick that makes every bite taste like summer in a slice. (Yes, even if you’re eating it in January.)
- Weekend or Weeknight: Honestly, this cake works for everything. Serve it for brunch with a dollop of Greek yogurt, pack slices for kids’ lunches (they’ll actually eat the veggies hidden in the batter if you tell them it’s dessert), or bring it to a potluck where it’ll disappear faster than the chips.
- Budget-Friendly Luxury: Between us, almond flour might seem pricey, but a little goes a long way—this recipe uses just half a cup, and the rest of the ingredients are pantry staples. Plus, strawberries are often on sale in summer, so you can make two cakes for the cost of one store-bought. Leftovers? They reheat beautifully or freeze like a champ.
Step-by-step instructions for all natural strawberry cake
Here's how to create layers of tender cake with vibrant strawberry flavor—no artificial ingredients in sight.
👨🍳 Step 1: Prepare the Strawberry Filling
In a medium bowl, combine the 1.5 lb fresh strawberries with the 1.5 cups granulated sugar and 1 tbsp lemon juice. Let this mixture sit for 10 minutes while you prepare the cake batter. The strawberries will release their juices, creating a natural syrup that enhances the filling's richness.
After 10 minutes, gently mash the strawberries with a fork until you achieve a chunky consistency—some whole berries should remain for texture. Strain the mixture through a fine-mesh sieve to remove seeds, pressing gently with a spoon to extract all the juices. This strained filling will create a smooth, vibrant layer between the cake's sponges. Keep it at room temperature while you bake the cake layers.
👨🍳 Step 2: Mix the Cake Batter
In a large mixing bowl, whisk together the 2 cups all-purpose flour, 1 cup almond flour, 2 tsp baking powder, and 0.5 tsp salt. Sift the dry ingredients together to ensure a light, airy texture—this prevents dense cake layers. Set the bowl aside while you prepare the wet ingredients.
In a separate bowl, cream the 1 cup softened unsalted butter and 1.5 cups granulated sugar together using an electric mixer on medium speed for 3-4 minutes. The mixture should become pale and fluffy, nearly doubling in volume. This creaming process incorporates air, which creates a tender crumb. Add the 3 whole large eggs, one at a time, mixing well after each addition. Stir in the 1 tbsp vanilla extract until fully combined.
🍳 Step 3: Combine Wet and Dry Ingredients
Gradually add the dry ingredients to the wet mixture, mixing on low speed just until combined. Avoid overmixing—you should still see small streaks of flour. The batter should be smooth and thick, similar to pancake batter. Fold in the prepared strawberry filling, distributing it evenly throughout the batter. This ensures each layer will have that signature strawberry flavor.
Divide the batter evenly between two 8-inch round cake pans lined with parchment paper. The batter should fill each pan about ⅔ full, allowing room for the cakes to rise. Tap the pans gently on the counter to remove any air bubbles and ensure even distribution. Bake at 350°F for 25-30 minutes, or until a toothpick inserted into the center comes out clean. Rotate the pans halfway through baking for even browning.
🥘 Step 4: Assemble the Cake Layers
Once the cakes have cooled completely, level the tops if necessary using a serrated knife. Place the first cake layer on a cake stand or plate. Spread ⅓ of the reserved strawberry filling evenly over the top, leaving a ½-inch border around the edges. This prevents the filling from oozing out during assembly.
Whip the 1 cup cold heavy cream with the 0.5 cup powdered sugar until soft peaks form. Spread a thin layer of whipped cream over the strawberry filling to help the second cake layer adhere. Place the second cake layer on top, press gently, and repeat the process with the remaining filling and whipped cream. Chill the assembled cake in the refrigerator for at least 2 hours before serving to allow the flavors to meld and the layers to set.
Pro Tips For Making All Natural Strawberry Cake
- Prep Strawberries Like a Pro: Hull and slice strawberries just before mixing—no waiting. Overripe berries? Toss them in a blender with 1 tablespoon sugar and strain for a smoother, sweeter filling. (Yes, even if you’re impatient like me, this makes a real difference.) ---
- Whisk Butter and Sugar Properly: Cream the butter and sugar until it’s light and fluffy—about 3-4 minutes with a mixer. I learned this the hard way: under-whipped batter turns dense. If your butter’s soft but not room temp, microwave it in 5-second bursts until it just melts into itself. ---
- Sift Almond Flour First: Almond flour clumps like a stubborn guest at a party. Sift it before mixing with all-purpose flour to avoid lumps in your batter. Pro move: Use a fine-mesh sieve and tap the bowl sharply to break up any stubborn bits. ---
- Test for Doneness Early: Strawberry cakes often look underdone when they’re actually perfect. Insert a toothpick at the center—if it comes out clean but slightly moist (not wet), pull it out. Overbaking dries out the almond flour’s richness, and nobody wants cake that tastes like sawdust.
Storing and reheating your all natural strawberry cake
Refrigerator Storage
Store individual cake layers in an airtight container between parchment paper for up to 3 days at 40°F or below. The almond flour keeps them moist without drying out, but avoid stacking fully assembled cakes—they'll get soggy. I wrap each cooled layer in plastic wrap before placing them in the container to prevent moisture loss. 🥧
Freezer Prep Tips
For longer storage, bake the layers a day ahead and freeze them individually in plastic wrap for up to 2 months. Thaw overnight in the fridge before assembling. The strawberry filling freezes beautifully too—store it in a small airtight container with a splash of lemon juice to preserve color. Just don't freeze the whipped cream; make it fresh before serving. ❄️
Reheating Slices
If you're reheating individual slices, warm them in the microwave for 10-15 seconds on 50% power to maintain moisture. For a stovetop approach, place slices on a lightly greased skillet over low heat for 1-2 minutes per side—this adds a subtle caramelized flavor. Always serve with fresh whipped cream to refresh the texture. 🔥
Whipped Cream Freshness
Make the whipped cream right before serving—it holds its shape for 2 hours in the fridge if stored in an airtight container. For extra stability, chill the bowl and beaters before whipping. If the cream starts to separate, simply rewhip it with a pinch of powdered sugar. The contrast of cold cream on warm cake is what makes this dessert magical. ✨
Strawberry Filling Refresh
If you've prepped the strawberry filling in advance, store it in the fridge for 24 hours before using. The flavors deepen slightly as the strawberries macerate. For extra vibrancy, add a pinch of citric acid (available at baking stores) to maintain that bright red color. Just don't overdo it—you want natural flavor, not chemical brightness. 🍓
Serving Warm vs Cold
This cake is delicious both ways! Serve warm from the oven with a scoop of vanilla bean ice cream for a decadent treat, or chill it for 2 hours before slicing for a lighter dessert. The texture changes slightly—warm cake is more tender, while chilled layers hold their shape better. I like to offer both options at gatherings. 💛
Nutrition facts
Frequently asked questions
Can I substitute frozen strawberries in this recipe?
Yes, but with one key adjustment! Thaw the frozen berries completely first, then pat them very dry with paper towels to remove excess moisture. This prevents soggy cake layers. For best results, use 1.5 lb thawed frozen strawberries and add 1 extra tablespoon of sugar to compensate for their lower natural sweetness.
Why does your recipe use almond flour instead of regular flour?
The almond flour creates a naturally moist, tender crumb that's lighter than traditional cake flour. It also adds subtle nutty depth that complements the strawberries beautifully. For a closer texture to classic cake, you can substitute 3/4 cup all-purpose flour plus 1/4 cup cornstarch for the almond flour, but the flavor will be slightly different.
How do I prevent the strawberry filling from leaking out?
Leave a 1/2-inch border around the edges when spreading the filling between layers. This creates a "dam" that holds the filling in place. Also, chill the cake for at least 2 hours before serving—this helps the layers set properly. For extra insurance, spread a thin layer of whipped cream between the filling and cake layers to act as a glue.
Can I make this cake without eggs?
Yes! Replace the 3 eggs with 3 tablespoons ground flaxseed plus 9 tablespoons water (let sit for 5 minutes to thicken) or 1/2 cup unsweetened applesauce. For best results, reduce the sugar by 1 tablespoon since egg substitutes can add slight sweetness. The texture will be slightly denser but still delicious.
What's the best way to decorate this cake?
Keep it simple with fresh strawberries! Arrange whole berries on top or create a strawberry "drip" by melting 1/4 cup white chocolate and drizzling it over the chilled cake. For a rustic look, sprinkle crushed pistachios or toasted coconut around the base. The natural beauty of the cake shines best with minimal decoration.