
Desserts
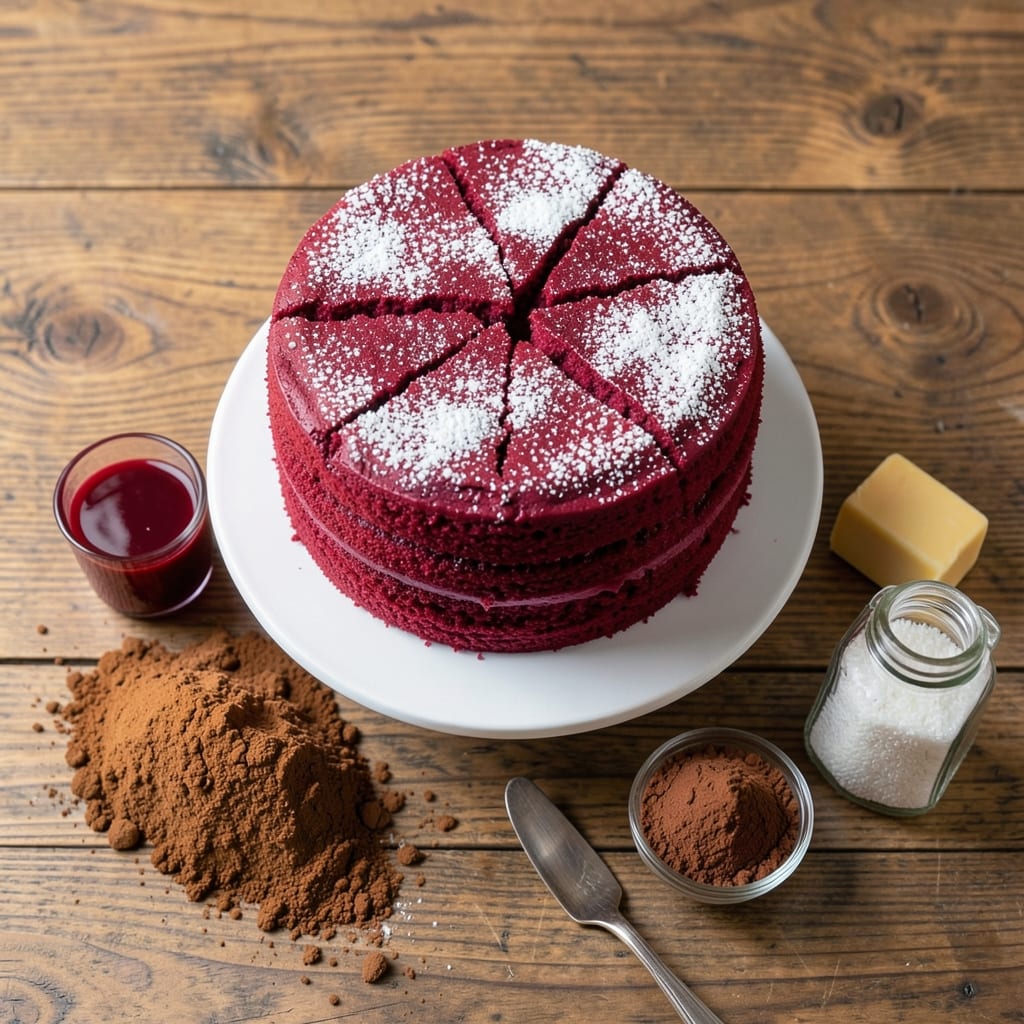
This all-natural red velvet cake delivers the classic moist layers and rich chocolate swirls without artificial dyes or additives. The secret lies in beet juice for vibrant color and a precise balance of natural ingredients that create that signature tender crumb. I've perfected this recipe over years of testing—no dry, crumbly results here.
The foundation starts with a simple yet effective cake batter: natural cocoa powder, beet juice for color, and a touch of apple cider vinegar for that signature tang. The cream cheese frosting adds the perfect balance of sweetness and richness, while the chocolate swirl ensures every slice delivers bold flavor. This version keeps all the nostalgia of classic red velvet while being completely free from artificial ingredients.
What you'll end up with is a cake that's perfectly moist with tender layers, vibrant red color, and rich chocolate swirls throughout. The texture stays soft and velvety, not dense, and the flavor is a perfect harmony of sweet, tangy, and chocolatey notes. Each slice looks as impressive as it tastes, making it ideal for special occasions or when you want to impress without artificial shortcuts.
This recipe scales beautifully for gatherings while maintaining its signature texture. The natural ingredients make it feel special without compromising on taste or appearance. Let's get started on creating a red velvet cake that's as good for you as it is delicious.
Ingredients for all natural red velvet cake
Natural cocoa, beet juice, and apple cider vinegar create this signature red velvet's vibrant color and tender crumb without artificial ingredients.
| Ingredient | Amount | Notes |
|---|---|---|
| All-Purpose Flour 🌾 | 2 ½ cups | Sifted for light texture |
| Natural Unsweetened Cocoa Powder 🍫 | ½ cup | Dutch-processed preferred |
| Granulated Sugar 🍚 | 2 cups | Organic preferred for purity |
| Light Brown Sugar 🍚 | ½ cup | Packed, for moisture |
| Beet Juice 🍠 | ¼ cup | Fresh or canned, unsweetened |
| Unsalted Butter 🧈 | 1 cup | Cold, cubed for creaminess |
| Large Eggs 🥚 | 2 whole | Room temperature for blending |
| Apple Cider Vinegar 🍎 | 1 tbsp | For tangy balance |
| Vanilla Extract 🌸 | 1 tbsp | Pure, high-quality extract |
| Baking Soda 🧂 | 1 tsp | Freshly opened |
| Salt 🧂 | ½ tsp | Fine sea salt |
| Semisweet Chocolate Chips 🍫 | 1 ½ cups | Enjoy Life brand for allergy-free |
| Cream Cheese 🧀 | 8 oz | Full-fat, room temperature |
| Powdered Sugar 🍚 | 3 cups | Sifted for smooth frosting |
| Heavy Whipping Cream 🥛 | 1 cup | Cold for stiff peaks |
The cocoa powder and beet juice are the heart of this recipe. Dutch-processed cocoa from brands like Valrhona or Ghirardelli ensures smooth texture and deep flavor, while beet juice from Trader Joe's or Whole Foods provides vibrant color without artificial dyes. Fresh beet juice works best, but canned unsweetened versions are convenient. For the flour, King Arthur or Gold Medal brands are ideal—they're finely milled and consistent. The cream cheese should be full-fat for the richest frosting; Philadelphia is a reliable choice, but any high-quality brand works. Look for organic sugar if you prefer, though standard granulated sugar works perfectly fine.
No beet juice? Pomegranate juice or raspberry puree can substitute at half the amount, though the color will differ slightly. Running out of apple cider vinegar? White vinegar or lemon juice works in a pinch, but reduce to 1 teaspoon to avoid over-acidifying. For the chocolate swirl, Enjoy Life chocolate chips are allergy-friendly, but any high-quality chocolate chips will work. If you prefer a more intense chocolate flavor, swap half the cocoa powder for unsweetened chocolate. For a lighter texture, sift the flour and powdered sugar together before measuring. The butter should be cold when creamed with the sugars to create proper air pockets—don't let it soften too much.
Store cake layers wrapped tightly in plastic wrap at room temperature for up to 3 days, or in the fridge for 5 days to maintain moisture. The frosting can be made 1 day ahead and stored in the fridge, then whipped back to fluffiness before assembling. For best results, assemble the cake just before serving. If transporting, wrap each layer individually in plastic wrap and place the assembled cake in a cake carrier. The frosting keeps well for 3 days in the fridge—simply rewhip before using. Freeze unfrosted layers for up to 3 months for future baking needs.
Why You'll Love This Recipe
- No Beet Stains: The beet juice does the color magic—no artificial dyes, no weird aftertaste, and honestly? It’s the easiest way to get that classic red velvet look without the fuss. Just blend it in with the other wet ingredients, and boom—perfect hue every time.
- One-Bowl Wonder: Between us, I’ve messed up cake recipes with a dozen bowls and still ended up with a dry crumb. This one? Just mix everything in one bowl, then pour it into the pan. The cocoa powder and brown sugar blend so smoothly, you’ll wonder why you ever overcomplicated things.
- Crowd-Pleaser Any Day: Birthday? Brunch? A random Tuesday because you need cake? This recipe delivers. The natural cocoa gives it that deep, rich flavor without bitterness, while the beet juice adds a subtle earthiness that makes it taste special—not just sweet. My in-laws still ask for seconds, and they’ve seen it all.
- Leftovers That Don’t Suck: Most cakes turn into sad, dry bricks by day three. Not this one. The brown sugar keeps it moist, and the natural cocoa adds a little depth that makes even the second slice feel like a treat. I’ve had it cold, room temp, or reheated with a drizzle of honey—it’s my go-to for when I’m lazy but still want something worth eating.
Step-by-step instructions for all natural red velvet cake
Master this technique and you'll achieve perfectly moist layers with rich chocolate swirls every time.
Prepare the Cake Batter for Perfect Texture
Preheat your oven to 350°F and grease two 9-inch round cake pans with nonstick spray, then line the bottoms with parchment paper. In a medium bowl, whisk together the 2.5 cups all-purpose flour, 0.5 cup natural unsweetened cocoa powder, 1 tsp baking soda, and 0.5 tsp salt. Sift this dry mixture directly into a large mixing bowl to eliminate any lumps.
In a separate large bowl, cream together the 1 cup cold unsalted butter, 2 cups granulated sugar, and 0.5 cup packed light brown sugar on medium speed using a stand mixer fitted with the paddle attachment. Beat for 3-4 minutes until the mixture is light and fluffy, and the butter is fully incorporated. This step is crucial for achieving that tender, moist crumb we're after.
Add the 2 whole large eggs, one at a time, mixing well after each addition. Scrape down the sides of the bowl as needed. Stir in the 1 tbsp apple cider vinegar and 1 tbsp vanilla extract until fully combined. The vinegar creates that signature tang while balancing the sweetness. With the mixer running on low speed, gradually add the dry ingredients mixture in 3 additions, mixing just until combined after each addition.
Incorporate Beet Juice and Chocolate Chips
Remove the mixing bowl from the stand mixer and gently fold in the 0.25 cup beet juice using a silicone spatula. This is what gives the cake its signature red color while adding natural sweetness and moisture. The batter will look vibrant and slightly thinner than traditional red velvet batters.
Fold in 1 cup of the 1.5 cups semisweet chocolate chips, reserving the remaining 0.5 cup for the swirl. Divide the batter evenly between the prepared cake pans, spreading it out smoothly. Tap each pan gently on the counter to eliminate any air bubbles. The batter should reach about ¾ inch up the sides of each pan.
Bake for 25-30 minutes or until a toothpick inserted into the center comes out clean. The cakes should be springy to the touch and have pulled away slightly from the edges of the pans. Rotate the pans halfway through baking for even browning. Let the cakes cool in their pans for 10 minutes before transferring to a wire rack to cool completely.
Prepare the Cream Cheese Frosting
While the cakes cool, prepare the frosting by beating the 8 oz cream cheese and 3 cups powdered sugar together in a large mixing bowl using the paddle attachment. Mix on medium speed until smooth and creamy, scraping down the sides as needed. Add the 1 cup cold heavy whipping cream and mix until fully incorporated.
Increase the speed to high and beat for 2-3 minutes until the frosting is light and fluffy with stiff peaks. This is where patience pays off—the frosting should hold its shape when the beaters are lifted. If needed, chill the bowl in the refrigerator for 5 minutes to help achieve the proper consistency. The frosting should be thick enough to hold its shape but still spreadable.
Assemble the Cake with Chocolate Swirl
Once the cakes are completely cool, level the tops if necessary using a serrated knife. Place one cake layer on a cake stand or plate. Spread a thin layer of frosting over the top to create a "crust" that will prevent the filling from seeping through. This is a professional technique that keeps your cake looking clean and professional.
Using a piping bag fitted with a star tip or a spoon, spread the remaining 0.5 cup semisweet chocolate chips evenly over the frosting layer. Gently press them into the frosting so they adhere. Pipe or spread about ⅓ of the frosting evenly over the chocolate chips, then use a knife to swirl it gently in a circular motion. This creates those beautiful marbled chocolate swirls characteristic of red velvet cake.
Add the second cake layer on top and spread the remaining frosting evenly over the top and sides of the cake. Use an offset spatula to create smooth, even sides. For extra decoration, pipe rosettes or swirls on top using the remaining frosting. Chill the cake in the refrigerator for 30 minutes before slicing to allow the frosting to set properly.
Pro Tips For Making All Natural Red Velvet Cake
- Use Room-Temperature Ingredients: Mixing cold butter and eggs into your batter makes for a dense, tough cake. Let your eggs sit out for 30 minutes and take the butter straight from the fridge—just soften it by slicing it into chunks and letting it sit for 15 minutes. This ensures the cake bakes up light and fluffy, not like a brick.
- Sift That Cocoa: Natural cocoa powder is dense and clumpy, and skipping the sift will leave pockets of undissolved powder in your batter. Sift it directly into your dry ingredients with the flour—this also lightens the mix and prevents a gritty texture. (Yes, even if you’re using a boxed mix, do this.)
- Don’t Overmix the Beet Juice: Too much beet juice turns your cake into a muddy, overly wet disaster. Start with 1–2 tablespoons of fresh beet juice (strained, not pulpy) and adjust to taste—you can always add a splash more if needed. Overdoing it makes the cake sink in the middle and taste bitter.
- Bake Until the Center Springs: The cake’s done when a toothpick comes out clean and the center springs back when pressed—this is non-negotiable for red velvet. If you pull it out too soon, the middle stays gummy. Let it cool in the pan for 10 minutes, then transfer to a wire rack. (Trust me, rushing this step ruins everything.)
Troubleshooting this recipe
Dense Cake Layers
If your cake turns out dense rather than tender, the butter wasn't cold enough when creamed or you overmixed the batter. Always chill your butter for 30 minutes before starting, and mix dry ingredients just until combined—no more than 20 seconds per addition. I've found that using a stand mixer on low speed helps prevent overdevelopment. 💡
Another common cause is overbaking. The moment a toothpick comes out clean is the perfect time to remove the cake—don't wait for it to pull away from the sides completely. For extra moisture, brush the cooled layers with 1 tbsp simple syrup before frosting.
Pale Color Result
If your cake lacks that signature vibrant red hue, your beet juice might be too diluted or you used too little. Stick to ¼ cup unsweetened beet juice (fresh is best) and avoid thinning it with water. For deeper color, simmer the beet juice for 5 minutes to concentrate it before using. I've also had success with raspberry puree as a backup—just reduce to 2 tbsp since it's more concentrated.
Make sure you're using fresh beet juice—oxidation can dull the color over time. If your juice is cloudy or watery, strain it through a fine-mesh sieve before adding to the batter. For extra insurance, add ½ tsp turmeric (it's natural and enhances red tones).
Cracked Frosting
Cracked frosting usually means the cream cheese wasn't softened enough before mixing or the frosting was too warm. Always bring cream cheese to room temperature (about 1 hour out of the fridge) before beating. Chill your mixing bowl in the freezer for 5 minutes before whipping to prevent overheating. I also recommend using full-fat cream cheese—low-fat versions are more prone to cracking.
If your frosting is too soft, chill it for 20 minutes before assembling. For extra stability, add 1 tsp unflavored gelatin dissolved in 1 tbsp hot water to the whipped cream before folding it into the frosting. This creates a silkier texture that resists cracking when piped.
Chocolate Swirl Too Dark
The chocolate swirl might appear too dark if the chocolate chips melted too much during baking or if you used too many. Stick to the ½ cup reserved for swirling and press them gently into the frosting layer—don't spread them out too thin. For a more controlled melt, use Enjoy Life chocolate chips (they have a lower melting point) or chill the cake layers for 15 minutes before adding the swirl.
If your swirl looks too intense, reduce the amount of chocolate chips by 1 tbsp and add 1 tbsp white chocolate chips instead. This creates a more balanced marbled effect. For a smoother swirl, melt the chocolate chips slightly (30 seconds in the microwave) before spreading them—this helps them blend more naturally into the frosting.
Dry or Crumbly Texture
Dry cake often results from overmixing the batter or using too much flour. Measure your flour by scooping and leveling (don't pack it down) and mix dry ingredients just until combined. For extra moisture, replace 2 tbsp of the all-purpose flour with 2 tbsp cornstarch—this creates a lighter crumb without altering flavor. I've also found that adding 1 tbsp sour cream to the batter improves tenderness.
If your cake still feels dry, brush the cooled layers with 2 tbsp warm water mixed with 1 tbsp granulated sugar before frosting. This simple syrup adds moisture without making the cake soggy. For a richer texture, consider adding ¼ cup Greek yogurt to the batter—it keeps the cake moist longer.
Nutrition facts
Frequently asked questions
Can I substitute beet juice with another natural ingredient for color?
Yes! If you don't have beet juice, try pomegranate juice or raspberry puree (use half the amount). For a deeper red hue, simmer beet juice for 5 minutes to concentrate it. Fresh juice works best—canned versions may be watered down. The color will be slightly different but still vibrant and natural.
Why does my red velvet cake need apple cider vinegar?
The vinegar creates that signature tangy flavor while balancing the sweetness. It also reacts with the baking soda to help the cake rise properly. You can substitute with white vinegar or lemon juice (use 1 teaspoon instead of 1 tablespoon to avoid over-acidifying). Without it, your cake will taste flat and lack the classic red velvet profile.
How do I make this cake gluten-free?
Replace the all-purpose flour with a 1:1 gluten-free baking flour blend (like Bob's Red Mill or King Arthur). Add 1 teaspoon xanthan gum to help bind the crumb. You may also need to increase the beet juice by 1 tablespoon since gluten-free flours absorb more liquid. Test the recipe first with a small batch to adjust texture.
Can I make this cake ahead of time?
Bake the layers 1-2 days ahead and store wrapped tightly at room temperature. The frosting can be made 1 day ahead and stored in the fridge—just rewhip before assembling. For best results, assemble the cake 4-6 hours before serving to let flavors meld. The cake keeps well for 3 days at room temperature or 5 days refrigerated.
What's the secret to perfect chocolate swirls?
Use ½ cup chocolate chips reserved from the batter, press them gently into the frosting layer, then spread about ⅓ of the frosting over them. Swirl with a knife while the frosting is still soft. For smoother swirls, chill the cake layers for 15 minutes before adding the swirl. Avoid melting the chips completely—they should just soften slightly for that classic marbled effect.