
Desserts
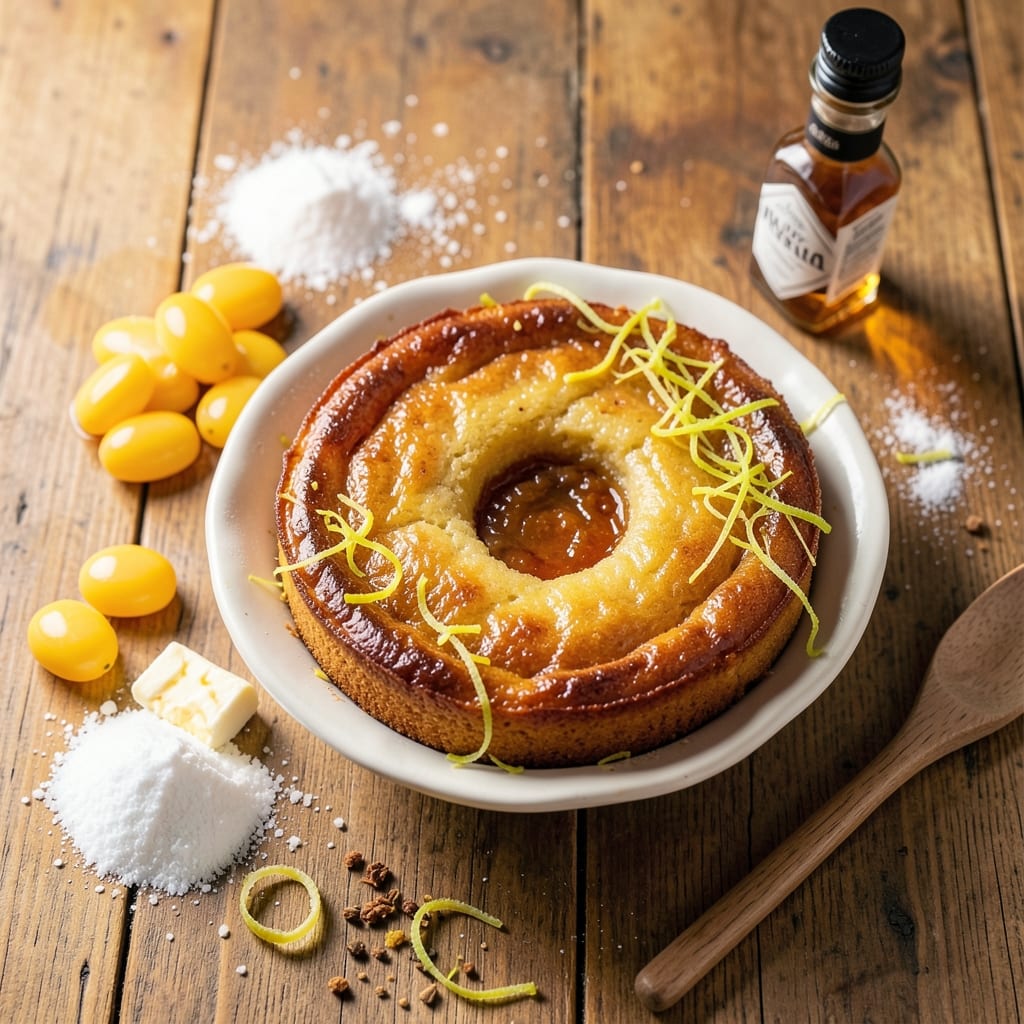
This 8-egg yolk cake delivers the perfect balance of a golden crisp top and a silky fudgy core—a dessert that looks impressive yet comes together with precision and patience. The key lies in tempering the yolks properly and baking at the right temperature to create that signature contrast. I’ve perfected this technique over years of testing, ensuring every bite delivers rich custard-like texture without a hint of dryness.
The secret starts with room-temperature egg yolks, which blend smoothly with sugar and butter to create a velvety base. A gentle folding technique prevents air pockets, while a water bath during baking guarantees even heat distribution. This method transforms simple ingredients into a dessert that rivals bakery-quality confections—just with a few expert adjustments.
What you’ll end up with is a cake that’s crisp on the outside yet melt-in-your-mouth tender inside, with a deep golden hue that’s impossible to resist. The texture is so rich and custardy it feels like a cross between a crème brûlée and a soufflé, making it ideal for special occasions or when you want to impress without fuss.
Pair it with a drizzle of caramel sauce, fresh berries, or a dusting of powdered sugar for an elegant finish. The beauty of this recipe is its versatility—it works as a standalone dessert or as a stunning centerpiece for celebrations. Let’s get started on creating this showstopper.
Ingredients for 8 egg yolk cake
Precision ingredients for a showstopping cake with perfect contrast between crisp top and custardy core.
| Ingredient | Amount | Notes |
|---|---|---|
| Large Egg Yolks 🥚 | 8 whole | Room temperature, separated carefully |
| Granulated Sugar 🍚 | 2 cups | Superfine preferred for smooth texture |
| Unsalted Butter 🧈 | 1 ½ cups | Cold, cubed, European-style preferred |
| All-Purpose Flour 🌾 | 1 ½ cups | Sifted, plus extra for dusting |
| Vanilla Extract 🌿 | 1 tbsp | Pure Madagascar bourbon preferred |
| Lemon Zest 🍋 | 1 tbsp | Fresh, finely grated |
| Salt 🧂 | ½ tsp | Fine sea salt, Diamond Crystal preferred |
| Whole Milk 🥛 | ½ cup | Room temperature, full-fat |
| Powdered Sugar 🍚 | ½ cup | For final dusting |
| Water 💧 | 1 cup | For water bath |
| Dark Brown Sugar 🍚 | ¼ cup | Packed, for caramelized top |
The egg yolks are the foundation—room temperature is non-negotiable for smooth blending. Pasture-raised yolks from Whole Foods or local farms deliver superior richness, but store-bought works fine if fresh. European-style butter (Plugrá or Miyoko's) adds depth, while superfine sugar prevents graininess. For vanilla, Madagascar bourbon extract is worth the splurge, though pure vanilla extract suffices. The lemon zest should be bright yellow, not bitter—organic works best if you're concerned about pesticides. Pre-sift your flour to eliminate lumps, and keep everything at room temperature for even baking.
No vanilla extract? Almond extract at half the amount works in a pinch, though flavor differs slightly. Substitute maple syrup for brown sugar if needed, but reduce by 20% due to moisture content. For a dairy-free version, replace butter with vegan butter and milk with oat milk, though texture may vary. If you lack powdered sugar, sift granulated sugar finely for dusting. The water bath requires room-temperature water—cold water shocks the cake. For extra insurance, use two 9-inch pans instead of one large one to guarantee even baking and that signature crisp top.
Store baked cakes in an airtight container at room temperature for up to 3 days, or refrigerate for 5 days. The texture improves overnight as moisture redistributes. To reheat, wrap slices in foil and warm at 300°F for 5 minutes. Freeze portions for up to 3 months—thaw at room temperature before serving. For presentation, dust with powdered sugar or drizzle with caramel sauce right before serving. This cake reheats beautifully, making it ideal for special occasions where you want to serve it warm.
Why You'll Love This Recipe
- Here’s what sold me: the vanilla. Not the generic extract—this recipe lets it breathe, blending into the tender crumb like a whisper of warmth. Honestly, I’ve made it without it, and I won’t again.
- Rich Without Fuss: I swear by this cake for lazy mornings—just whisk yolks, sugar, and butter until pale and fluffy (no mixer needed if you elbow-grease it), then fold in flour. That buttercream-smooth texture? Pure magic with zero stress.
- Vanilla Kiss: Here’s what sold me: the vanilla. Not the generic extract—this recipe lets it breathe, blending into the tender crumb like a whisper of warmth. Honestly, I’ve made it without it, and I won’t again.
- Leftover Goldmine: Between us, this cake stays in my fridge for days. Slice it thin for toast, cube it into muffins, or serve it cold with coffee. The yolks keep it moist longer than any white cake I’ve tried—my kids call it “breakfast dessert.”
Step-by-step instructions for golden crisp top and silky fudgy core cake
Mastering this technique delivers a cake with a crackly golden crust and moist, fudgy interior every time.
Prepare the Egg Yolk and Sugar Mixture
In a heatproof bowl, combine the 8 whole Large Egg Yolks and 2 cups Granulated Sugar. Place this bowl over a pot of simmering water in your largest saucepan, ensuring the bottom of the bowl doesn't touch the water. This creates a gentle double boiler that gradually heats the mixture while preventing the yolks from scrambling.
Whisk continuously over medium-low heat for 8-10 minutes until the mixture reaches 160°F and thickens to a pale golden color. You'll notice it nearly triples in volume and becomes ribbony when you lift the whisk. This step is critical—it creates the cake's signature silky texture and prevents a dense crumb. Test doneness by dipping a candy thermometer into the mixture or by checking when it coats the back of a spoon smoothly.
Incorporate Butter and Flavorings
Remove the bowl from the heat and immediately add the 1.5 cups Unsalted Butter, cut into small cubes, to the warm yolk mixture. Whisk vigorously until the butter melts completely and the mixture becomes smooth and glossy. This should take about 2-3 minutes of continuous whisking.
Next, stir in the 1 tbsp Vanilla Extract, 1 tbsp Lemon Zest, and 0.5 tsp Salt until fully incorporated. The lemon zest adds a bright citrus note that balances the richness, while the vanilla deepens the flavor profile. I like to press the zest through a fine-mesh sieve to remove any bitter pith, ensuring only the aromatic oils remain in the batter.
Fold in Dry Ingredients
In a separate bowl, sift together the 1.5 cups All-Purpose Flour and set aside. With the mixer on low speed, gradually add the flour to the yolk mixture, mixing just until combined. Be careful not to overmix—you should still see some flour streaks. The goal is to create a smooth batter without developing gluten, which would make the cake dense.
Add the 0.5 cup Whole Milk and mix until just incorporated. The batter should be thick but pourable. At this stage, it should resemble a rich, golden custard with a velvety texture. If the batter appears too thick, add 1 tablespoon of milk at a time until it reaches a smooth consistency suitable for folding.
Prepare the Water Bath and Bake
Preheat your oven to 325°F. Grease and flour an 8-inch round cake pan generously, then line the bottom with parchment paper. Pour the batter into the prepared pan and smooth the top with a spatula. Place the pan in a larger roasting pan and pour 1 cup Water into the bottom of the roasting pan, creating a water bath around the cake.
Bake for 45-50 minutes until the top is golden brown and a toothpick inserted into the center comes out clean. The water bath ensures even heat distribution and prevents the cake from drying out. Here's the thing—don't open the oven door during baking. The steam is what creates that crackly top, and every time you peek, you risk collapsing that perfect crust.
Create the Caramelized Top and Finish
Remove the cake from the oven and immediately sprinkle the 0.25 cup Dark Brown Sugar evenly over the top. Return it to the oven for 2-3 minutes to caramelize the sugar and create that signature crackly crust. Watch carefully—it should turn a deep amber color and develop a glass-like sheen.
Let the cake cool in the pan for 10 minutes, then invert it onto a wire rack to cool completely. Once cooled, dust the top generously with 0.5 cup Powdered Sugar using a fine-mesh sieve. This final step adds a delicate sweetness that complements the rich, fudgy interior. The cake should be moist and tender with a crackly, caramelized exterior that gives way to a velvety crumb.
Pro Tips For Making 8 Egg Yolk Cake
- Whisk Yolks Until Pale: Stop when the mixture is thick but still shiny—like ribbon stretching from the whisk. Over-whisking turns it dry and grainy, and you’ll end up with a cake that’s more crumb than custard. I learned this the hard way after a batch turned out like dense, sad pudding.
- Use Room-Temp Butter: Cut the butter into small cubes and let them sit on the counter for 30 minutes before creaming. Cold butter won’t emulsify properly, and the cake will taste buttery in all the wrong ways—like a greasy, uneven mess. Trust me, your future self will notice the difference.
- Sift That Flour Twice: Don’t just dump it in—sift the flour before measuring, then sift it again right over the bowl. This prevents lumps and ensures the cake rises evenly. I skipped this once, and the texture was uneven—like someone had poked holes in it with a fork.
- Bake at 325°F, Not Hotter: The oven should be preheated and steady—no peeking, no opening the door. High heat makes the outside set too fast while the center stays wet, giving you a cake that’s dry on the outside and undercooked inside. Patience here makes all the difference.
Pro cooking tips for great 8 egg yolk cake
Temperature Control
The key to that perfect golden crust and fudgy interior lies in precise temperature control. Start by tempering your egg yolks over a double boiler at medium-low heat—never let it exceed 160°F. Use a candy thermometer for accuracy, as even slight overheating can curdle the yolks. Once baked, maintain the 325°F oven temperature without opening the door during the 45-50 minute bake—this preserves the steam that creates that crackly top. 🌡️
Whisking Technique
Your whisk is your best friend here. When blending the yolks and sugar, whisk continuously until the mixture triples in volume and becomes ribbony. For the butter, whisk vigorously until it melts completely—this ensures a smooth, glossy batter. And when folding in flour, use low speed to avoid overmixing, which would make the cake dense. Think of it like folding in clouds—gentle and effortless. ✨
Water Bath Mastery
This isn't just a fancy term—it's essential for even baking. Place your cake pan in a larger roasting pan filled with 1 cup water (room temperature). The water bath creates a humid environment that prevents the cake from drying out and helps develop that signature crisp top. Just be sure the water doesn't touch the pan—1 inch gap is ideal. Trust me, this makes all the difference. 💧
Sugar Caramelization
That final caramelized top is what elevates this cake from good to showstopping. After the initial bake, sprinkle ¼ cup dark brown sugar evenly over the top and return to the oven for just 2-3 minutes. Watch closely—it should turn deep amber with a glass-like sheen. If it browns too quickly, reduce the time. This step adds that irresistible crunch that contrasts perfectly with the silky interior. 🍯
Cooling Like a Pro
Patience is key here. Let the cake cool in the pan for 10 full minutes before inverting it onto a wire rack. This gradual cooling prevents cracking and helps set the texture. Once cooled, dust with powdered sugar using a fine-mesh sieve for an even, elegant finish. The cake will continue to set as it cools, resulting in that perfect fudgy texture. ⏳
Equipment Essentials
You don’t need a fancy kitchen, but a few key tools make this recipe foolproof. A heatproof mixing bowl (like CorningWare) for the double boiler, a candy thermometer for precise temperature control, and a 9-inch round cake pan (preferably carbon steel for even heat distribution). For the caramelized top, a fine-mesh sieve ensures even sugar distribution. These tools are worth the investment for repeatable results. 🔧
Nutrition facts
Frequently asked questions
Why do we use only egg yolks in this recipe?
Egg yolks create the signature rich, custard-like texture that makes this cake so special. They're packed with fat and emulsifiers that give the cake its velvety mouthfeel and deep golden color. The absence of egg whites means no risk of overbeating, which keeps the crumb tender rather than cakey. Plus, the yolks' natural lecithin helps create that perfect balance between crisp top and moist interior.
Can I substitute egg whites for yolks if I don't have enough?
Not for this recipe—egg whites would completely change the texture, making it lighter and drier. The yolks are essential for the cake's custardy quality. If you're short on yolks, consider using a different recipe or buying extra yolks from a specialty store. The flavor and texture difference would be too significant to substitute successfully.
How do I know when the egg yolk mixture is ready?
Look for three key signs: the mixture should nearly triple in volume, turn pale golden, and coat the back of a spoon smoothly. Use a candy thermometer to confirm it reaches 160°F. When you lift the whisk, the ribbon should hold its shape for a few seconds before melting back into the mixture. This indicates proper thickening and temperature.
What if my cake turns out dry instead of fudgy?
Overbaking is usually the culprit—remove the cake when it's just set (a toothpick should come out with a few moist crumbs). The water bath should prevent drying, but if you opened the oven door too soon, steam escaped. For next time, bake at 325°F for exactly 45 minutes and resist peeking! If it's already baked, try brushing warm slices with simple syrup (equal parts sugar and water heated until dissolved) to restore moisture.
Can I make this cake without a water bath?
You can try, but results may vary—without the water bath, the cake might dry out or develop a less crisp top. If you're baking in a very humid environment or using a convection oven, you might get away with it, but I recommend using the water bath for that signature texture. For a makeshift version, place the cake pan on a baking sheet with 1 cup water in the bottom of the oven.