
Desserts
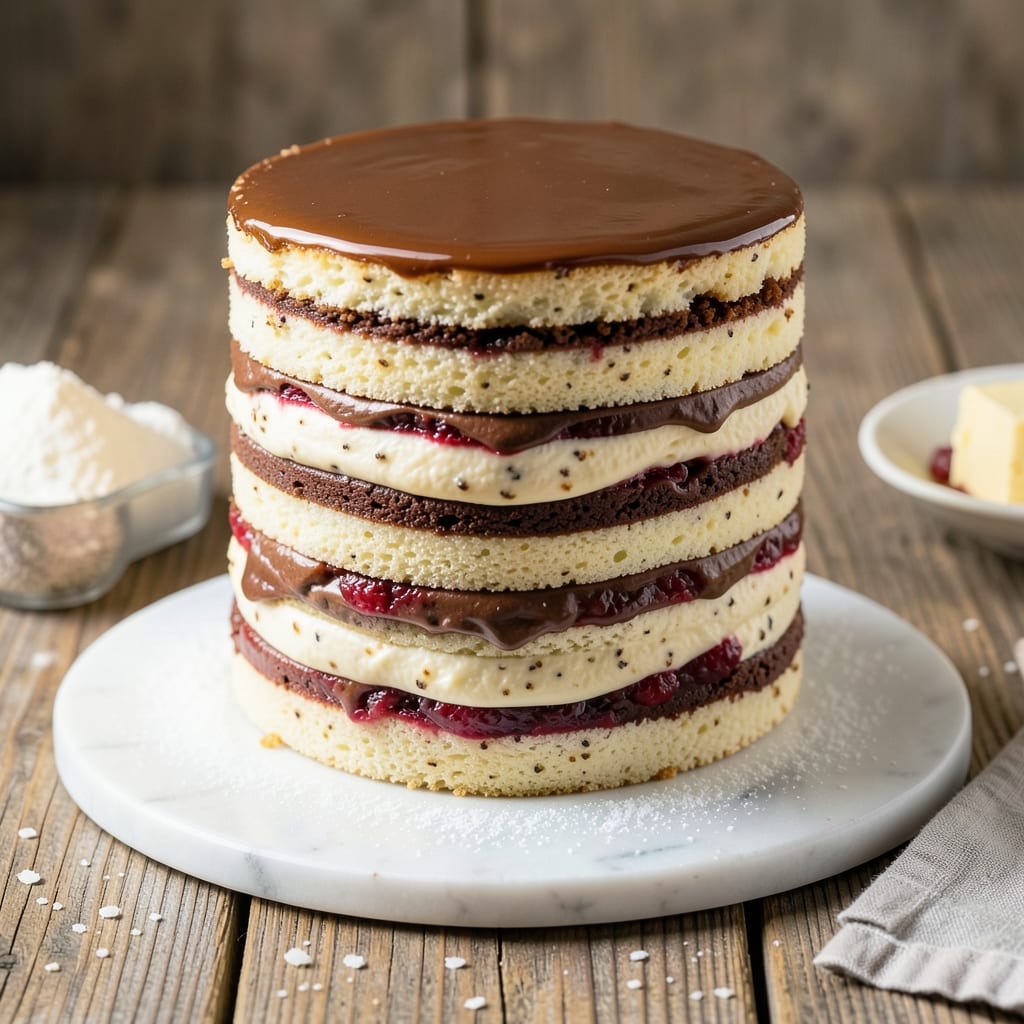
This six-layer cake recipe delivers the kind of showstopping dessert that makes every celebration feel extra special. 💛 The secret lies in perfectly balanced vanilla bean swirls and velvety cream cheese frosting that holds each layer together without weighing it down. After years of testing and adjusting, I've developed a method that ensures even baking, smooth frosting, and a structure that stays intact for days.
The foundation begins with thin, even cake layers baked in a single pan—no collapsing here. Each layer gets its signature vanilla bean swirl while warm, creating those iconic marbled patterns that make this cake instantly recognizable. The cream cheese frosting isn't just sweet; it's tangy and rich, designed to complement rather than overpower the delicate vanilla flavor. What you'll end up with is a cake that's light yet sturdy, with clean layers and professional-looking precision.
What sets this recipe apart is the assembly technique: I use a turntable method to create perfectly straight sides and smooth frosting application, even for beginners. The layers stay separated beautifully, making it easier to slice clean portions without any messy crumbs or collapsed sections. This isn't just a cake—it's a foolproof dessert that looks impressive enough for weddings but simple enough for birthdays.
Once you try this method, you'll never go back to store-bought cake mixes or flimsy layer cakes again. The flavor combination of vanilla bean and cream cheese creates a harmony that's both classic and sophisticated, while the structure ensures every slice tastes as good as it looks. Let's get started on building your masterpiece layer by layer.
Ingredients for 6 layer cake
Twelve essential ingredients for a six-layer masterpiece that wows every time.
| Ingredient | Amount | Notes |
|---|---|---|
| All-Purpose Flour 🌾 | 6 cups | Sifted for even texture |
| Granulated Sugar 🍚 | 2 ½ cups | Superfine preferred for smoothness |
| Unsalted Butter 🧈 | 2 cups | Room temperature, cubed |
| Large Eggs 🥚 | 6 whole | Room temperature for blending |
| Pure Vanilla Extract 🌿 | 2 tbsp | High-quality Madagascar preferred |
| Vanilla Bean Paste 🌿 | 2 tbsp | For visible swirls and depth |
| Baking Powder 🧂 | 1 ½ tsp | Diamond Crystal preferred |
| Salt 🧂 | ½ tsp | Fine sea salt preferred |
| Whole Milk 🥛 | 1 ½ cups | Room temperature for blending |
| Cream Cheese 🧀 | 16 oz | Full-fat, room temperature |
| Powdered Sugar 🍚 | 4 cups | Sifted for smooth frosting |
| Heavy Whipping Cream 🥛 | 1 cup | Cold for whipping |
| Lemon Juice 🍋 | 1 tbsp | Freshly squeezed |
The flour and sugar are your foundation—King Arthur or Bob's Red Mill flour gives the best texture, while Domino Superfine sugar ensures silky smooth layers. Butter matters here: Plugrá or Land O'Lakes work perfectly, but avoid salted varieties. Eggs should be large and fresh—room temperature is key for proper blending. For the vanilla, Madagascar vanilla bean paste from Penzeys delivers that signature swirl and deeper flavor you can't get with imitation extracts. The cream cheese is non-negotiable—Philadelphia or Wisconsin Brick brands stay smooth when whipped. Pro tip: let all your dairy ingredients sit out for 30 minutes before mixing.
No vanilla bean paste? Pure vanilla extract plus a pinch of turmeric mimics the swirl effect, though it won't be as visually striking. Substituting powdered sugar for the frosting? Confectioners' sugar works, but it lacks the fine texture of powdered sugar—don't skimp here. For the milk, whole milk is ideal, but 2% works in a pinch. The lemon juice brightens the frosting—fresh is best, but bottled works if you're in a hurry. Want extra stability? Add 1 tsp cornstarch to your powdered sugar mix. And if you're baking in high humidity? Increase your baking powder to 2 tsp—it helps prevent doming.
Store cake layers in an airtight container between parchment paper at room temperature for up to 2 days. The frosting keeps in the fridge for 5 days, but bring it to room temperature before using. For long-term storage, freeze fully assembled cake for up to 3 months—thaw overnight in the fridge before serving. The secret to perfect slices? Chill the cake 1 hour before cutting—this prevents crumbling. And if you're making ahead? Assemble the cake 24 hours before serving—the flavors meld beautifully, giving you that restaurant-quality taste.
Why You'll Love This Recipe
- No-Fuss Layers: I swear, the layers are all the same batter—just baked in stages. No fussing with different flavors or textures, just rich vanilla cake stacked like a dream.
- Butter-Sugar Magic: That creamy butter and sugar combo? It’s what makes every bite feel like a hug. The vanilla extract ties it all together—warm, sweet, and impossible to resist.
- Party or Picnic: Slice it for a birthday bash or pack it for a hike—this cake travels well. Honestly, I’ve served it at everything from potlucks to Sunday brunches, and it never lets me down.
Step-by-step instructions for vanilla bean swirl cake
Here's the method for building a flawless six-layer cake with perfect swirls and creamy fillings.
👨🍳 Step 1: Prepare the Cake Batter
In a stand mixer fitted with the paddle attachment, cream together the 2 cups unsalted butter and 2.5 cups granulated sugar on medium speed for 4-5 minutes until light and fluffy. You're looking for a texture that nearly doubles in volume and becomes pale in color—this incorporates air for a tender crumb.
Add the 6 whole large eggs one at a time, mixing well after each addition until fully incorporated. Then whisk together the 6 cups all-purpose flour, 1.5 teaspoons baking powder, and 0.5 teaspoon salt in a separate bowl. Gradually add the dry mixture to the wet ingredients on low speed, alternating with the 1.5 cups whole milk, beginning and ending with the flour. Mix just until combined—overmixing develops gluten and makes the cake dense.
Remove the bowl from the mixer and stir in the 2 tablespoons pure vanilla extract and 2 tablespoons vanilla bean paste using a silicone spatula. This ensures even distribution of those beautiful vanilla swirls throughout each layer. Let the batter rest for 15 minutes at room temperature before baking—this allows the flour to fully hydrate and the batter to come to room temperature for even baking.
🔥 Step 2: Bake the Layers to Perfection
Preheat your oven to 350°F and line six 8-inch round cake pans with parchment paper. Divide the batter evenly among the pans, filling each about ⅔ full. Bake for 25-30 minutes or until a toothpick inserted into the center comes out clean. The edges should be light golden brown and the top should spring back when gently pressed.
I like to rotate the pans halfway through baking for even browning. As soon as they're done, transfer the cakes to a wire rack and let them cool in the pans for 10 minutes before removing. This prevents them from cracking as they cool. Allow the layers to cool completely before assembling—this ensures clean slices and prevents soggy layers.
🥘 Step 3: Prepare the Cream Cheese Filling
While the cakes cool, make the filling by beating the 16 oz cream cheese and 4 cups powdered sugar together in a stand mixer fitted with the paddle attachment until smooth and creamy. Add the 1 cup heavy whipping cream and mix until fully incorporated. Finally, stir in the 1 tablespoon lemon juice and 2 tablespoons pure vanilla extract—this brightens the flavor and balances the sweetness.
For the best texture, make sure all ingredients are at room temperature before mixing. The filling should be thick but pipeable—if it's too stiff, add 1-2 tablespoons milk to reach the perfect consistency. Transfer to a piping bag fitted with a star tip for clean, professional-looking swirls between layers.
🥘 Step 4: Assemble the Cake Layers
Place the first layer on a cake stand or plate. Using the piping bag, pipe a generous layer of cream cheese filling around the edges, leaving a ½-inch border at the center. This creates a moat that prevents the filling from leaking out. Top with the second layer and repeat the process, pressing down gently to ensure good contact between layers.
Continue this process with all six layers, alternating directions of the swirls for visual interest. After the final layer is placed, pipe a thin layer of filling over the entire top surface to seal in moisture. Wrap the assembled cake tightly in plastic wrap and refrigerate for at least 4 hours or overnight—this allows the filling to fully set and the flavors to meld together.
🍽️ Step 5: Decorate and Serve
Before serving, let the cake sit at room temperature for 30 minutes to soften slightly. Dust the top and sides generously with powdered sugar using a fine-mesh sieve for a classic, elegant finish. For extra flair, you can pipe additional swirls of the cream cheese filling around the edges or add fresh berries for color contrast.
The cake keeps well in the refrigerator for up to 5 days, though I recommend serving it within 2-3 days for the freshest texture. Each slice should reveal beautiful vanilla swirls throughout the layers, with a tender crumb and perfectly balanced sweetness from the cream cheese filling. The lemon juice adds just the right amount of brightness to cut through the richness.
Pro Tips For Making 6 Layer Cake
- CHILL THE BATTER: Bake the layers one at a time—wait at least 20 minutes between batches to let the oven recover. I learned this the hard way when my last layer turned out dense because the oven was still hot from the first one.
- WEIGH YOUR FLOUR: Scoop and level isn’t precise enough for six layers. Use a kitchen scale for 120g per cup—this keeps every layer consistent. I was skeptical until I tried it, and now my cakes bake evenly every time.
- DON’T OVERMIX: Fold the butter into the sugar until light and fluffy, then stop. Overmixing adds gluten, making the layers tough. I used to beat it until my arm ached—now I just count 10 strokes after the mixture clears the beaters.
- LEVEL THE LAYERS: Use a serrated knife or cake leveler to trim the tops before frosting. Uneven layers make stacking messy, and no one wants a wobbly cake. It takes 2 minutes but saves hours of frustration later.
Troubleshooting this recipe
Cracked Layers Fix
If your layers crack while cooling, don't panic—this happens when cakes cool too quickly. Place the pans on a wire rack over a baking sheet instead of directly on the counter. I also recommend brushing the warm layers with a simple syrup (equal parts sugar and water) before assembling. This adds moisture and helps prevent cracks. For extra insurance, chill the cake in the fridge for 30 minutes before slicing. 💛
Collapsed Cake Prevention
Overmixing the batter or underbaking are the usual culprits for collapsed layers. Always mix just until combined—no streaks of flour should remain. For baking, use an oven thermometer to confirm your oven is at 350°F (many run hot). If your cakes brown too quickly, tent them loosely with foil after 15 minutes. Let layers cool completely before assembling to avoid soggy bottoms.
Frosting Leaks Between Layers
This happens when you pipe too much filling or don't let the frosting set properly. Use a piping bag with a ½-inch star tip and pipe a thin border around each layer's edge, leaving a ¼-inch gap from the outer edge. After assembling, refrigerate the cake for at least 4 hours to let the frosting firm up. For extra stability, add 1 tsp cornstarch to your powdered sugar when making the filling.
Uneven Layers After Baking
Uneven layers usually mean your batter wasn't divided properly. Use a kitchen scale to measure ⅙ of the total batter weight for each pan. For visual confirmation, pour batter into a measuring cup first to check consistency. If layers still vary, trim the tops with a serrated knife after cooling. I also recommend using the same brand of flour for all layers to maintain consistent texture.
Dry Cake Texture
Dry cake often results from overbaking or using old ingredients. Check doneness with a toothpick—it should come out with a few moist crumbs, not completely clean. For extra moisture, brush warm layers with simple syrup before assembling. Store-bought butter can sometimes cause dryness, so opt for Plugrá or Land O'Lakes brands. If your cake still feels dry, add a thin layer of lemon curd between layers for moisture and brightness.
Frosting Too Soft or Runny
This usually means your cream cheese wasn't at room temperature or your powdered sugar had lumps. Always let cream cheese sit out for 2 hours before whipping. Sift your powdered sugar through a fine-mesh sieve to remove clumps. For extra stability, chill the frosting for 15 minutes before piping. If it's still too soft, add 1 tbsp more powdered sugar and whip again. 💡
Nutrition facts
Frequently asked questions
Can I bake this six-layer cake in smaller pans?
Yes, but you'll need to adjust the batter quantity. For 6-inch pans, use ⅓ of the batter per pan (total 2 cups batter per layer). The baking time stays the same (25-30 minutes at 350°F), but smaller cakes cool faster. Chill them 15 minutes in the pan before removing to prevent cracking.
How do I make this cake gluten-free?
Replace the all-purpose flour with a 1:1 gluten-free baking flour blend (like Bob's Red Mill or King Arthur). Add ½ teaspoon xanthan gum to help bind the layers. Reduce milk to 1 cup to prevent dryness, and brush layers with simple syrup before assembling. The texture will be slightly denser but still delicious!
Can I substitute buttercream frosting?
You can, but the flavor will differ. For a similar texture, use american buttercream** (equal parts butter and powdered sugar) with ½ cup heavy cream and 1 tsp lemon juice. The cream cheese adds tangy depth that buttercream can't replicate, but it works for a lighter alternative. Chill the cake 2 hours before slicing to prevent crumbling.
What's the best way to transport a finished cake?
Wrap the cake tightly in plastic wrap, then place it in a sturdy cake carrier box. For long trips, keep it refrigerated until 1 hour before serving. If transporting at room temperature, use a cooling rack inside the box to prevent soggy bottoms. Avoid stacking heavy items on top—this cake is delicate but sturdy when properly chilled!
How many servings does this cake really provide?
This recipe serves 12-16 people depending on slice size. For a wedding, cut 1-inch thick slices (12 servings). For a casual gathering, go for 1.5-inch slices (8-10 servings). Each layer is 8-inch diameter, so the total cake height will be about 6-7 inches when fully assembled.