
Desserts
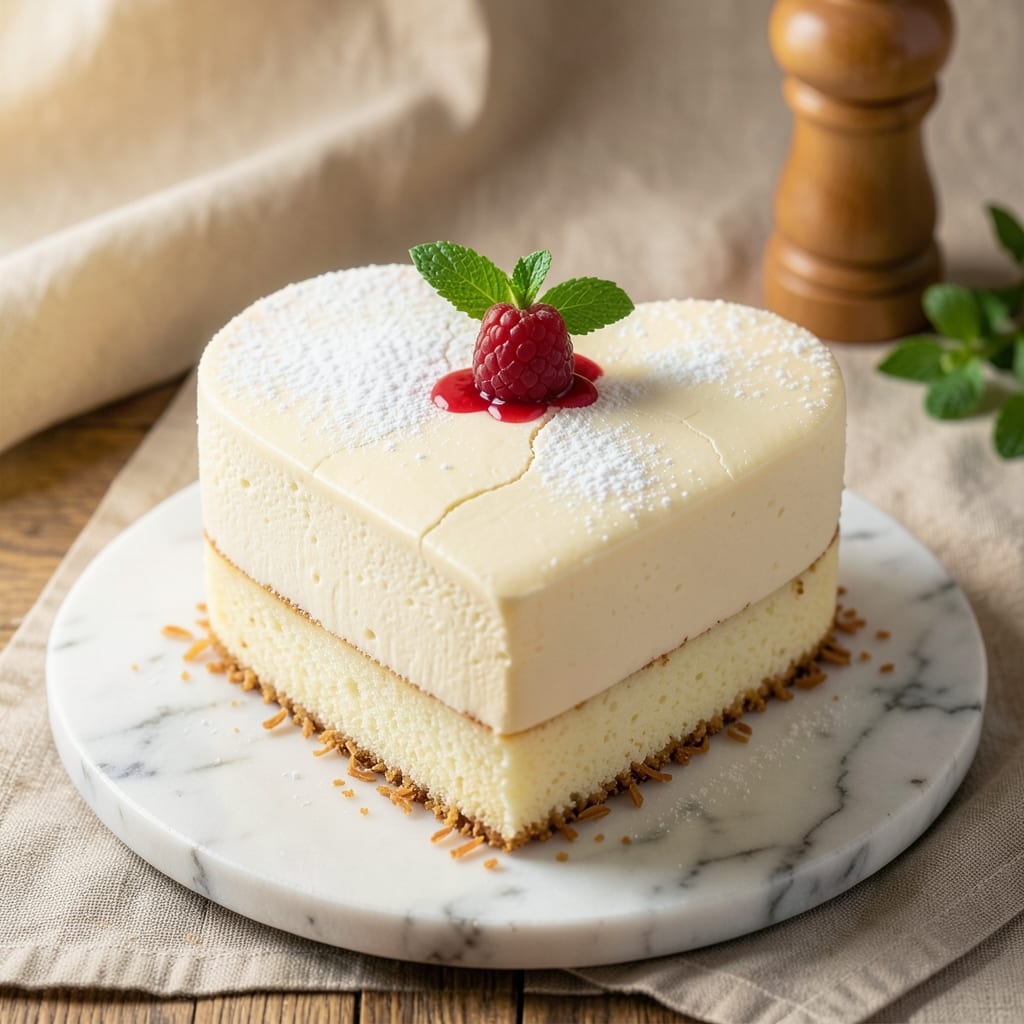
This 6-inch heart cake recipe delivers a stunning, romantic centerpiece that fits perfectly in one tin—ideal for Valentine’s Day or celebrations. The secret lies in a simple yet elegant fondant bridge design that transforms a basic cake into a showstopper, all while keeping prep manageable. With just a few key techniques, you’ll achieve crisp edges, tender layers, and a delicate fondant finish that looks like it came from a bakery.
The recipe begins with a classic vanilla butter cake batter—rich, moist, and foolproof—baked in a round pan before being carefully carved into a heart shape. The fondant bridge, made from smooth white or pastel-colored fondant, adds a whimsical touch without requiring advanced skills. Even beginners can achieve professional-looking results with the right tools and a steady hand.
What sets this cake apart is its versatility and visual impact. Serve it as a standalone dessert, paired with fresh berries or a drizzle of chocolate ganache for extra elegance. The fondant bridge not only enhances the heart shape but also creates a romantic focal point that’s perfect for gifting or photographing. Every bite delivers the perfect balance of sweetness and texture, making it as delicious as it is beautiful.
Ready in under 2 hours (including cooling and decorating), this cake is perfect for last-minute occasions. The instructions break down each step clearly, from baking to shaping and fondant application, ensuring you’ll have a showstopper dessert without the stress. Let’s create something truly special.
Ingredients for 6 inch heart cake
Transform simple pantry staples into a romantic showstopper with this heart-shaped cake design.
| Ingredient | Amount | Notes |
|---|---|---|
| All-Purpose Flour 🌾 | 1 ½ cups | Sifted for light texture |
| Unsalted Butter 🧈 | 1 cup | Cold, cubed for even mixing |
| Granulated Sugar 🍚 | 1 cup | Superfine preferred for smoothness |
| Vanilla Extract 🌸 | 1 tbsp | Pure Madagascar for best flavor |
| Large Eggs 🥚 | 2 whole | Room temperature for even baking |
| Milk 🥛 | ½ cup | Whole milk for richness |
| Baking Powder 🍞 | 1 ½ tsp | Freshly opened for lift |
| Salt 🧂 | ½ tsp | Fine sea salt preferred |
| White Fondant 🎀 | 12 oz | Smooth, pliable for shaping |
| Food Coloring Gel 🎨 | ½ tsp | Pastel shade of choice |
| Corn Syrup 🍯 | 1 tbsp | For fondant elasticity |
| Fresh Strawberries 🍓 | ¼ cup | Sliced for garnish |
| Chocolate Ganache 🍫 | ½ cup | For elegant drizzle |
| Round Cake Pan (6-inch) 🍰 | 1 whole | Non-stick preferred |
The vanilla butter cake batter is where the magic begins. Wilton or Duncan Hines brands deliver consistent results, but feel free to use your favorite. For the fondant, Wilton or Smooth-On are industry standards—avoid pre-colored fondant as it lacks the smooth finish needed for delicate details. Room-temperature eggs and cold butter ensure the perfect crumb structure. Pro tip: Sift your flour and baking powder together to eliminate lumps, which is crucial for that bakery-style texture. The 6-inch round pan should be greased with butter and lined with parchment for easy release—no sticking means no stress during the heart carving later.
No vanilla extract? Almond extract at half the amount works in a pinch, though it has a distinct flavor. For the fondant, store-bought white fondant is fine, but if you're ambitious, homemade fondant made with powdered sugar, shortening, and corn syrup yields superior results. Want to skip the ganache? Fresh berries or edible gold leaf add instant elegance. The strawberries should be firm and vibrant—look for deep red hues at your local Whole Foods or Trader Joe's. If you're feeling extra, a drizzle of white chocolate sauce can elevate the presentation without much effort. And remember, the fondant bridge is the star—keep it smooth and thin for that delicate, romantic look.
Store the cake layers wrapped in plastic wrap in the fridge for up to 3 days before decorating. Fondant keeps best in an airtight container at room temperature for about 1 week, though it softens in humidity—avoid the fridge. Once assembled, the heart cake stays fresh for 2 days at room temperature, but the fondant bridge will lose its crispness after that. Freeze the cake layers (without fondant) for up to 3 months if prepping ahead. When ready to serve, bring the cake to room temperature for about 30 minutes—this ensures clean slices and prevents fondant from cracking. Garnishes like berries should be added just before serving to maintain freshness.
Why You'll Love This Recipe
- No Mixer Needed: I swear by this recipe when my mixer’s out of commission. Creaming the butter and sugar by hand feels almost meditative—plus, the eggs blend right in with just a fork. No electric mess, no fuss.
- Buttery Vanilla Bliss: That first bite? Pure comfort. The butter-rich batter stays tender, and the vanilla—just a whisper—lets the sugar’s caramel notes shine. It’s the kind of cake that disappears faster than I can say “second slice.”
- Date Night or Dessert Party: Too pretty for weeknights but simple enough to make last-minute. Dust it with powdered sugar for a bakery vibe, or add a drizzle of chocolate for flair. My boyfriend still thinks I hired a decorator.
- Pantry Staples Only: Flour, butter, sugar, eggs—if you’ve got those, you’ve got this. No exotic ingredients, no last-minute grocery runs. I’ve made it with store-bought vanilla and fresh, and both times, it was a hit.
Step-by-step instructions for creating a romantic fondant bridge cake
Here's how to craft this stunning heart cake with perfect structure and elegant design.
Bake the Cake Layers to Perfect Height
Preheat your oven to 350°F and grease the 6-inch round cake pan thoroughly with butter. In a stand mixer fitted with the paddle attachment, cream together the 1 cup unsalted butter and 1 cup granulated sugar on medium speed for 3-4 minutes until light and fluffy. This creaming process incorporates air that will create that tender crumb we want.
Add the 2 whole large eggs, one at a time, mixing well after each addition. Stir in the 1 tbsp vanilla extract and 0.5 cup milk. In a separate bowl, whisk together the 1.5 cups all-purpose flour, 1.5 tsp baking powder, and 0.5 tsp salt. Gradually add the dry ingredients to the wet mixture on low speed until just combined—you should still see small flour streaks. Pour the batter into the prepared pan and smooth the top.
Bake for 25-30 minutes or until a toothpick inserted in the center comes out clean. The cake should spring back gently when pressed. Let it cool in the pan for 10 minutes before transferring to a wire rack to cool completely. For a perfectly flat cake, I recommend using a cake leveler to trim the top once fully cooled.
Create the Fondant Bridge Structure
Roll out about 6 oz of the 12 oz white fondant on a lightly floured surface to about 1/8-inch thickness. Cut a rectangle slightly larger than the cake diameter using a fondant cutter or knife. This will be your bridge base. Apply a thin layer of chocolate ganache to the top of the cooled cake layer, then press the fondant rectangle on top, smoothing any air bubbles with your fingers.
For the bridge supports, roll out the remaining 6 oz fondant and cut two strips about 1-inch wide and 6-inches long. Position these strips vertically on either side of the cake, creating a bridge effect. Use a small amount of ganache to secure them in place. Let the ganache set slightly before proceeding—this prevents the fondant from sliding during assembly.
Shape the Heart Fondant Design
Roll out the remaining 6 oz fondant and knead in the 0.5 tsp food coloring gel and 1 tbsp corn syrup until evenly distributed. The corn syrup adds elasticity to the fondant, making it easier to work with. Roll the colored fondant to about 1/4-inch thickness and cut out a heart shape using a heart-shaped cutter or knife.
Position the heart fondant on top of the bridge structure, centering it carefully. Use a small amount of ganache to adhere it to the fondant bridge. For extra stability, you can create a small base layer by rolling out a thin sheet of fondant and attaching it to the cake before adding the heart. This hidden layer provides additional support for your decorative piece.
Add Final Decorative Touches
Slice the 0.25 cup fresh strawberries into thin rounds and arrange them around the base of the cake. For a romantic touch, you can also create small fondant flowers using the remaining fondant and place them along the bridge. Let the ganache set completely before adding any delicate decorations to prevent them from sticking or sliding.
Once everything is set, you can drizzle additional chocolate ganache over the cake for an elegant finish. Use a piping bag with a small round tip to create decorative drips along the edges. Store the cake in a cool, dry place until ready to serve to maintain the fondant's shape and freshness.
Pro Tips For Making 6 Inch Heart Cake
- Cream Butter First: Take 5 minutes to beat the butter and sugar until it’s pale and fluffy—like a cloud, not just "mixed." I used to skip this, and my cakes turned out dense. That extra elbow grease makes the texture light and tender, especially in a small heart pan where every layer counts.
- Sift the Flour Twice: Don’t just dump the flour in. Sift it once, then sift it again through the same sieve while folding it into the butter mixture. This cuts out lumps and aerates the batter, which is critical for a 6-inch heart cake where you want even rise and no heavy spots.
- Room-Temp Eggs Matter: Cold eggs? They’ll curdle your batter. Let them sit in warm water for 10 minutes before cracking them into the mix. I learned this the hard way—my first batch had weird streaks from eggs straight out of the fridge. Warm eggs blend smoothly and keep the cake uniform.
- Rotate the Pan Mid-Bake: After 15 minutes in the oven, swap the heart pan from top to bottom rack. This evens out the heat and prevents the edges from browning faster than the center. I used to forget, and my cakes would have a dark crust on one side and a pale middle—annoying for such a small pan.
Creative variations of these flavors
Romantic Valentine’s Version
Transform your heart cake into a true Valentine’s Day masterpiece by adding a gold leaf accent along the fondant bridge. Use a small brush to apply a thin layer of edible glue (like a water-based mixture) to the bridge edges, then press on 24K gold leaf pieces. For extra romance, pipe a delicate red rose pattern in white buttercream along the cake’s base. I love using Wilton’s 1M tip for this—it creates those perfect swirls. 💖
Seasonal Spring Twist
Swap the white fondant for pastel pink or mint green using Americolor gel food coloring. Replace strawberries with edible flowers (like pansies or violets) for a fresh spring look. Add a light dusting of gold luster dust to the fondant bridge for a shimmering effect. This version feels perfect for Easter or Mother’s Day celebrations. 🌸
Chocolate Lover’s Upgrade
Ditch the white fondant and use dark or milk chocolate ganache to create a chocolate bridge instead. Roll out 4 oz of white fondant and tint it with cocoa powder for a marbled effect. Add chocolate-covered raspberries as garnish—simmer fresh raspberries in sugar syrup, then dip in melted chocolate. The tartness cuts through the richness beautifully. 🍫
Minimalist Modern Design
For a sleek, contemporary look, skip the fondant bridge entirely. Instead, use black or dark gray fondant to create a geometric heart shape on top of the cake. Add matte black drips of ganache along the edges for a moody, elegant effect. Garnish with black sesame seeds or activated charcoal powder for a striking contrast. This version works beautifully for anniversary celebrations. ✨
Kids’ Birthday Fun Version
Let the little ones get creative! Use colorful fondant (red, blue, green) to make a rainbow bridge with strips in each color. Add fondant cupcakes or mini fondant animals along the bridge. For extra fun, include sprinkles mixed into the ganache drizzle. This version turns cake decorating into a playful activity. 🎉
Wedding Cake Inspiration
Scale up the recipe for a 3-tier heart cake using 3x 6-inch cake pans. Create a fondant arch bridge connecting all three tiers. Add pearl dust to the fondant for a bridal glow. Garnish with edible silver pearls and fresh orchids for a luxurious wedding centerpiece. This version makes an unforgettable dessert table statement. 💍
Nutrition facts
Frequently asked questions
Can I make this heart cake without fondant?
Replace the fondant bridge with a simple buttercream or ganache drizzle. Pipe white buttercream in a decorative swirl along the cake's edges to mimic the bridge effect. For extra flair, add fresh berries or edible flowers. This version is easier for beginners and still looks stunning.
How do I prevent the fondant from cracking?
Keep your fondant at room temperature (never cold) and work in a cool, dry environment. Knead in 1 tbsp corn syrup to add elasticity, and avoid over-handling. If cracks appear, use a tiny bit of water or edible glue to smooth them. Work quickly once the ganache is applied to prevent drying.
What’s the best way to store this cake before serving?
Store the cake layers wrapped in plastic in the fridge for up to 3 days before decorating. Once assembled, keep it at room temperature for 2 days max—fondant softens in humidity. For longer storage, freeze the cake layers (without fondant) for up to 3 months. Let it thaw overnight before decorating.
Can I use this recipe for a larger heart cake?
For a bigger cake, bake two 6-inch layers and stack them for height, or use a 7-8 inch pan with adjusted baking time (30-35 minutes). Scale up fondant by 50% and adjust bridge supports proportionally. For stability, add a hidden fondant base layer before decorating.
What if I don’t have a heart-shaped cutter?
No problem! Use a knife to carefully cut a heart shape from rolled fondant, or draw the outline with a toothpick and trim along it. For the cake itself, carve a heart shape from a round layer using a serrated knife—start with a small cut and expand outward. Practice on a spare cake layer first if needed.