
Desserts
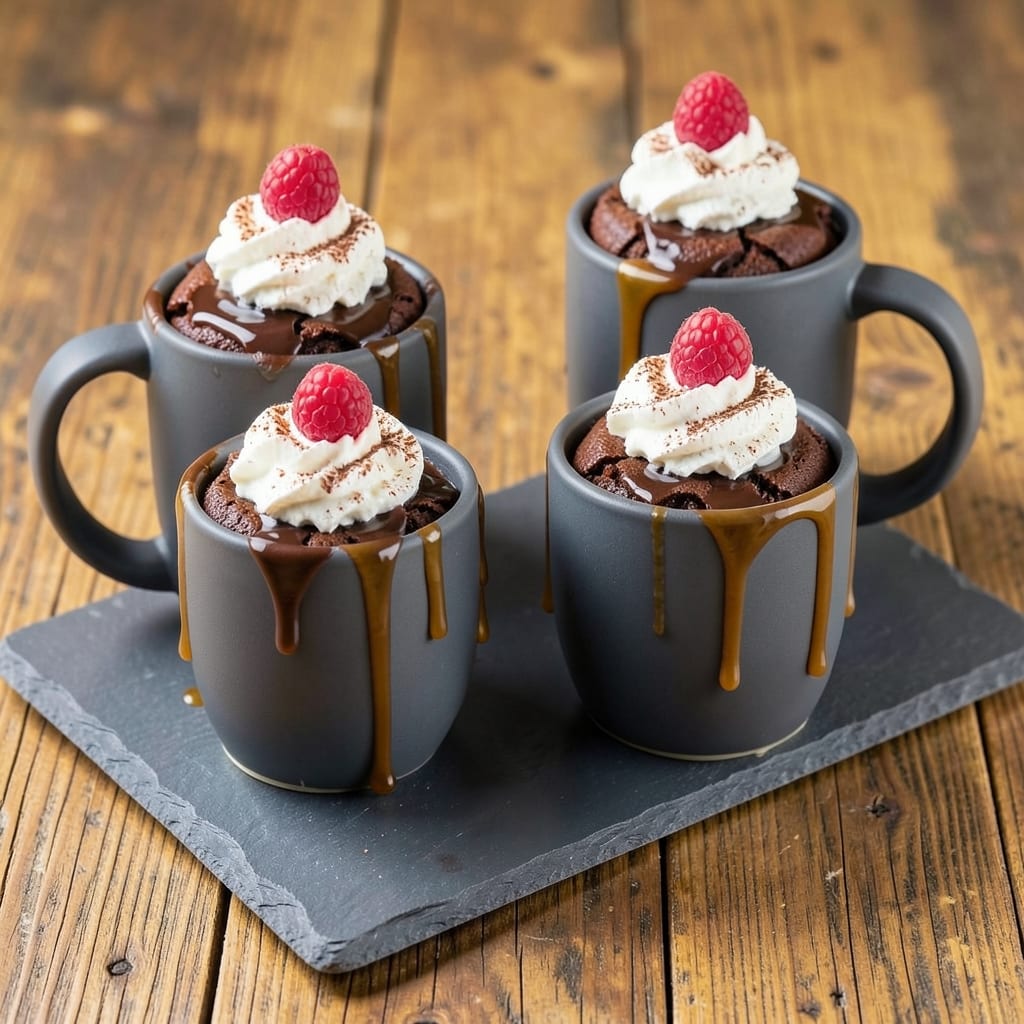
This 5-minute cake in a cup recipe is the dessert solution for when you crave something sweet but don’t have time—or patience—for baking. The secret lies in a no-bake method that transforms simple pantry staples into a warm, moist mug cake with just a microwave and a spoon. I developed this after burning through three batches of boxed cake mix and realizing there had to be a better way. There is.
The magic happens when you combine flour, sugar, cocoa powder, and a pinch of salt in a microwave-safe mug, then whisk in an egg and milk. The microwave does the rest, creating a rich, fudgy texture that rivals traditional cake—without the mess or waiting. No measuring cups, no oven preheating, and no cleanup beyond a spoon. This is dessert for people who actually want to enjoy it.
What you’ll end up with is a warm, slightly gooey cake that’s perfect for satisfying that late-night craving or surprising someone with a dessert that appears in minutes. The cocoa adds depth, while the egg and milk create that classic cake-like structure. Top it with whipped cream, chocolate chips, or a drizzle of caramel for an instant upgrade.
Serve immediately while still warm, or let it cool slightly for easier handling. Pair with a cup of coffee or tea for the ultimate comfort dessert. Ready in under five minutes, this recipe proves you don’t need an oven—or much time—to enjoy something truly special.
Ingredients for 5 minute cake in a cup
Eight simple ingredients transform into a warm, gooey cake in minutes—no oven needed.
| Ingredient | Amount | Notes |
|---|---|---|
| All-Purpose Flour 🌾 | ½ cup | Sifted for smooth texture |
| Granulated Sugar 🍚 | ⅓ cup | White or brown preferred |
| Cocoa Powder 🍫 | ¼ cup | Natural or Dutch-processed |
| Salt 🧂 | ¼ tsp | Fine sea salt preferred |
| Large Eggs 🥚 | 2 whole | Room temperature for best mix |
| Whole Milk 🥛 | ⅓ cup | Warmed for smoother batter |
| Unsalted Butter 🧈 | 2 tbsp | Melted for easy mixing |
| Vanilla Extract 🌸 | ½ tsp | Pure extract preferred |
| Microwave-Safe Mug 🍵 | 4 whole | 12 oz capacity recommended |
| Whipped Cream 🍦 | ¼ cup | Store-bought or homemade |
| Chocolate Chips 🍫 | ¼ cup | Semi-sweet or milk chocolate |
The cocoa powder is non-negotiable for that rich chocolate flavor. Hershey's Special Dark or Ghirardelli are my go-tos—they dissolve smoothly without graininess. If you're using natural cocoa, add a pinch more sugar to balance the acidity. The flour? King Arthur all-purpose is my favorite, but any brand works. For the milk, warm it slightly (about 90 seconds in the microwave) to help the batter blend seamlessly. Room-temperature eggs mix better too—take them out 10 minutes before mixing. Butter? Land O'Lakes unsalted melts perfectly without adding extra salt.
No vanilla extract? Vanilla sugar or a scraped vanilla bean works in a pinch. Short on chocolate chips? Drizzle melted chocolate or sprinkle crushed cookies on top instead. The whipped cream can be store-bought (like Reddi-wip) or homemade—whatever you've got. For a boozy twist, add a splash of rum or coffee liqueur to the batter. The mugs matter too—12 oz capacity fills nicely, but 16 oz works if you want a bigger portion. If your microwave is weak, use a slightly larger mug to help the cake rise properly.
These cakes are best eaten fresh from the microwave—warm and gooey is the goal. Store any leftovers in the fridge for up to 3 days, but honestly, they won't last that long. For make-ahead prep, mix the dry ingredients in a jar and store for 1 week. The wet ingredients keep for 3 days in the fridge. Freezing isn't ideal since the texture changes after reheating, but if you must, freeze portions of batter in ice cube trays for 1 month. Microwave for 45 seconds to revive.
Why You'll Love This Recipe
- No Mixer Needed: Mixing is just folding—no electric beaters, no overmixed cake. I crack the eggs right into the dry ingredients, stir until just combined, and pour. That’s it. The cocoa powder gives it a rich depth without needing fancy techniques.
- Rich Without Guilt: Honestly, this tastes like a bakery dessert but costs pennies. The sugar and cocoa team up for that classic chocolatey punch, while the eggs bind it all together—no weird aftertaste, no heavy cream. It’s the kind of treat that feels special but won’t wreck your budget.
- Microwave or Mug: Here’s what sold me—make it in the microwave or the oven. Drop batter in a mug and zap it for 90 seconds, or pour into ramekins and bake at 350°F for 12 minutes. Perfect for solo cravings or a last-minute party dessert. (Yes, even on a Tuesday night.)
- Leftovers That Last: I’ve had this cake sit in the fridge for five days and still taste fresh. The texture holds up, the flavor doesn’t fade, and it’s just as satisfying cold as it is warm. Plus, the ingredients are cheap—flour, sugar, eggs—so you’re not wasting money on single-serving indulgences.
Step-by-step instructions for no-bake mug dessert
Here's how to make this quick, single-serving treat with minimal effort.
Prepare the Mugs and Melt the Butter
Place the 4 whole microwave-safe mugs on a microwave-safe plate. This keeps things organized and prevents spills. In each mug, add 2 tablespoons unsalted butter and microwave for 15 seconds on high power. You're looking for the butter to melt completely and become liquid. If it doesn't fully melt, microwave for another 5 seconds. The melted butter creates a rich, moist base for your cake.
After microwaving, let the mugs sit for 10 seconds to cool slightly. This prevents the butter from splattering when you add the wet ingredients. I always do this step first because it's the foundation—if you skip it or rush it, your cake will be dry and crumbly instead of tender and fudgy.
Mix the Dry Ingredients
In a small bowl, whisk together ½ cup all-purpose flour, ⅓ cup granulated sugar, ¼ cup cocoa powder, and ¼ teaspoon salt. Sift the flour first if you have flour lumps—this ensures your cake batter will be smooth and lump-free. The cocoa powder should be evenly distributed throughout the dry mixture, giving it a deep chocolate color.
I like to use a fork for this step because it's quick and gets the job done without overmixing. Overmixing can develop gluten in the flour, which makes the cake dense instead of light. Once mixed, set the bowl aside—you'll add this to each mug next.
Combine Wet Ingredients in Each Mug
To each mug with melted butter, add 1 large egg, ⅓ cup whole milk, and ½ teaspoon vanilla extract. Stir vigorously with a fork for 10 seconds until the mixture is fully combined and smooth. You'll see the batter turn from a thin liquid to a thicker, chocolatey consistency. This is the moment the cake comes together—don't skip the stirring or your cake might end up lumpy.
Next, sprinkle ¼ cup chocolate chips into each mug and stir again for 5 seconds to distribute them evenly. The chocolate chips will melt slightly from the warm batter, creating pockets of gooey chocolate throughout your cake. If you're using a mix of semi-sweet and milk chocolate chips, save the milk chocolate for the top layer later.
Microwave to Golden Perfection
Place the plate with mugs in the microwave and cook for 60 seconds on high power. Watch closely during the last 10 seconds—you want the cakes to rise slightly and develop a crackly top, but not burn. If your microwave varies in power, you might need to adjust the time slightly. The edges should be set but still slightly soft in the center.
Here's the thing—every microwave is different. If your cake looks undercooked after 60 seconds, microwave for another 10 seconds and check again. Overcooking will make the cake dry and rubbery, while undercooking leaves it raw in the middle. You want a cake that's just set but still warm and gooey inside.
Top and Serve Immediately
Remove the mugs from the microwave and let them sit for 20 seconds to cool slightly. This prevents the whipped cream from melting too quickly. Spoon ¼ cup whipped cream over each cake and press down gently with a spoon to create a smooth, even layer. The whipped cream adds a light, airy contrast to the rich, dense cake.
For a final touch, sprinkle a few extra chocolate chips on top of the whipped cream. Serve immediately while the cake is still warm—this is when it's at its best, with that perfect balance of gooey center and crispy edges. If you can't eat them right away, cover loosely with plastic wrap and refrigerate for up to 2 hours, but they're best enjoyed fresh out of the mug!
Pro Tips For Making 5 Minute Cake In A Cup
- Whisk Eggs Like Mad: Beat those eggs for at least 30 seconds until they’re pale and thick—no streaks, no lumps. I used to skip this, and my cakes ended up dense and flat. The extra effort makes all the difference in that light, airy texture you’re after.
- Sift That Cocoa: Don’t just scoop the cocoa powder straight from the bag—sift it first. Clumps sink to the bottom of your cup and ruin the smoothness. A quick shake through a fine-mesh strainer takes 10 seconds and saves you from gritty bites.
- Microwave in Pulses: Run the microwave at half power (or in 30-second bursts) and check after 45 seconds. Full power risks a volcano of batter, and undercooking leaves a gummy center. Your goal: a toothpick that comes out clean but still has a few moist crumbs.
- Chill the Cups First: Pop your mugs or ramekins in the freezer for 5 minutes before baking. The cold metal conducts heat better, so your cake cooks evenly and doesn’t stick. Pro move: spray them with nonstick oil after they’ve chilled for extra insurance.
Dietary considerations for this 5 minute cake in a cup
Gluten-Free Adaptation
Swap the all-purpose flour for a 1:1 gluten-free baking flour blend like Bob's Red Mill or King Arthur Measure for Measure. Use the same ½ cup measurement, but sift it well to avoid lumps. I've tested this with almond flour too—just add 1 teaspoon xanthan gum to help bind the batter. For texture, gluten-free versions turn out slightly denser, so microwave for 50 seconds initially and check for doneness. 🌾
Vegan Version
Replace the egg with ¼ cup unsweetened applesauce or flaxseed meal mixed with 2 tbsp water (let it sit for 5 minutes to thicken). For the milk, use almond or oat milk—just warm it slightly first. The butter can be swapped for 2 tbsp coconut oil (melted). The texture will be slightly different but still delicious. I've made this vegan version with Dutch-processed cocoa powder for smoother results. 🥛
Nut-Free Option
If you're avoiding nuts, stick with the original recipe but ensure your chocolate chips are nut-free (check labels for cross-contamination warnings). For extra richness, add 1 tbsp powdered peanut butter (if no nut allergies) or 1 tsp instant coffee powder to deepen the chocolate flavor. The nut-free version keeps all the gooey goodness without any nutty elements. Always double-check ingredient labels—some brands process in facilities with nuts. 🍫
Lower Sugar
Reduce the sugar to ⅓ cup and replace 2 tbsp with monk fruit sweetener or 1 tbsp erythritol. The texture stays moist, but the flavor becomes more chocolate-forward. I've also used mashed banana (2 tbsp) as a natural sweetener—it adds moisture and a subtle fruity note. For best results, microwave for 55 seconds to prevent over-browning. The lower sugar version satisfies cravings without the sugar crash. 🍌
Dairy-Free Toppings
Skip the whipped cream and use coconut whipped cream (chilled canned coconut milk + powdered sugar) or dairy-free chocolate sauce. For a crunchy topping, try crushed pretzels or toasted coconut flakes. The dairy-free topping keeps the dessert rich and satisfying while accommodating lactose intolerance. I've found So Delicious coconut whipped cream works perfectly as a substitute. 🥥
Single-Serving Flexibility
This recipe works perfectly for one serving, but you can easily halve it for a single mug using ¼ cup flour, ⅙ cup sugar, 1 tbsp cocoa powder, 1 egg, and ⅙ cup milk. The proportions stay the same, and the microwave time remains 60 seconds. It's great for when you only need one treat—no leftovers to worry about! This makes it ideal for dietary restrictions where portion control matters. 🍵
Nutrition facts
Frequently asked questions
Can I make this mug cake without eggs?
Replace each egg with ¼ cup unsweetened applesauce or a flax egg (1 tbsp ground flaxseed + 2.5 tbsp water, mixed and rested for 5 minutes). The texture will be slightly denser but still delicious. For best results, use Dutch-processed cocoa powder to prevent graininess.
Why does my mug cake turn out dry?
Overmicrowaving is the #1 cause—check for doneness at 50 seconds and let it rest 20 seconds before eating. If using gluten-free flour or less sugar, reduce microwave time by 5-10 seconds. Always use melted butter (not oil) for moisture. A splash of extra milk in the batter helps too!
Can I use this recipe for a party?
Yes! Make 8-10 mugs ahead and keep them warm in a 200°F oven for up to 1 hour (covered loosely with foil). For a crowd, set up a DIY station with pre-mixed dry ingredients and let guests assemble their own. Serve with a chocolate sauce bar for customization.
What if I don't have chocolate chips?
No problem! Swap for ½ cup chopped dark chocolate (melted and stirred in) or 1 tbsp cocoa powder + 1 tsp sugar for a fudgier texture. For a fruity twist, add ¼ cup diced strawberries or raspberries (they'll soften but keep some texture). The key is keeping the moisture balance.
How do I make it less sweet?
Reduce sugar to ⅓ cup total and add 1 tsp instant coffee powder or ½ tsp cinnamon to enhance chocolate flavor. For a natural option, replace 2 tbsp sugar with mashed banana. The texture stays moist, but the flavor becomes more complex. Cut microwave time by 5 seconds to prevent over-browning.