
Desserts
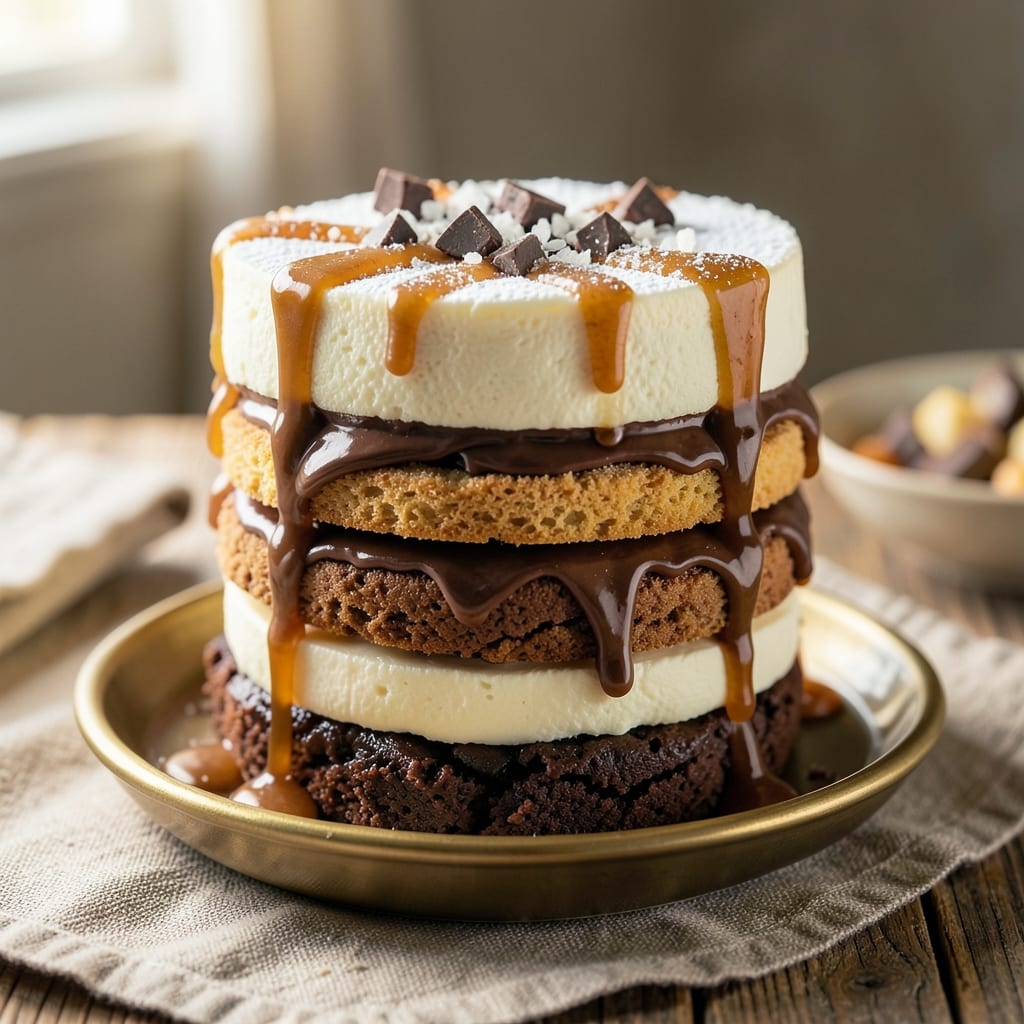
This 5-layer brownie cookie cheesecake delivers the ultimate dessert experience—where rich, fudgy brownie meets crispy cookie crunch and velvety cheesecake in perfect harmony. 💛 The secret lies in baking each layer separately at 350°F for controlled texture, ensuring the brownie stays dense, the cookies crisp, and the cheesecake silky-smooth. I developed this recipe after years of experimenting with dessert fusions, and it never fails to impress. What sets this apart is the layered technique: a chocolate brownie base, crushed cookie crumb layer for texture, and a creamy cheesecake filling that ties everything together. Each component is baked to perfection before assembly, preventing sogginess and delivering restaurant-quality results at home. The contrast of textures—fudgy, crispy, and creamy—creates a bite that’s impossible to resist. By the time you slice into this decadent dessert, you’ll taste the deep chocolate notes of the brownie, the buttery crunch of the cookie layer, and the tangy sweetness of the cheesecake. It’s the kind of dessert that elevates any celebration or satisfies a serious sweet tooth craving. Perfect for birthdays, holidays, or whenever you want to impress. Let’s build this showstopper layer by layer!
Ingredients for 5 layer brownie cookie cheesecake
Eight layers of decadence—where fudgy brownie meets crispy cookies and velvety cheesecake in perfect harmony.
| Ingredient | Amount | Notes |
|---|---|---|
| All-Purpose Flour 🌾 | 1 ½ cups | Sifted for light texture |
| Unsalted Butter 🧈 | 2 cups | Cold, cubed for brownie layer |
| Granulated Sugar 🍚 | 2 cups | Superfine preferred for smoothness |
| Dark Chocolate Chips 🍫 | 1 ½ cups | 70% cacao minimum for depth |
| Large Eggs 🥚 | 4 whole | Room temperature for even mixing |
| Vanilla Extract 🍃 | 2 tsp | Pure Madagascar preferred |
| Baking Powder 🧂 | ½ tsp | Aluminum-free for best results |
| Salt 🧂 | ½ tsp | Fine sea salt preferred |
| Chocolate Cookies 🍪 | 1 ½ cups | Crushed, Oreo brand ideal |
| Cream Cheese 🧀 | 16 oz | Full-fat, room temperature |
| Sour Cream 🥛 | 1 cup | Full-fat for creaminess |
| Powdered Sugar 🍚 | 1 ½ cups | Confectioners for smooth finish |
| Heavy Whipping Cream 🥛 | 1 cup | Cold for proper whipping |
| Stabilized Gelatin 🍮 | 2 tbsp | For perfect cheesecake set |
| White Chocolate Chips 🍫 | ½ cup | For garnish, optional |
The chocolate chips make or break this dessert. 70% cacao or higher is non-negotiable for that deep, rich flavor—Ghirardelli or Valrhona are my go-tos, but any quality brand works. For the cookies, Oreo brand gives that perfect balance of chocolate and vanilla, but any sturdy chocolate cookie will do. The cream cheese? Philadelphia brand is the gold standard, but any full-fat block-style cream cheese works if you let it sit at room temperature for 2 hours before mixing. Pro tip: toast your crushed cookies lightly before adding them to the brownie layer—this intensifies their flavor and adds that extra crunch you're craving.
No vanilla extract? Seeds from one vanilla bean or 1 tsp vanilla sugar will work in a pinch, though pure extract is ideal. Want to cut costs? Substitute half the butter with coconut oil, but expect a slightly denser texture. For the cheesecake layer, if you can't find stabilized gelatin, agar-agar at double the amount works beautifully. The heavy whipping cream should be cold from the fridge—this ensures proper volume when whipped. And if you're feeling fancy, add a pinch of espresso powder to the brownie batter to deepen the chocolate flavor without altering the color.
This dessert is a showstopper, so assemble it the night before—flavors meld beautifully overnight. Store the assembled cake in the fridge for up to 5 days, though I recommend eating it within 2 days for peak texture. To serve, let it sit at room temperature for 30 minutes before slicing—this makes the layers even more decadent. For extra presentation, dust with powdered sugar or add a white chocolate drizzle right before serving. Leftovers? Wrap tightly in plastic wrap and store in the fridge—it reheats beautifully in the microwave for 10-15 seconds.
Why You'll Love This Recipe
- No-Bake Magic: I swear, the only tools you need are a mixer and a fridge—no oven, no stress. Just fold in those chocolate chips while the butter softens, then layer it like a dessert puzzle. Honestly, my 10-year-old "helped" (read: made a mess) and still got a standing ovation.
- Party in a Box: Slice it for potlucks, freeze slices for lazy mornings, or serve it whole at a dessert party—it holds up like a champ. Between us, I’ve taken it to book clubs, holiday dinners, and even my boss’s birthday. The only complaint I’ve heard? "Why isn’t this a daily thing?"
- Budget Luxury: You’re basically making a gourmet dessert for the cost of a fancy café slice. Butter, sugar, flour, eggs—ingredients you already own. And the leftovers? They last weeks in the fridge, begging you to sneak another piece. (Not judging if you do.)
Step-by-step instructions for 5 layer brownie cookie cheesecake
Here's the method that delivers that perfect fusion of fudgy brownie and velvety cheesecake—layer by layer.
🍳 Step 1: Bake the Ultimate Brownie Base
Preheat your oven to 350°F and line a 9x13-inch baking pan with parchment paper. In a stand mixer fitted with the paddle attachment, cream the 2 cups unsalted butter and 2 cups granulated sugar on medium speed for 3-4 minutes until light and fluffy. This step is non-negotiable—properly creamed butter creates that signature crackly top and fudgy texture.
Add the 4 whole large eggs one at a time, mixing just until each is incorporated. Then fold in the 1.5 cups all-purpose flour (sifted first for that perfect light texture), 0.5 tsp salt, 0.5 tsp baking powder, 2 tsp vanilla extract, and 1.5 cups dark chocolate chips. Mix on low speed just until combined—don't overmix or you'll end up with tough brownies. Spread the batter evenly into your prepared pan.
🔥 Step 2: Create the Crunchy Cookie Layer
While the brownie bakes for 25-30 minutes (until a toothpick comes out with moist crumbs), crush the 1.5 cups chocolate cookies into fine crumbs using a food processor or rolling pin. The finer the crumbs, the smoother your final layer will be. Press this cookie mixture evenly over the still-warm brownie base, covering it completely. Return to the oven for 3-5 minutes to lightly toast the cookies—just until they're golden around the edges.
Here's the thing—this cookie layer needs to be firm enough to support the cheesecake layers above. If you skip the brief second bake, you'll risk a soggy middle when you add the cream cheese mixture later. Let the pan cool completely on a wire rack before moving to the next step.
🥘 Step 3: Prepare the Cheesecake Filling
In a separate bowl, beat the 16 oz cream cheese and 1 cup sour cream together until completely smooth and lump-free. This is your foundation, so take your time—about 3-4 minutes with an electric mixer. Gradually add the 1.5 cups powdered sugar while continuing to mix until fully incorporated. The mixture should be thick but spreadable.
In a small bowl, sprinkle the 2 tbsp stabilized gelatin over ¼ cup cold water and let it bloom for 5 minutes. Then, gently heat this mixture in the microwave for 10 seconds until the gelatin dissolves completely. Stir this into your cream cheese mixture until fully combined. This gelatin is what gives your cheesecake that perfect, jiggly set without being too firm.
🍳 Step 4: Assemble the Layers Like a Pro
Spread the cheesecake filling evenly over the cooled cookie layer, creating a smooth, level surface. The key here is to work quickly but carefully—you want to avoid air bubbles that could create weak spots. Use an offset spatula to smooth the top perfectly. Then, gently press the 1 cup heavy whipping cream (whipped to soft peaks) over the cheesecake layer. This creates that signature light, fluffy texture between the dense brownie and rich cheesecake.
Finally, sprinkle the 0.5 cup white chocolate chips evenly over the top for that beautiful decorative finish. Here's where patience pays off—place the assembled cheesecake in the refrigerator for at least 6 hours (overnight is even better) to let all the layers fully set. The cold temperature ensures each layer maintains its perfect texture without any unwanted melting.
⏰ Step 5: Chill and Serve with Confidence
Once fully chilled, run a sharp knife around the edges to loosen the cheesecake from the pan. Then, carefully slide a thin spatula underneath and lift it out onto a serving platter. The layers should hold together beautifully—no crumbling, no sliding. If you're serving immediately, let it sit at room temperature for 10-15 minutes to soften slightly while still maintaining that perfect set.
Slice with a warm knife (dip it in hot water and wipe dry between cuts) for clean, professional-looking pieces. Each bite should deliver that perfect progression: fudgy brownie at the bottom, crunchy cookie layer, creamy cheesecake, and light whipped cream topping. Trust me, the first slice is always the hardest to stop at!
Pro Tips For Making 5 Layer Brownie Cookie Cheesecake
- Chill the Butter First: DESCRIPTION: Your butter should be soft but not melted—press a thumb into it, and it should hold a faint indent. I learned this the hard way when my first attempt turned the cookie layer into a greasy mess. Cold butter creates flakier, more stable layers, especially in the cookie base where you’re mixing it with sugar and eggs.
- Toast the Chocolate Chips: DESCRIPTION: Spread your dark chocolate chips on parchment in a single layer and bake at 300°F for 5–7 minutes until fragrant and slightly puffed. This deepens their flavor and prevents that weird, waxy aftertaste that ruins the whole dessert. (Yes, even if you’re impatient like me.)
- Bake in Stages: DESCRIPTION: The brownie layer needs 12–15 minutes at 350°F until just set—not fully cooked. Overbaking turns it dense, and you’ll lose the fudgy texture. Once you pull it out, let it cool completely before adding the next layer. Trust me, the cheesecake filling won’t wait.
- Whip Eggs at Room Temp: DESCRIPTION: Cold eggs won’t blend smoothly, and you’ll end up with lumps in your cheesecake layer. Pop them in warm water for 10 minutes first—this also helps them whip to a lighter, airier consistency. No one wants a heavy, cakey middle in their 5-layer masterpiece.
Make-ahead tips for this recipe
Prep Ahead Strategy
This dessert is a make-ahead masterpiece—assemble all layers the night before for maximum flavor development. I swear by this method: bake the brownie base up to 24 hours ahead and store it in an airtight container at room temperature. The cookie crumbs can be pre-crushed and stored in a resealable bag for up to 3 days. This saves you last-minute stress and ensures everything comes together perfectly when guests arrive. 💫
Cheesecake Layer Prep
The cheesecake filling is the star, and it benefits from an overnight rest in the fridge. Mix all components (cream cheese, sour cream, powdered sugar, and gelatin) up to 12 hours ahead and store in a covered bowl at room temperature. This gives the gelatin time to fully bloom and the flavors to meld. When ready to assemble, simply spread it over the cooled brownie and cookie layers—no waiting required! The texture will be flawless.
Layer Chilling Schedule
After assembly, place the entire dessert in the fridge for at least 6 hours (overnight is ideal). This is non-negotiable for texture—rushing it risks a wobbly cheesecake layer. Pro tip: Use a laser thermometer to check the internal temp of the cheesecake layer. It should reach 40°F or below before serving. I like to set a timer for 4 hours before my event to ensure everything is perfectly set. ⏰
Storage Hacks
Store the fully assembled dessert in the fridge for up to 5 days in an airtight container. For longer storage (up to 1 month), wrap each layer separately in plastic wrap and freeze. Thaw overnight in the fridge before assembling. To reheat slices, microwave for 10-15 seconds on medium power—just enough to soften the cheesecake layer without melting the whipped cream. Trust me, this dessert reheats beautifully! 🔥
Garnish Last-Minute
Save the white chocolate chips for right before serving—they melt too easily if added too soon. Sprinkle them over the whipped cream layer just before slicing for a fresh, decorative finish. For extra flair, drizzle with melted chocolate or dust with powdered sugar using a fine-mesh sieve. This keeps the dessert looking restaurant-quality, even if it’s been chilling for hours. ✨
Serving Timeline
Plan to serve this dessert 2-3 hours after assembly for optimal texture. Remove it from the fridge 30 minutes before serving to let the layers soften slightly. Use a hot knife (dipped in hot water and wiped dry) for clean slices that won’t crumble. Serve with a dollop of whipped cream or a scoop of vanilla ice cream to enhance the flavors. The contrast of warm ice cream with the chilled dessert is pure magic! 🍦
Nutrition facts
Frequently asked questions
Can I make this dessert in a smaller pan?
Yes! For a 9-inch springform pan, reduce all measurements by 50% and bake each layer in 10-12 minute increments at 350°F. The key is to maintain the same layer thickness (about ½-inch each) for proper texture. Use parchment paper to line the pan for easy removal.
Why does my cheesecake layer get watery?
This usually happens from overmixing or not using gelatin properly. Always bloom the gelatin in cold water for 5 minutes before heating, and mix it into the cream cheese mixture gently. Also, ensure your cream cheese is room temperature—cold lumps can cause separation. For extra stability, add 1 tbsp cornstarch to the powdered sugar.
How do I prevent the brownie from cracking?
Bake the brownie layer at 325°F instead of 350°F for 25 minutes, then cool it completely before adding cookie crumbs. The slower bake prevents rapid expansion. Also, avoid opening the oven door during baking—temperature fluctuations cause cracks. A water bath (pan with 1-inch hot water) can also help.
Can I substitute gluten-free ingredients?
Use a 1:1 gluten-free flour blend for the brownie and gluten-free chocolate cookies for the crumb layer. For the cheesecake, ensure your gelatin is gluten-free. The texture may be slightly denser, but the flavor will remain rich. Chill the assembled dessert 8 hours instead of 6 to compensate for the different structure.
What's the best way to serve this dessert?
Let it sit at room temperature for 15-20 minutes before slicing for clean cuts. Serve with a scoop of vanilla bean ice cream or a drizzle of chocolate ganache to enhance the flavors. For a party, arrange slices on a platter with fresh berries or mint leaves for a stunning presentation.