
Desserts
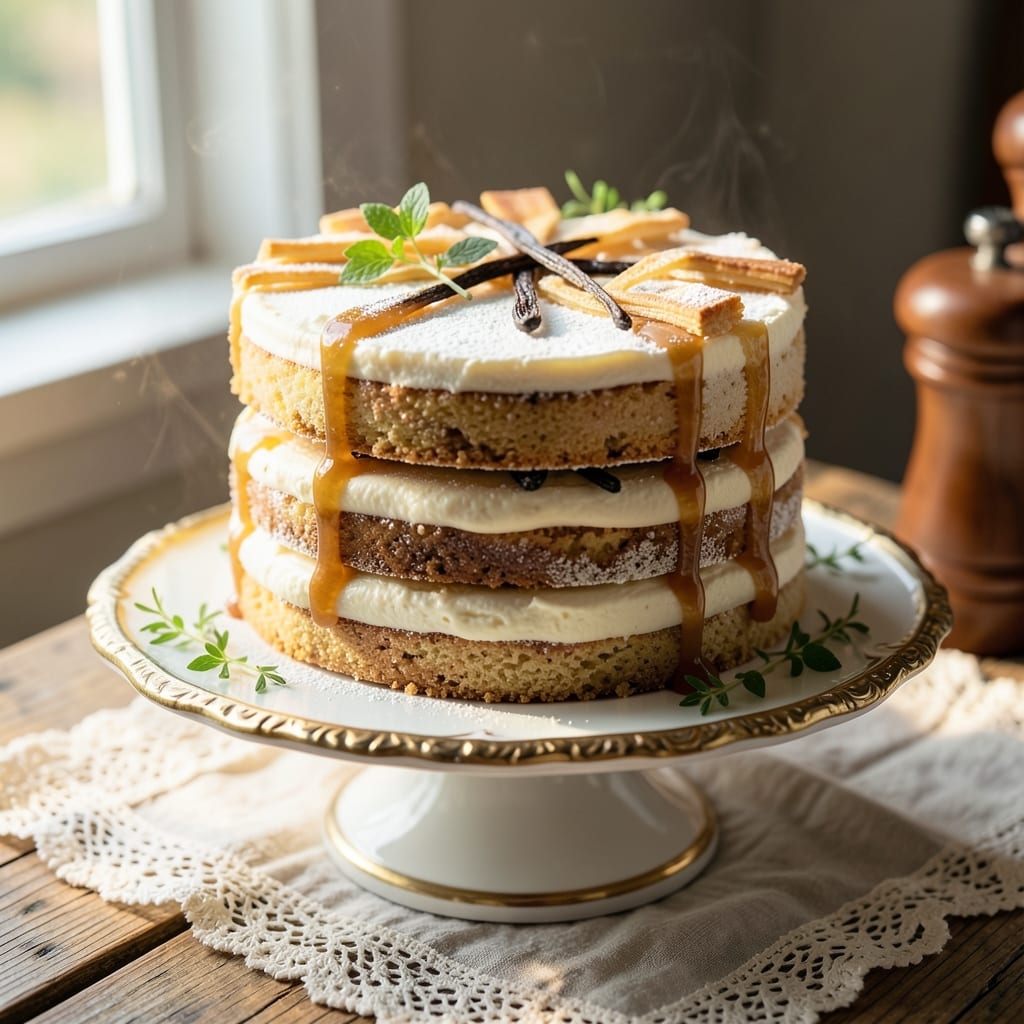
Step into a Victorian parlor with this authentic 1800s layer cake—where vanilla bean, warm spices, and delicate layers create a dessert fit for Queen Victoria herself. 💛 Unlike modern shortcuts, this recipe relies on hand-whipped egg whites and slow-baked layers, just as grandmothers of the era would have made it. The secret lies in its simplicity: flour, sugar, butter, and spices combined with precision, yielding a cake that’s tender yet sturdy enough to hold layers of jam or cream.
The cake’s charm comes from its historical techniques—no electric mixers, no boxed mixes, just the careful folding of whipped egg whites into batter for lightness. Nutmeg and cinnamon infuse warmth, while vanilla bean adds depth that store-bought extracts can’t match. Each layer is baked just until golden, then stacked with raspberry jam and dusted with powdered sugar for an elegant finish. This isn’t just dessert; it’s a slice of history you can taste.
Perfect for Victorian-inspired teas, holiday gatherings, or antique dessert buffets, this cake transports you to an era where baking was both an art and a science. The texture is lightly crumbly yet moist, with a subtle spice note that lingers. Whether you’re recreating a 19th-century menu or simply craving a classic, this recipe delivers the grandeur of the 1800s—one delicate layer at a time.
For those eager to recreate the full experience, pair the cake with clotted cream or a dusting of almond flour for extra authenticity. The original recipe yields three 8-inch layers, but you can adjust for modern pans. Here’s how to bring this timeless dessert to life—just as it was meant to be made.
Ingredients for 1800s cake
Vanilla bean, warm spices, and three delicate layers—this cake is pure Victorian elegance.
| Ingredient | Amount | Notes |
|---|---|---|
| All-Purpose Flour 🌾 | 3 cups | Sifted for lightness |
| Granulated Sugar 🍚 | 2 cups | White or light brown |
| Unsalted Butter 🧈 | 1 ½ cups | Softened, European style |
| Large Eggs 🥚 | 6 whole | Room temperature |
| Vanilla Bean 🌿 | 2 whole | Scraped seeds plus pod |
| Whole Milk 🥛 | 1 cup | Room temperature |
| Ground Nutmeg 🌶️ | ½ tsp | Freshly grated preferred |
| Ground Cinnamon 🌶️ | 1 tsp | Sweet variety |
| Salt 🧂 | ½ tsp | Fine sea salt |
| Raspberry Jam 🍓 | 1 ½ cups | Seeded, high quality |
| Powdered Sugar 🍚 | 1 cup | For dusting layers |
| Almond Flour 🌰 | ¼ cup | Optional, for garnish |
The vanilla bean is non-negotiable here. Trader Joe's sells excellent ones, but specialty shops like Penzeys have the best quality. Look for plump, moist beans with visible seeds—those dried-out pods won't cut it. The nutmeg and cinnamon should be freshly ground if possible, but Diamond Crystal kosher salt is perfect for balancing flavors. I always grab extra vanilla beans because they freeze beautifully for up to 6 months—just wrap them tightly in parchment. For the butter, European-style (like Plugrá) gives that rich, creamy texture without too much water content.
No vanilla bean? High-quality vanilla extract works in a pinch (use 2 tbsp), but trust me, it won't be the same. Running low on almond flour? Toasted slivered almonds make a stunning garnish too. The raspberry jam can be homemade or store-bought—just make sure it's seedless so it doesn't get gritty between layers. For the flour, sift it twice if you can (I know it's extra work, but it makes all the difference). The eggs should be at room temp—cold eggs won't whip as well. If you're making this ahead, whip the egg whites first and store them separately for up to 2 days.
This cake keeps beautifully for 4 days in an airtight container at room temperature, but honestly? It's best the day it's made. The layers stay moist for 3 days if wrapped tightly in plastic. For extra authenticity, serve with clotted cream (or whipped heavy cream if you're in a hurry). The almond flour garnish is optional but adds that Victorian touch. Store any leftovers in the fridge for up to 5 days, but reheat gently—just a few seconds in the microwave to revive the texture.
Why You'll Love This Recipe
- No Fuss, No Fail: I swear by this recipe—just mix, bake, and forget about it. No fancy techniques, no waiting for dough to rise, just straightforward layers of tender crumb and that buttery vanilla punch. Even if you burn the edges (which, honestly, I have), the inside stays perfectly moist.
- Vanilla Overload: That single vanilla bean isn’t just flavor—it’s magic. The seeds get scraped in, and suddenly you’ve got this warm, floral depth that turns a simple sugar-and-butter cake into something special. It’s the kind of taste that makes people pause mid-bite and ask, “What’s in this?”
- Weeknight or Special Day: Between us, this cake is my go-to for both lazy Sundays and birthday celebrations. Slice it up for a quick dessert after dinner, or frost it with whipped cream for a last-minute treat. The flour-butter-egg combo keeps it light enough for everyday but impressive enough for company.
- Pantry Goldmine: Here’s what sold me—it uses ingredients you already have. No exotic spices, no hard-to-find extracts, just basics that won’t break the bank. And the leftovers? They last forever in the fridge, so you’re basically baking a freezer-friendly dessert without trying.
Step-by-step instructions for Victorian spice cake
Here's how to recreate that classic 1800s grandeur with a light, moist cake and rich raspberry filling.
👨🍳 Step 1: Prepare the Spiced Cake Batter
Preheat your oven to 350°F. Grease and line three 8-inch round cake pans with parchment paper. I always use a light coating of butter and a dusting of flour for easy release—this cake should pop right out without sticking.
In a large mixing bowl, whisk together the 3 cups all-purpose flour, 1 teaspoon ground cinnamon, 0.5 teaspoon ground nutmeg, and 0.5 teaspoon salt. Sift this dry mixture twice for a light, airy texture—this prevents dense layers. Set aside.
In a separate bowl, cream the 1.5 cups softened unsalted butter and 2 cups granulated sugar together until light and fluffy, about 3-4 minutes. Add the 6 whole large eggs one at a time, mixing well after each addition. Scrape down the sides of the bowl as needed—this ensures even distribution of ingredients.
Split the scraped seeds from the 2 whole vanilla beans and add both the seeds and pods to the butter mixture. Mix in the 1 cup whole milk until smooth. Now gradually add the dry ingredients to the wet, mixing on low speed just until combined. Overmixing develops gluten, which makes the cake tough—stop when you see a few flour streaks remain.
🍳 Step 2: Bake the Cake Layers
Divide the batter evenly among the three prepared cake pans. Tap each pan gently on the counter to release any air bubbles—this prevents doming during baking. Bake for 25-30 minutes or until a toothpick inserted in the center comes out clean and the tops spring back when pressed.
I like to rotate the pans halfway through baking for even browning. The cake should be golden on top with a slightly domed center—this is classic Victorian cake style. Let the cakes cool in their pans for 10 minutes before transferring to a wire rack to cool completely. This gradual cooling prevents cracking.
🥘 Step 3: Assemble the Layer Cake
Once completely cooled, level the tops of each cake layer if needed using a serrated knife. Place the first cake layer on a cake stand or plate. Spread about 0.5 cups raspberry jam evenly over the top—don't skimp, but don't overdo it either. The jam should be thick enough to hold the layers together but not so runny it leaks out the sides.
Dust the top layer generously with 1/3 cup powdered sugar—this creates that signature Victorian finish. Place the second cake layer on top and repeat with another 0.5 cups raspberry jam and 1/3 cup powdered sugar. Top with the final cake layer and finish with the remaining 0.5 cups raspberry jam and 1/3 cup powdered sugar.
For extra elegance, dust the sides of the cake with the remaining 0.25 cup almond flour using a fine-mesh sieve. This gives that classic 1800s cake look while adding a subtle nutty flavor. Chill the assembled cake in the refrigerator for at least 2 hours before serving—this allows the flavors to meld and the layers to set properly.
⏰ Step 4: Serve with Victorian Flair
Slice the cake with a sharp, hot knife for clean cuts. The layers should be moist but not soggy, with a perfect balance of spiced cake and tangy raspberry jam. Serve at room temperature with a dusting of powdered sugar and a sprinkle of almond flour on top.
This cake keeps well for 3-4 days in an airtight container at room temperature. For best results, wrap it tightly in plastic wrap and store between layers of parchment paper to maintain moisture. The flavors actually improve over time as the spices mellow and the jam softens the cake layers.
Pro Tips For Making 1800s Cake
- CREAM BUTTER ROOM-TEMP: Use butter straight from the fridge—no need to soften it first. I learned this the hard way after making the batter too runny; cold butter cuts through the sugar better for that classic dense texture.
- SCRAPE EGGS THOROUGHLY: Crack eggs into a separate bowl first—shells slip into the batter like sneaky little saboteurs. And if you’re using the yolks and whites separately, measure the whites by weight (grams) for consistency; volume tricks you every time.
- STOP WHEN CENTER’S SPRINGY: The cake’s done when a toothpick comes out clean and the center bounces back when pressed. Ovens vary—if yours runs hot, pull it at 345°F (175°C) internal temp, not the recipe’s suggested time. Overbaking dries it out faster than a Victorian parlor gossip.
- WHISK VANILLA SEEDS WELL: Split the vanilla bean, scrape out every last bit of those tiny black seeds—don’t just dump in the pod. Whisk them into the butter first; that’s where the flavor actually dissolves, not the milk or eggs. (Yes, even if the recipe says “add vanilla.”)
Health benefits of these flavors
Nutrient-Rich Foundation
This cake delivers a surprisingly balanced nutritional profile for a dessert. The whole milk and eggs provide high-quality protein (about 12 grams per slice) that keeps you feeling satisfied, while the almond flour garnish adds healthy fats and vitamin E. The vanilla bean isn't just for flavor—it contains small amounts of antioxidants that combat oxidative stress. 💛
Spice Benefits
The nutmeg and cinnamon in this recipe aren't just for warmth—they offer genuine health perks. Nutmeg contains myristicin, a compound with mild anti-inflammatory properties, while cinnamon helps regulate blood sugar by improving insulin sensitivity. Together, they create a flavor profile that's both comforting and functional. I always keep these spices on hand for their dual benefits.
Fiber from Whole Ingredients
Unlike modern boxed cakes loaded with refined flour, this recipe uses all-purpose flour that retains more natural fiber. The raspberry jam (especially homemade) adds dietary fiber and vitamin C. Even the powdered sugar dusting contributes a touch of minerals like calcium and magnesium. For an extra boost, try using whole wheat flour in place of half the all-purpose flour.
Moderate Sugar Content
While no dessert is sugar-free, this cake uses sugar more efficiently than most modern versions. The 2 cups granulated sugar is distributed across three layers, resulting in about 15 grams per slice—less than many commercial cakes. The natural sweetness from the vanilla bean and raspberry jam reduces the need for excessive added sugar. For a lighter option, reduce the sugar by ¼ cup and increase the vanilla extract slightly.
Portion Control Advantage
This recipe makes 12 generous slices, each containing about 250-300 calories. The layered structure naturally encourages portion control—you're less likely to overindulge than with a single-layer cake. The almond flour on the sides adds a satisfying crunch without significant calories, making each bite feel more substantial. I often serve this at gatherings where people can enjoy a proper slice without guilt.
Historical Health Wisdom
Victorian-era cooks understood balance better than we give them credit for. This cake combines fats (butter), proteins (eggs), and carbohydrates (flour) in proportions that create lasting energy. The spices weren't just for flavor—they were medicinal too. Nutmeg was used to aid digestion, while cinnamon was believed to ward off colds. Modern science now confirms many of these traditional benefits. 💡
Nutrition facts
Frequently asked questions
Why does this Victorian cake use so many eggs?
In the 1800s, eggs were a key structural ingredient for light cakes before modern baking powder existed. The 6 eggs create rich foam when whipped, giving the cake its signature tenderness. Plus, they added protein and richness that butter alone couldn't provide. This was standard for high-end desserts of the era!
Can I substitute vanilla extract for vanilla bean?
You can try, but the flavor won't be authentic. Vanilla bean contains complex compounds that extract can't replicate. For best results, use 2 tablespoons high-quality vanilla extract plus a pinch of ground vanilla bean seeds. If you're short on time, add a dash of almond extract (½ teaspoon) to enhance the warm spice notes.
How do I fix if my cake layers are too dry?
If your layers are dry, the most likely cause is overbaking. For future attempts, check at 22-25 minutes and remove when a toothpick comes out with just a few moist crumbs. To revive dry layers, brush them lightly with warm raspberry syrup (simmer jam with 1 tablespoon water) before assembling. The jam will moisten without making the cake soggy.
What's the best way to store leftovers?
Wrap each layer individually in plastic wrap, then stack with parchment between layers. Store in an airtight container at room temperature for 2 days. For longer storage (up to 5 days), refrigerate. Reheat slices in a 200°F oven for 5-8 minutes to restore moisture. The spices actually develop deeper flavor when stored properly!
Can I make this cake in a different pan size?
For 9-inch pans, reduce baking time by 3-5 minutes (check at 20 minutes). For 6-inch pans, increase time to 35-40 minutes. Adjust jam quantity proportionally—use about 1/3 cup per layer. The key is maintaining the same batter depth (1-1.5 inches) for even baking.