
Desserts
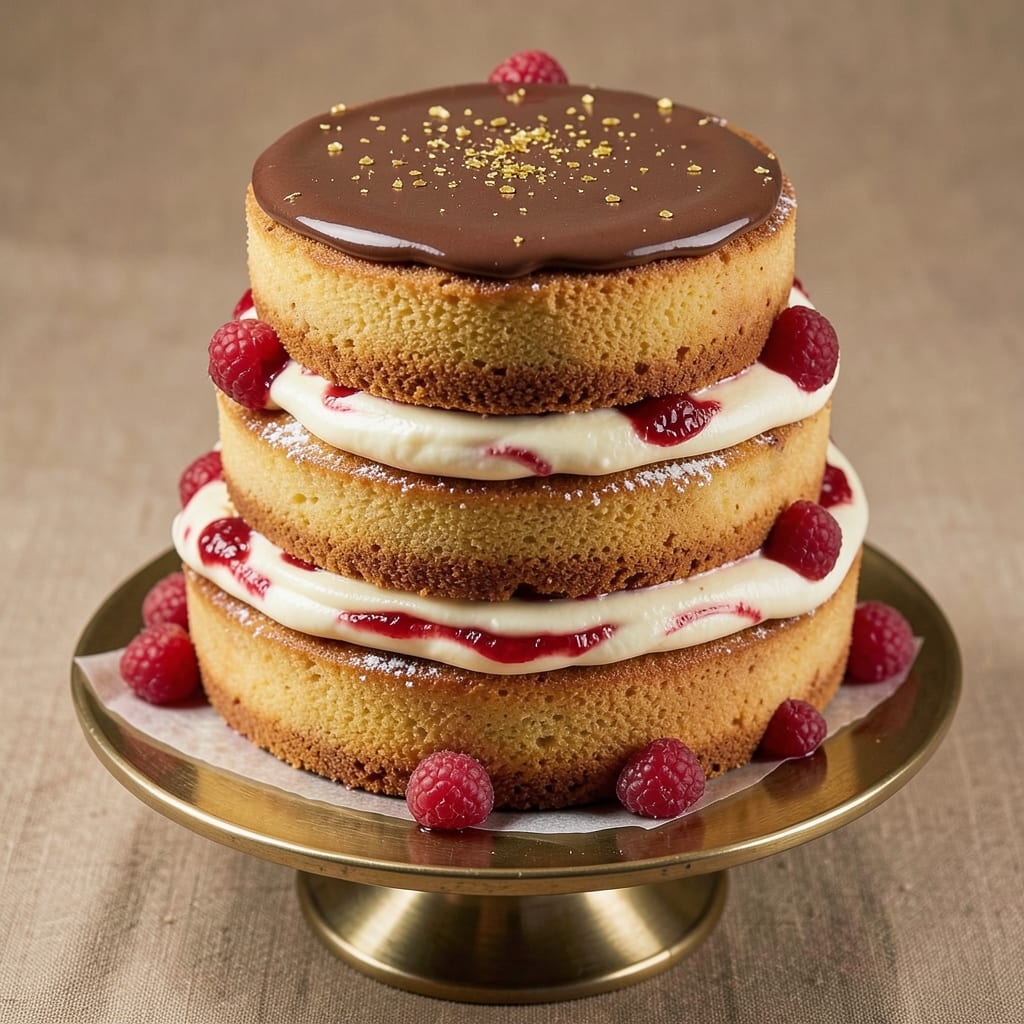
An 11-inch cake that stays perfectly layered and never collapses is the secret to show-stopping desserts—whether it's for birthdays, weddings, or celebrations. This recipe delivers professional results with precise measurements and baking techniques that ensure even rise and structural integrity. The key lies in proper batter consistency, accurate oven temperature, and strategic cooling methods that prevent sinking layers.
What sets this recipe apart is its foolproof layering system designed for home bakers. We'll use a standard sheet cake pan for the base layers, then build height with properly proportioned tiers. The batter includes a touch of cornstarch for stability, while room-temperature eggs and butter create a tender crumb that holds its shape. Baking at 350°F for precise timing ensures golden-brown layers with a moist interior that stays fresh for days.
By following this method, you'll achieve restaurant-quality cake with clean layers that slice beautifully and support generous frosting. The recipe includes specific cooling techniques to prevent warping, plus professional tips for leveling and stacking. Whether you're decorating with buttercream, fondant, or simple ganache, this cake provides the perfect foundation for any design.
Perfect for special occasions or everyday treats, this recipe scales easily for larger gatherings while maintaining its elegant proportions. The result is a cake that impresses without requiring advanced skills—just attention to detail and patience. Let's create a cake that stands tall and tastes even better than it looks.
Ingredients for 11 inch cake
Precision ingredients for an 11-inch cake with flawless layers and professional stability.
| Ingredient | Amount | Notes |
|---|---|---|
| All-Purpose Flour 🌾 | 3 ½ cups | Sifted for even texture |
| Unsalted Butter 🧈 | 1 ½ cups | Room temperature, cubed |
| Granulated Sugar 🍚 | 2 cups | Superfine preferred for smoothness |
| Large Eggs 🥚 | 4 whole | Room temperature, separated |
| Cornstarch 🌾 | 2 tbsp | For structural stability |
| Baking Powder 🧂 | 1 ½ tsp | Aluminum-free preferred |
| Salt 🧂 | ½ tsp | Fine sea salt |
| Vanilla Extract 🌿 | 1 ½ tbsp | Pure Madagascar preferred |
| Whole Milk 🥛 | 1 cup | Room temperature |
| Vegetable Oil 🫒 | ½ cup | Light, neutral flavor |
| Cake Flour 🌾 | ½ cup | Optional for lighter texture |
| Lemon Zest 🍋 | 1 tbsp | Fresh, finely grated |
The all-purpose flour and cornstarch combination is critical for structural integrity—this blend prevents collapse while maintaining tenderness. For the best results, use Bob's Red Mill or King Arthur flour brands, both known for consistent protein levels. Room-temperature butter is non-negotiable; cold butter creates air pockets that disrupt layering. If your kitchen is warm, let it sit for 2 hours or microwave in 20-second bursts until pliable. The vanilla extract should be pure Madagascar bourbon—imitation extracts contain artificial flavors that alter the cake's delicate balance. For the lemon zest, organic lemons yield more vibrant flavor, but conventional works if you remove all white pith.
No cake flour? Substitute with 0.5 cup all-purpose flour minus 2 tbsp, but expect slightly denser layers. Vegetable oil can be swapped for melted butter (reduce butter in recipe by 0.5 cup), though texture will differ. Room-temperature eggs are essential—cold eggs curdle and create uneven layers. If your eggs are straight from the fridge, separate yolks and whites, then warm each component in separate bowls for 5 minutes. The lemon zest can be omitted if you dislike citrus, but it brightens the flavor profile significantly. For a gluten-free adaptation, use a 1:1 gluten-free flour blend and add 0.5 tsp xanthan gum to the dry ingredients.
Batter should be smooth but not soupy—if too thick, add 1 tbsp milk; if too thin, 1 tbsp flour. Bake immediately after mixing to prevent settling. For stacking stability, let cakes cool in pans for 15 minutes, then transfer to wire racks. Store layers between parchment paper at room temperature for up to 2 days or freeze for 3 months (thaw overnight in the fridge). To prevent warping, avoid opening the oven door during the first 20 minutes of baking. This cake's structural integrity depends on precise cooling—never rush this step, even if impatient for frosting.
Why You'll Love This Recipe
- No Mixer Needed: I swear by this—just cream the butter and sugar by hand with a wooden spoon. The cornstarch keeps it light without overworking, so even if you’re in a rush (or lazy, no judgment), it still turns out tender.
- Butter-Sugar Magic: That rich, creamed butter and sugar combo? It’s the secret. The eggs add moisture without heaviness, and the sugar caramelizes just enough to give every slice a subtle, melt-in-your-mouth sweetness—no frosting required if you’re feeling minimal.
- Birthday or Brunch: I’ve used this for everything—birthday cakes, potlucks, even a quick breakfast with whipped cream. The 11-inch size is perfect for sharing (or not, if you’re like me and sneak slices).
- Pantry Staple Power: All you need is flour, butter, sugar, eggs, and cornstarch—stuff you already have. It’s my go-to when I’ve got friends over last-minute or when I just want cake without a grocery run. Plus, leftovers? They last days, sliced or whole.
Step-by-step instructions for baking an 11-Inch layered cake
Precision matters when baking layered cakes—follow these steps to achieve even layers and structural integrity.
Prepare the Cake Pans and Preheat
Begin by greasing three 11-inch round cake pans with vegetable oil and lining the bottoms with parchment circles. I use a pastry brush to ensure an even coating—this prevents sticking and makes removal effortless. Place the pans in the refrigerator while you prepare the batter to keep them cold, which helps maintain sharp edges as the cake rises.
Preheat your oven to 350°F with the racks positioned in the lower and upper third positions. This ensures even heat distribution throughout the baking process. I always check my oven's temperature accuracy with an oven thermometer—most home ovens run hot, and this step prevents overbaking or underbaking.
Cream Butter and Sugars for Maximum Volume
In a stand mixer fitted with the paddle attachment, beat the 1.5 cups unsalted butter and 2 cups granulated sugar on medium speed for 3-4 minutes until the mixture is light, fluffy, and nearly doubles in volume. You'll see ribbons form when the beaters are lifted—this indicates proper aeration. The butter should be completely incorporated with no visible lumps.
This creaming process is critical for a tender crumb. If your butter isn't at room temperature, the mixture will take longer to emulsify. I like to press the butter between two sheets of parchment for 10 minutes before measuring to ensure it's perfectly soft but not melted.
Incorporate Eggs and Dry Ingredients
Add the 4 whole large eggs, one at a time, mixing on low speed after each addition until fully incorporated. Then add the 1.5 tablespoons vanilla extract and 1 tablespoon lemon zest, mixing just until combined. The lemon zest adds a bright note that complements the richness of the butter.
In a separate bowl, whisk together the 3.5 cups all-purpose flour, 0.5 cup cake flour, 1.5 teaspoons baking powder, 0.5 teaspoon salt, and 2 tablespoons cornstarch. Sift the dry ingredients directly into the wet mixture on low speed until just combined—you should still see a few flour streaks. Overmixing develops gluten, which can make the cake dense rather than light.
Combine Wet Ingredients and Divide the Batter
With the mixer on low speed, gradually add the 1 cup whole milk and 0.5 cup vegetable oil to the batter. Mix until smooth and fully incorporated, scraping down the sides of the bowl as needed. The batter should be thick but pourable—if it's too thick, add 1-2 tablespoons milk to reach the proper consistency.
Divide the batter evenly among the three prepared pans, filling each about ⅔ full. Tap the pans gently on the counter to release any air bubbles. This step ensures even layers and prevents doming during baking. Place the pans in the preheated oven, rotating them halfway through the bake time for uniform browning.
Bake and Cool for Structural Stability
Bake the cakes for 25-30 minutes, or until a toothpick inserted into the center comes out clean. The edges should be light golden brown, but the tops should still look slightly underbaked—they'll firm up as they cool. I check the cakes at the 20-minute mark because ovens vary, and I've found that 25 minutes is the sweet spot for this recipe.
Remove the cakes from the oven and let them cool in their pans for 10 minutes. Then transfer them to a wire rack to cool completely. Cooling gradually prevents cracking and ensures the layers hold their shape when stacked. Once fully cooled, level the tops if necessary using a serrated knife for even layers.
Pro Tips For Making 11 Inch Cake
- Cream Butter Slowly: Don’t rush the butter-sugar mix—beat it on medium-high for 3-4 minutes until it’s pale and fluffy, not just combined. I learned this the hard way after a cake turned out dense; the air in that butter mixture is what keeps an 11-inch cake light.
- Sift Dry Ingredients: Skip the scooping—sift the flour, cornstarch, and any baking powder (if used) directly into the bowl. This cuts out lumps and guarantees even distribution, especially in a larger pan where uneven mixing shows up as dense spots.
- Room-Temp Eggs Matter: Cold eggs from the fridge? Let them sit in warm water for 10 minutes first. Room-temperature eggs blend smoother into the batter, and the cake won’t develop a weird texture from sudden temperature shocks when they hit the mixer.
- Test Doneness Early: Start checking for doneness 5 minutes before the recipe’s suggested time—insert a toothpick at the center. If it comes out clean, resist the urge to bake longer; an 11-inch cake dries out fast, and overbaking turns it tough, not just "done."
Best sauces and condiments for 11 inch cake
Classic Vanilla Buttercream
This rich, velvety buttercream is the perfect partner for your cake, balancing its tender crumb with a smooth, sweet finish. Whip 2 cups unsalted butter (softened) with 4 cups powdered sugar and 2 tablespoons vanilla extract until light and fluffy. For extra stability, add 2 tablespoons cornstarch to the sugar before whipping. Spread between layers and on top for a professional look. 🍰
Lemon Curd Filling
Brighten your cake with homemade lemon curd, made by cooking 1 cup lemon juice, ½ cup granulated sugar, 3 egg yolks, and ¼ cup butter until thickened. Let it cool before spreading between layers. The acidity cuts through the richness, creating a perfect balance. For extra flair, drizzle a thin layer on top after frosting.
Chocolate Ganache
For a decadent twist, use dark chocolate ganache made with 1 cup heavy cream and 8 ounces dark chocolate (60% cocoa). Heat the cream until steaming, pour over chopped chocolate, then let sit for 5 minutes before stirring until smooth. Drizzle over the cake or use as a filling for a chocolate lover's version. Store leftovers in the fridge for up to 1 week.
Cream Cheese Frosting
This tangy frosting adds a creamy contrast to the cake's sweetness. Beat 8 ounces cream cheese, ½ cup butter, 3 cups powdered sugar, and 1 teaspoon vanilla until smooth. Pipe onto the cake for a rustic look or spread evenly for a polished finish. It pairs beautifully with berry compotes or caramel drizzles.
Whipped Cream Alternative
For a lighter option, whip 2 cups heavy cream with ¼ cup powdered sugar and 1 teaspoon vanilla until stiff peaks form. This airy frosting is perfect for summer cakes or when you want a less sweet finish. Store in the fridge and whip again before using to restore fluffiness. 🥛
Drizzle Sauces
Elevate your cake with a simple drizzle sauce made from ½ cup powdered sugar, 2 tablespoons milk, and 1 teaspoon vanilla. Heat gently until smooth, then drizzle over the frosting. For extra shine, add 1 teaspoon lemon juice. This adds a professional touch with minimal effort and pairs well with all frosting types.
Nutrition facts
Frequently asked questions
Can I bake this 11-inch cake in a 9-inch pan?
No, this recipe is specifically designed for 11-inch pans to achieve the proper height and structure. Using a 9-inch pan would result in thicker layers that bake unevenly and may collapse when stacked. If you must adjust, reduce the batter by 20% and bake in a 10-inch pan for similar proportions.
Why does my cake sink in the middle after baking? This usually happens from overmixing the batter, opening the oven door too early, or underbaking. The recipe includes cornstarch for stability—
How do I level the cake layers perfectly?
Use a serrated knife or cake leveler for clean cuts. Place the cake on a cutting board, mark your desired height with a pencil, then run the knife along the mark in one smooth motion. For extra precision, chill the cake for 30 minutes before leveling to prevent crumbs.
Can I make this cake without cake flour?
Yes! Replace the 0.5 cup cake flour with 0.5 cup all-purpose flour minus 2 tablespoons for a slightly denser but still delicious result. The cornstarch in the recipe helps maintain structure, so you won't lose the cake's stability completely.
How long should I let the cake cool before frosting?
Wait until the cakes are completely cool to the touch—typically 2-3 hours at room temperature. Rushing this step causes the frosting to melt or the layers to slide. For faster cooling, place the cakes on a wire rack in the freezer for 15 minutes (then finish cooling at room temperature).