
Desserts
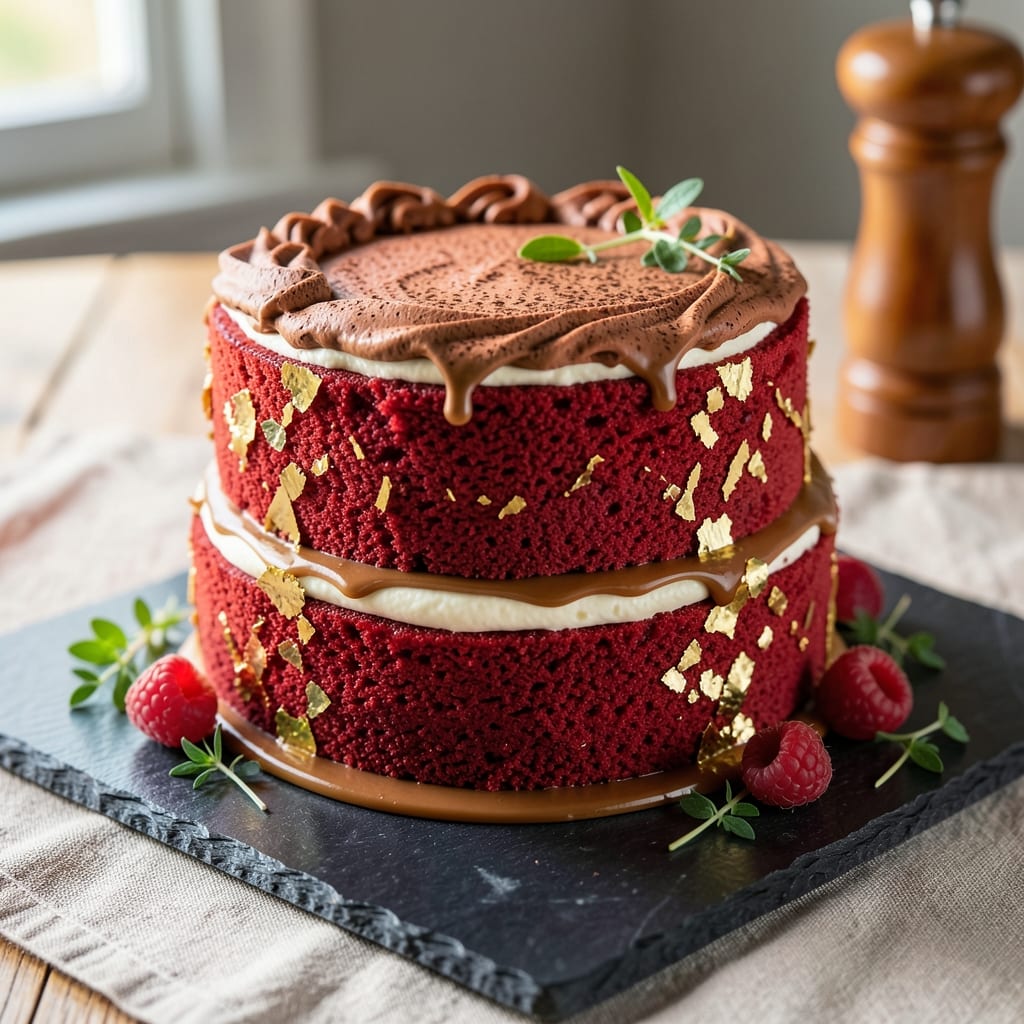
This 10-inch red velvet cake recipe delivers the perfect balance of bold cocoa depth and velvety texture, crowned with luscious cream cheese frosting that's both tangy and sweet. 💛 The secret lies in precise ingredient ratios and a foolproof baking technique that ensures moist layers and a crack-free finish—no guesswork, just restaurant-quality results every time.
Baking at 350°F for 30-35 minutes yields perfectly domed layers with a tender crumb and subtle cocoa richness. The cream cheese frosting, made with full-fat cream cheese and powdered sugar, requires just 10 minutes of mixing to achieve that signature smooth, pipeable consistency. No stand mixer? No problem—hand-whipped frosting works just as well.
Assembling the cake is where the magic happens: leveling the layers ensures clean slices, while the frosting's tangy sweetness complements the cake's subtle spice notes. The cooling process is critical—patience here prevents a soggy bottom. For a showstopping finish, pipe swirls or create a classic tiered look with fresh berries or chocolate shavings.
Perfect for birthdays, holidays, or whenever you crave a cake that tastes like a bakery secret. This recipe delivers foolproof layers, professional frosting, and a visually stunning result that's impossible to resist. Let's get baking!
Ingredients for 10 inch red velvet cake
Precision-measured ingredients for a restaurant-quality 10-inch red velvet cake with flawless layers and velvety frosting.
| Ingredient | Amount | Notes |
|---|---|---|
| All-Purpose Flour 🌾 | 3 cups | Sifted for even texture |
| Granulated Sugar 🍚 | 2 cups | White, not raw or brown |
| Cocoa Powder 🍫 | ¾ cup | Natural, unsweetened |
| Red Food Coloring 🎨 | ½ tsp | Gel-based for precision |
| Buttermilk 🥛 | 1 cup | Fresh, not powdered |
| Vegetable Oil 🫒 | ¾ cup | Light, not extra-virgin |
| Vanilla Extract 🌿 | 2 tsp | Pure, not imitation |
| Baking Soda 🧂 | 1 tsp | Pure, not baking powder |
| Salt 🧂 | ½ tsp | Diamond Crystal preferred |
| White Vinegar 🍶 | 1 tbsp | For buttermilk activation |
| Full-Fat Cream Cheese 🧀 | 16 oz | Room temperature, Philadelphia brand |
| Powdered Sugar 🍚 | 4 cups | Sifted for smooth frosting |
| Unsalted Butter 🧈 | 1 cup | Room temperature, softened |
| Fresh Strawberries 🍓 | 1 lb | Hull-free, sliced for garnish |
The cocoa powder and buttermilk are non-negotiable for that signature red velvet flavor. Natural, unsweetened cocoa delivers deeper chocolate notes without sweetness, while fresh buttermilk (or vinegar + milk) ensures tender crumb. For the best results, use King Arthur or Gold Medal flour—their high protein content yields a tender yet sturdy cake. The red food coloring should be gel-based to avoid altering moisture levels; liquid dyes can make the batter too wet. Philadelphia cream cheese is the gold standard for frosting—its consistent fat content ensures smooth, pipeable texture every time.
No buttermilk? Mix 1 tbsp vinegar with 1 cup milk and let sit for 5 minutes. Substituting cocoa powder? Dutch-processed cocoa works but may darken the batter further—reduce by 0.25 tsp. For the frosting, powdered sugar must be sifted to avoid graininess; Domino brand is ideal. Short on butter? Vegetable shortening maintains stability, though butter adds richness. The strawberries should be firm and vibrant—local farmers markets offer the best quality in season. If unavailable, frozen berries thawed and drained work in a pinch, but fresh is always superior for presentation.
Store cake layers wrapped in plastic at room temperature for 2 days or refrigerate for 5 days—bring to room temp before frosting. The frosting keeps 3 days refrigerated or 3 months frozen (thaw overnight). For a showstopping finish, pipe frosting swirls using a Wilton 1M tip and garnish with fresh berries. Assemble the cake just before serving to prevent soggy layers—a critical step for maintaining that bakery-fresh texture. Prep ingredients ahead: mix dry ingredients the night before and refrigerate the frosting for easier handling.
Why You'll Love This Recipe
- No-Fuss Mixing: I swear by this recipe’s simplicity—just fold the buttermilk into the dry ingredients, add a splash of red coloring, and you’re done. No creaming butter for hours, no tempering eggs, just a smooth batter that comes together faster than you can sing "Happy Birthday."
- Velvet Magic: That perfect balance of cocoa and buttermilk? It’s what makes this cake ridiculously good. The red hue isn’t just for show—it’s a subtle hint of tangy depth that keeps you reaching for seconds, even when you’re "not supposed to be eating dessert."
- Party in a Pan: One 10-inch cake feeds a crowd (or my family’s endless appetites) without the stress of multiple layers. It’s my go-to for birthdays, holidays, or just because—slice it, serve it, and watch it disappear. Honestly, half the time it’s gone before the candles even melt.
- Budget-Friendly Luxury: Flour, sugar, cocoa—these are pantry staples that won’t break the bank. The leftovers? Even better. I’ll wrap a slice in parchment and stash it for days; that moist crumb stays fresh like it’s brand new. (Yes, even on a Tuesday night.)
Step-by-step instructions for red velvet cake with cream cheese frosting
Precision matters here—every ingredient plays a role in that signature moist crumb and velvety frosting.
👨🍳 Step 1: Prepare the Buttermilk Mixture
In a medium bowl, combine the 1 cup buttermilk with 1 tablespoon white vinegar. Stir gently and let it sit for 5 minutes until it thickens slightly—this activates the buttermilk for better rise. Meanwhile, sift together the 3 cups all-purpose flour, 0.75 cup cocoa powder, 1 teaspoon baking soda, and 0.5 teaspoon salt into a separate large bowl. This sifting step prevents dense pockets in your cake.
Here's where the color comes in: dissolve the 0.5 teaspoon red food coloring in 2 tablespoons of the vegetable oil before adding it to the wet ingredients. This ensures even distribution of that signature hue throughout the batter. The remaining 0.55 cups vegetable oil can be added directly to the bowl.
🍳 Step 2: Cream Wet Ingredients and Combine
In a stand mixer fitted with the paddle attachment, beat the 2 cups granulated sugar and 1 cup unsalted butter on medium speed for 3-4 minutes until light and fluffy. This creaming process incorporates air that will make your cake tender. Scrape down the sides of the bowl to ensure even mixing.
Add the 2 teaspoon vanilla extract and the prepared buttermilk mixture to the wet ingredients. Mix on low speed for 1 minute until just combined. With the mixer still running on low, gradually add the sifted dry ingredients in three additions, mixing just until incorporated after each addition. Overmixing develops gluten, which can make the cake tough. Stop mixing as soon as the batter comes together smoothly.
🔥 Step 3: Bake the Cake Layers
Preheat your oven to 350°F and grease two 10-inch round cake pans thoroughly with vegetable oil, then line the bottoms with parchment paper. Divide the batter evenly between the prepared pans. Tap each pan gently on the counter to remove any air bubbles and ensure even distribution.
Bake for 25-30 minutes, or until a toothpick inserted into the center comes out clean. The edges should be set but the center should still have a slight bounce—this indicates proper doneness. Rotate the pans halfway through baking for even heat distribution. Let the cakes cool in the pans for 10 minutes, then transfer to a wire rack to cool completely before frosting.
🥘 Step 4: Make the Cream Cheese Frosting
Beat the 16 oz full-fat cream cheese and 1 cup unsalted butter together in a stand mixer fitted with the paddle attachment until smooth and creamy, about 3 minutes. Add the 4 cups powdered sugar gradually, mixing on low speed until combined, then increase to medium speed for 2-3 minutes until light and fluffy. This frosting needs to be perfectly smooth for that professional finish.
For flavor balance, add 1 teaspoon vanilla extract and 0.25 teaspoon salt to the frosting. Mix until fully incorporated. Here's the thing—this frosting should be thick enough to hold its shape but still spreadable. If it's too stiff, add 1-2 teaspoons of milk to loosen it. The frosting should be cool before assembling the cake to prevent melting.
🍽️ Step 5: Assemble and Garnish
Level the cooled cake layers if needed, then place one layer on a cake stand or plate. Spread a generous layer of the cream cheese frosting over the top, then place the second layer on top. Frost the entire cake with the remaining frosting, creating a smooth surface with a spatula. For a professional finish, use a bench scraper to create clean edges.
Garnish the top with the 1 lb fresh strawberries, sliced into thin rounds. Arrange them in a circular pattern around the edge of the cake for visual appeal. Let the cake sit at room temperature for 30 minutes before slicing to allow the frosting to set slightly. This ensures clean slices and prevents the frosting from sliding off. Serve within 2 days for the best texture and flavor.
Pro Tips For Making 10 Inch Red Velvet Cake
- Sift the Cocoa: I learned this the hard way—lumpy cocoa powder ruins the texture. For a 10-inch cake, sift the cocoa twice with the flour before mixing. That second pass breaks up any stubborn clumps, so your batter stays smooth and the crumb turns out light. (Yes, even if you’re impatient like me.)
- Measure Buttermilk Precisely: Buttermilk’s acidity is the soul of red velvet, but cheap substitutions mess it up. Use exactly 1 cup (240ml) of buttermilk—no eyeballing—and let it sit at room temp for 10 minutes before mixing. Cold buttermilk curdles eggs faster, and your cake might end up dense.
- Rotate the Pan: After 20 minutes in a 350°F oven, swap the cake pan from front to back. I used to forget, and one side would bake faster, leaving a raw center or overbrowned edges. A 10-inch cake needs even heat—this guarantees a level top and perfect doneness.
- Skip the Extra Red Dye: Start with half the food coloring called for, then add more only if needed. Too much turns the cake muddy, and the creamy white frosting will look like a sad, pinkish sludge. Taste the batter before coloring—it’s already red enough from the cocoa and buttermilk.
Common mistakes when making your 10 inch red velvet cake
Overmixing the Batter
I see this all the time—bakers mix the cake batter until it’s too smooth, and suddenly the texture turns dense instead of tender. The key is to mix the wet and dry ingredients just until combined, about 20-25 strokes with a spatula. Overmixing develops gluten, which makes the cake tough. Stop as soon as the batter comes together smoothly—no streaks of flour should remain. 💛
Skipping the Cooling Step
Rushing to frost warm cake layers is a recipe for disaster—literally. If you frost the cake too soon, the heat from the layers will melt the frosting, creating a soggy bottom. Always let the layers cool completely (about 2 hours) before assembling. Pro tip: Place them in the fridge for 30 minutes to speed this up.
Incorrect Oven Temperature
Baking at 350°F is non-negotiable for this recipe. Too high (like 375°F) will burn the edges before the center cooks, while too low (325°F) can leave a gummy texture. Invest in an oven thermometer—many home ovens run 25°F hotter or colder than set. Calibrate yours before baking to avoid surprises.
Using Liquid Food Coloring
Liquid red dye will alter the batter’s moisture levels, leading to a denser cake and potential cracks. Stick with gel-based coloring—it’s precise and won’t affect the texture. I use Wilton gel food coloring because it blends evenly without adding extra liquid. A little goes a long way; start with ½ teaspoon and adjust.
Frosting Too Thick or Thin
The frosting should be spreadable but hold its shape—like thick pudding. If it’s too stiff, add 1 teaspoon milk at a time until smooth. Too runny? Chill it for 15 minutes to thicken. A stand mixer with a paddle attachment is ideal, but hand-whipping with a hand mixer works too. Just don’t rush it—2-3 minutes on medium speed ensures fluffiness.
Not Leveling the Layers
Uneven layers = uneven cake. Use a serrated knife or cake leveler to trim the tops of the cooled layers before frosting. This creates a clean surface for spreading frosting and ensures every slice looks perfect. Trust me, this small step makes a huge difference in presentation. 💡
Nutrition facts
Frequently asked questions
Can I make this red velvet cake in a 9-inch pan instead?
Yes, but you'll need to adjust the recipe. For a 9-inch pan, reduce each cake layer to 1 cup of batter per pan (total 2 cups batter) and bake for 25-30 minutes. The frosting quantity remains the same, but you may need to pipe decorative swirls instead of a full coat to avoid excess frosting. The texture will be identical—just smaller portions!
Why does my cake turn out too dense?
Overmixing the batter is the #1 culprit—it develops gluten, making the cake tough. Mix just until combined (20-25 strokes with a spatula). Also check your oven temperature: baking at 350°F is critical. Too hot or too cold can alter the crumb. Finally, ensure your cocoa powder is unsweetened and natural—Dutch-processed cocoa can darken the batter further.
How do I make this cake gluten-free?
Replace the all-purpose flour with a 1:1 gluten-free baking flour blend (like Bob's Red Mill 1-to-1) and add 1 teaspoon xanthan gum to the dry ingredients. The buttermilk and cocoa powder can stay the same, but you may need to reduce the leavening slightly (0.75 teaspoon baking soda). The frosting remains unchanged. Expect a slightly denser texture, but still delicious!
Can I bake just one layer for cupcakes?
Divide the batter into 12 lined cupcake molds (fill ⅔ full) and bake at 350°F for 18-20 minutes. Use the same frosting recipe but reduce to 2 cups powdered sugar and 8 oz cream cheese. Pipe frosting directly onto cupcakes or use a star tip for a classic look. The cupcakes will have a slightly taller rise than the cake layers.
How long can I store the unfrosted cake layers?
Wrap cooled layers tightly in plastic wrap and store at room temperature for 2 days or refrigerate for 5 days. For longer storage, freeze layers for up to 3 months. Thaw overnight in the fridge before frosting. The frosting should be made fresh after thawing for the best texture—it doesn't freeze well once mixed.