
Desserts
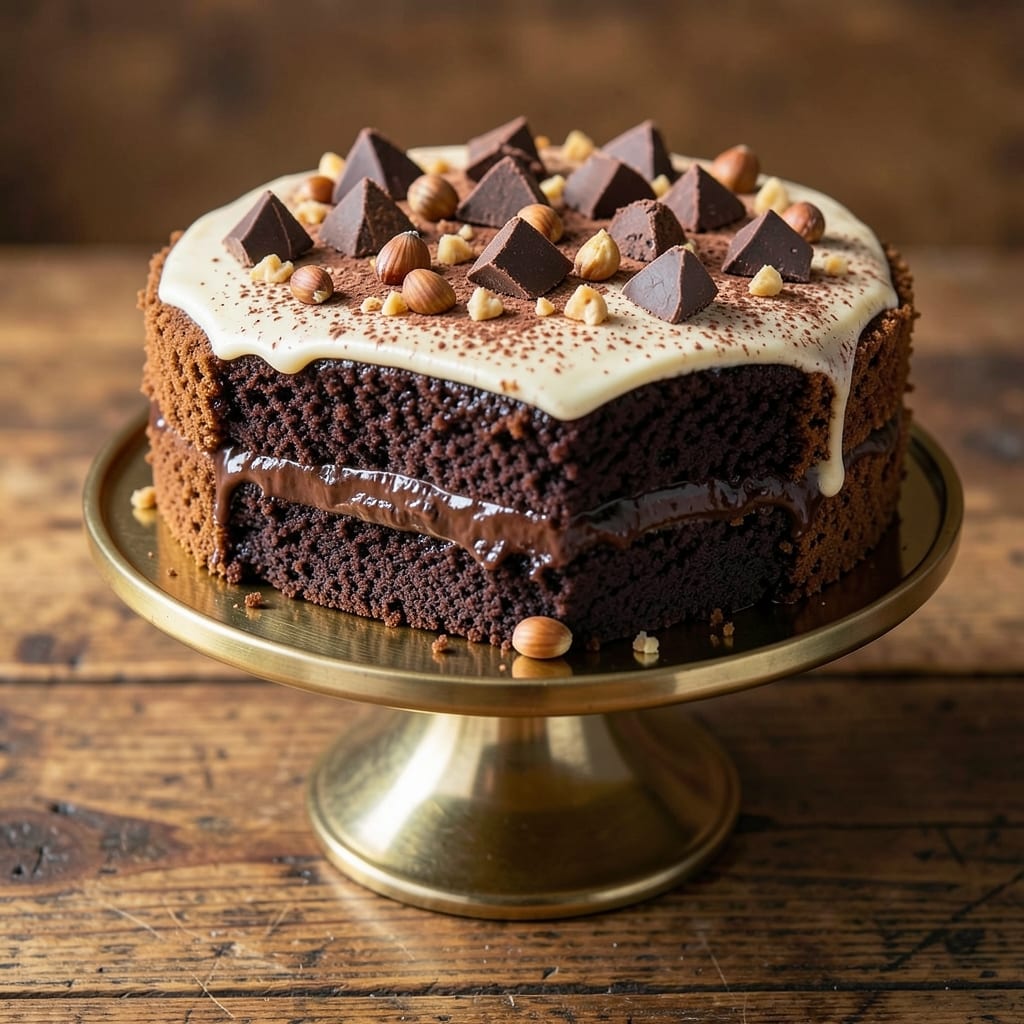
This 1 kg chocolate cake recipe delivers the perfect balance of dense, fudgy layers with moisture locked in for days—no dry crumbs in sight. 🔥 The secret lies in precise measurements and a simple yet effective technique that ensures rich, velvety texture without overmixing. Whether you're baking for a celebration or satisfying a chocolate craving, this recipe is designed to impress with every slice.
What sets this cake apart is the combination of high-quality cocoa powder, melted butter, and a precise ratio of eggs and sugar. These elements work together to create a cake that stays moist even after cooling, with a deep chocolate flavor that satisfies any cocoa lover. The recipe includes clear instructions for baking at the right temperature to achieve perfectly set layers without overbaking.
By following this method, you'll end up with a cake that's rich, decadent, and perfectly balanced—ideal for layering with your favorite frosting or enjoying plain. The texture is what truly makes this recipe stand out: tender yet sturdy, with a slight crumb that melts in your mouth. It's the kind of cake that holds up beautifully for slicing and serving, whether for a special occasion or a cozy dessert night.
The beauty of this recipe lies in its simplicity and reliability. With just a few key ingredients and straightforward steps, you can achieve professional-quality results every time. Whether you're a seasoned baker or new to the kitchen, this 1 kg chocolate cake is sure to become a favorite in your recipe collection.
Ingredients for 1 kg chocolate cake
High-quality cocoa, melted butter, and precise measurements create this decadent 1 kg chocolate cake.
| Ingredient | Amount | Notes |
|---|---|---|
| Unsalted Butter 🧈 | 10 oz | Melted and cooled to room temperature |
| Granulated Sugar 🍚 | 2 cups | Superfine preferred for smooth texture |
| Dark Chocolate Chips 🍫 | 8 oz | 70% cocoa or higher for rich flavor |
| Large Eggs 🥚 | 4 whole | Room temperature for even mixing |
| All-Purpose Flour 🌾 | 2 ½ cups | Sifted for light texture |
| Dutch-Processed Cocoa Powder 🍫 | ¾ cup | High-quality for deep chocolate flavor |
| Baking Powder 🌶️ | 1 tsp | For proper rise |
| Salt 🧂 | ½ tsp | Kosher or sea salt |
| Vanilla Extract 🌿 | 2 tsp | Pure vanilla for authentic flavor |
| Whole Milk 🥛 | 1 cup | Room temperature for even distribution |
| Espresso Powder ☕ | 1 tsp | Enhances chocolate flavor (optional) |
The cocoa powder and dark chocolate chips are the stars here. Valrhona or Guittard brands deliver the deepest flavor—worth the investment for a showstopper cake. If you're using chocolate bars instead of chips, chop them into even pieces for consistent melting. The butter should be melted and cooled to room temperature to prevent overmixing, which keeps the cake tender. For the flour, King Arthur or Gold Medal brands work best—they're consistently high-quality. Room temperature eggs mix more smoothly and create a lighter texture, so take them out 30 minutes before baking.
No Dutch-processed cocoa powder? Natural cocoa powder works at half the amount, but the flavor will be slightly different. Short on dark chocolate? Semisweet chocolate chips at 60% cocoa work in a pinch, though the flavor won't be as rich. The espresso powder is optional but enhances the chocolate depth—Starbucks instant espresso works perfectly. If you don't have vanilla extract, vanilla bean paste adds beautiful flecks and a stronger flavor. For the milk, any whole milk brand works, but avoid low-fat varieties—they can make the cake denser. The baking powder must be fresh; if it's over a year old, test it by mixing with water to see if it bubbles.
This cake keeps beautifully for up to 5 days in an airtight container at room temperature, wrapped tightly in plastic wrap. For longer storage, freeze the fully baked cake (without frosting) for up to 3 months. To serve, let it sit at room temperature for 30 minutes before slicing—this ensures clean cuts and prevents crumbs. The cake reheats well in the microwave for 10-15 seconds if it's been refrigerated, restoring its moisture. For best results, store the frosting separately and add it just before serving to maintain its texture.
Why You'll Love This Recipe
- No Mixer Needed: I swear by this recipe when my mixer’s on strike—just cream the butter and sugar by hand (yes, it’s doable). The eggs fold in like butter, and the flour? One bowl, one spatula. Honestly, my arms get a workout, but the cake’s worth it.
- Rich Without Bitterness: That dark chocolate is the star—melty pockets of it, not overpowering, just there in every bite. Between us, I’ve tried cheaper chocolate, and this? It’s the kind that makes people ask, “What brand is this?” (It’s the good stuff, okay?)
- Crowd-Pleaser Every Time: Birthdays, potlucks, or just because—this cake disappears fast. I’ve made it for book clubs, office parties, and even my mom’s “I don’t like chocolate” aunt. (She’s the exception.) The size feeds 10, but I’ve eaten half myself—no judgment.
- Leftovers? Better Than Fresh: The second day is almost as good as day one. I slice it thin, toast it lightly, and serve it with whipped cream for breakfast. (Yes, even on a Tuesday.) And because it’s budget-friendly, I can afford to bake it twice a month without crying over the butter bill.
Step-by-step instructions for 1 kg chocolate cake
Master the art of fudgy, moisture-locked layers with this precise technique.
👨🍳 Step 1: Mix Wet Ingredients for Perfect Texture
In a large mixing bowl, combine the 10 oz melted unsalted butter (cooled to room temperature) with the 2 cups granulated sugar. The butter should be completely smooth with no lumps—if it's too warm, chill it briefly in the fridge. This ensures a tender crumb rather than a greasy cake.
Add the 4 whole large eggs one at a time, whisking vigorously after each addition until fully incorporated. The mixture should lighten slightly in color. Stir in the 2 tsp vanilla extract and 1 tsp espresso powder, mixing until smooth. Here's the thing—espresso powder enhances chocolate flavor without adding bitterness, but skip it if you prefer pure chocolate taste.
Finally, whisk in the 1 cup whole milk and 8 oz dark chocolate chips. The chocolate should be evenly distributed but not melted—this creates pockets of rich flavor in every bite. I like to fold in the chocolate chips at the last moment to prevent them from dissolving completely during baking.
👨🍳 Step 2: Combine Dry Ingredients for Light Structure
In a separate bowl, sift together the 2.5 cups all-purpose flour, 0.75 cup Dutch-processed cocoa powder, 1 tsp baking powder, and 0.5 tsp salt. Sifting prevents lumps and ensures even distribution of the leavening agent. This step is critical for that signature dense yet tender texture we're after.
Gradually add the dry mixture to the wet ingredients, mixing on low speed with a hand mixer or paddle attachment. Mix just until combined—you should still see small streaks of flour. Overmixing develops gluten, which can make the cake tough. Stop mixing as soon as all the flour disappears from view.
For maximum moisture retention, I recommend using a stand mixer with the paddle attachment rather than a whisk. The paddle creates less air incorporation, which helps maintain that fudgy quality while still providing structure. The batter should be thick but pourable, with a deep chocolate color.
🔥 Step 3: Bake in Layers for Even Cooking
Preheat your oven to 350°F and prepare three 8-inch round cake pans by greasing them thoroughly with butter and lining the bottoms with parchment paper. Divide the batter evenly among the pans—you should have about ⅓ of the batter in each pan. Tap each pan gently on the counter to remove any air bubbles.
Bake for 25-30 minutes, or until a toothpick inserted into the center comes out with just a few moist crumbs (not wet batter). The edges should be set but the tops still slightly soft. Rotate the pans halfway through baking for even heat distribution. Here's the critical part: don't overbake. The cakes will continue cooking as they cool.
Remove from the oven and let the cakes cool in their pans for 10 minutes before transferring to a wire rack to cool completely. This gradual cooling prevents cracking. The internal temperature should read 200-205°F when done—this ensures maximum moisture retention in the dense layers.
🥘 Step 4: Assemble with Moisture-Sealing Technique
Once completely cooled, place one cake layer on a serving plate. Spread a thin layer of chocolate ganache (made from equal parts melted chocolate and heavy cream) over the top. This sealing layer prevents the cake from drying out when sliced. I use about 2 tablespoons of ganache per layer—just enough to create a moisture barrier.
Repeat with the remaining two layers, stacking them carefully. For extra insurance against dryness, brush the sides of the cake with a simple syrup made by dissolving ½ cup sugar in ¼ cup hot water. This syrup infuses moisture deep into the cake layers while adding subtle sweetness.
Wrap the assembled cake tightly in plastic wrap and refrigerate for at least 4 hours before serving. This resting period allows the flavors to meld and the moisture to fully distribute throughout the dense layers. When ready to serve, slice with a serrated knife for clean, professional-looking pieces.
Pro Tips For Making 1 Kg Chocolate Cake
- MELT BUTTER SLOWLY: I learned this the hard way—dumping cold butter straight into melted chocolate chips turns your batter grainy. Instead, warm the butter in the microwave for 20-30 seconds (just until it softens but doesn’t liquefy), then whisk it into the chocolate chips until fully smooth. The goal is to keep the chocolate from seizing up while still getting that rich, velvety texture.
- SIFT THE FLOUR: Yes, even for a 1 kg cake, skip the scoop-and-stir method. Sifting the flour removes air pockets and prevents dense layers. Use a fine-mesh sieve and tap it gently over the bowl—this also saves you from overmixing later. (Your future self will notice the difference when slicing.)
- DON’T OVERMIX THE BATTER: Once you add the eggs, mix just until combined—maybe 10-12 strokes with a spatula. Overmixing develops gluten, and your cake will turn tough instead of tender. I know, I know, it’s tempting to get it "perfect," but trust the process.
- CHILL THE BATTER: After mixing, let the batter sit for 10-15 minutes at room temperature. This relaxes the flour and helps the chocolate chips distribute evenly. (Pro move: Cover it loosely with plastic wrap—no need to seal it tight.) The cake will rise more evenly, and the texture stays moist longer.
Common mistakes when making perfect results
Overmixing the Batter
This is the number one mistake that turns a rich chocolate cake into a dense, tough brick. When you overmix the batter, you develop gluten in the flour, which creates a chewy texture instead of that tender, fudgy crumb we're after. I've seen home bakers whip the batter for 2-3 minutes after all the flour disappears—stop immediately when you see just a few streaks of flour remaining. Use a paddle attachment on your mixer for less air incorporation, which helps maintain that perfect moisture balance. 🔥
Incorrect Butter Temperature
Using butter that's too warm or too cold throws off the entire cake structure. If your butter is still liquid when you add the sugar, the cake will turn out greasy and dense. On the flip side, if it's too cold, the cake won't rise properly. Always melt your 10 oz unsalted butter, then let it cool completely to room temperature before mixing. You can test it by pressing a finger into the butter—it should leave a slight indentation but not be completely smooth. This step is non-negotiable for that perfect texture.
Skipping the Room Temperature Ingredients
Room temperature eggs and milk make all the difference in a smooth, even batter. Cold eggs can create pockets of air that cause uneven texture, while cold milk doesn't distribute properly. Take your 4 large eggs and 1 cup whole milk out of the fridge 30 minutes before mixing. Pro tip: I like to place them in a bowl of warm water for 5 minutes to speed up the process. This simple step prevents lumps and ensures your cake rises evenly throughout.
Overbaking the Layers
The moment you see that toothpick come out clean is the moment to pull your cake from the oven—even if it means taking it out a minute early. Overbaking causes the cake to dry out and develop a tough crust. Your cakes should have set edges but still be slightly springy in the center when done. Aim for an internal temperature of 200-205°F—any hotter and you'll lose that signature moisture. Remember, the cakes will continue cooking as they cool, so resist the urge to check them too often.
Not Cooling Properly
Rushing the cooling process is another common mistake that leads to cracked layers and uneven texture. Let your cakes cool in their pans for 10 full minutes before transferring to a wire rack. This gradual cooling prevents thermal shock that causes cracks. Then, let them cool completely before assembling. I've seen cakes that were sliced too soon—resulting in messy crumbs and uneven layers. Patience here pays off with clean slices and professional presentation. ✨
Improper Assembly Technique
Skipping the moisture-sealing steps during assembly is what turns a perfect cake into a dry one. Always use a thin layer of chocolate ganache between layers and brush the sides with simple syrup. This creates a moisture barrier that keeps your cake tender for days. I recommend using about 2 tablespoons of ganache per layer—just enough to create that seal without making the cake soggy. Wrap the assembled cake tightly in plastic wrap and refrigerate for at least 4 hours before serving to let the flavors meld properly.
Nutrition facts
Frequently asked questions about your 1 kg chocolate cake
Can I make this recipe in a different sized pan?
Yes, but adjust the baking time accordingly. For 9-inch pans, bake for 20-25 minutes per layer, while 6-inch pans will need 35-40 minutes. The key is to use the same batter volume per pan—just divide it evenly. Always check doneness with a toothpick, as pan size affects heat distribution.
How do I prevent my cake from cracking?
Cracking happens when the cake cools too quickly. Always let layers cool in pans for 10 minutes before transferring to a rack. Avoid opening the oven door frequently during baking, which causes temperature fluctuations. For extra insurance, brush the cooled layers with simple syrup before assembling. This keeps the cake moist and prevents stress cracks.
What's the best way to store leftover cake?
Wrap individual layers tightly in plastic wrap and store at room temperature for up to 3 days. For longer storage, freeze layers (unfrosted) for 3 months. Thaw overnight in the fridge before assembling. Never freeze the fully assembled cake—it can make the layers soggy. The plastic wrap creates an airtight seal that preserves moisture perfectly.
Can I substitute butter with oil?
You can try, but the texture will be different. Replace the 10 oz butter with 3/4 cup vegetable oil plus 1/4 cup melted butter (for flavor). Oil makes cakes more tender but can affect rise. For best results, stick with butter—it's what creates that signature rich, dense texture. If you must use all oil, reduce baking time by 3-5 minutes per layer.
Why did my cake turn out too dense?
This usually happens from overmixing, overbaking, or using too much flour. Check your mixing time—stop as soon as flour disappears. Verify baking time with a toothpick test (moist crumbs are fine). Also ensure your butter was properly cooled before mixing. For extra moisture, try adding 1 tbsp sour cream or 1/4 cup yogurt to the batter next time.